
Polar Bear Crochet Pattern Free Amigurumi - Low Sew Caramel Teddy
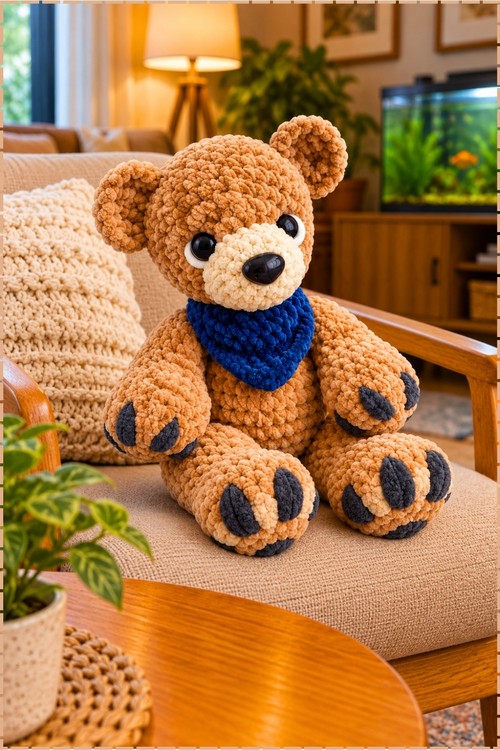
Striped grey paws let the caramel teddy from this polar bear crochet pattern sit upright on an armchair cushion unaided. Bedtime stories feel cozier when kids cuddle the plump amigurumi teddy bear, which fills two small hands with caramel softness.
Snow days call for something to hold, and the Crochet Polar Bear Amigurumi fits into mittened hands. Tuck one under the tree on Christmas morning. Swap the bandana for a scarf in January. When the first frost hits, a Crochet Polar Bear Amigurumi on the windowsill says winter has arrived.
Crochet Polar Bear Amigurumi
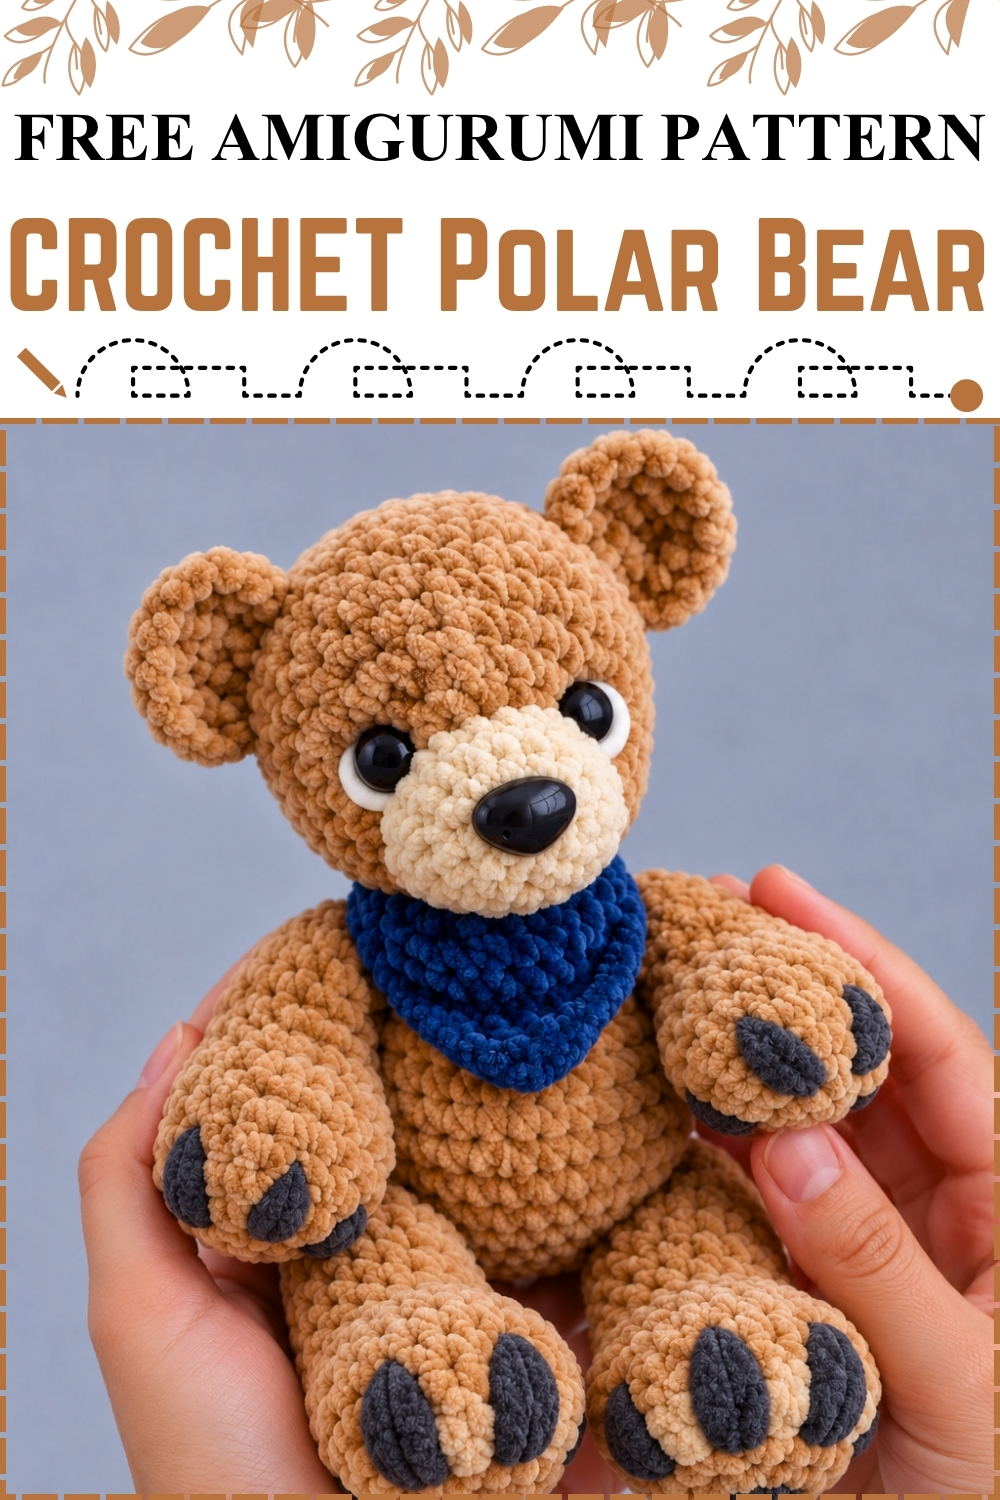
Because you crochet both ears straight into Round 9 of the head, this bear needs far less sewing than most amigurumi. I worked mine in caramel plush yarn with a cream snout, a glossy black safety nose, and a navy bandana around the neck. Dark grey claws wrapped across each paw finish the look. Swap the caramel for white and the same pattern turns into a crochet polar bear amigurumi. Beginners can manage every step, since the head uses only single crochet, increases, and decreases. Plan on a weekend for your first one, at least in my experience.
Materials and Tools
- Chunky plush chenille yarn (such as Premier Parfait Chunky) in caramel tan for the body, head, ears, and tail
- The same yarn in cream for the snout
- The same yarn in dark grey for the claws
- The same yarn in navy blue for the bandana
- White yarn for a polar bear version (optional)
- A lighter tan or accent colour for the sole pads (optional)
- 5.0 mm crochet hook
- Two 20 mm black safety eyes
- One 26 mm black safety nose
- A small piece of white felt or scrap white yarn for the eye rims
- Polyfill stuffing
- Stitch marker
- Tapestry or embroidery needle with a large eye
- Scissors
- Amigurumi alignment stick (optional, to hold the head steady while sewing)
Difficulty and Time
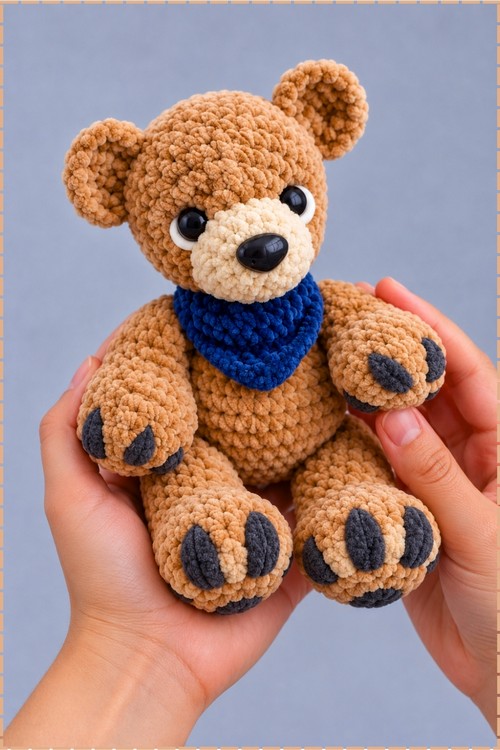
This is a beginner friendly project. The head is a simple increase and decrease sphere, and the ears join straight into the head, so there's very little sewing. Plush yarn is the only real challenge, because its stitches are hard to see. In my experience a first bear takes around five to six hours, and a second one goes much faster. Worked in chunky plush on a 5.0 mm hook, mine comfortably fills two cupped hands.
Beginner Technique Notes
This pattern uses US crochet terms. Abbreviations: single crochet (SC), increase (Inc, which means 2 SC in the same stitch), decrease (Dec, which means 2 stitches worked together into 1), and stitches (sts).
Magic ring: Wrap the yarn around two fingers to form a loop, insert your hook, pull up a loop, chain 1, then work the stated number of SC into the loop and pull the tail to close it. In plush yarn, pull the tail firmly and give it a second tug after the next round, because chenille likes to slip open.
Working in continuous rounds: Don't join with a slip stitch at the end of each round. Place a stitch marker in the last stitch and move it up every round. With plush yarn this matters even more, because you can't count stitches easily by eye.
Finding stitches in plush yarn: Feel for the stitches rather than looking. Each stitch has a small gap at its centre, and your hook goes into that gap. Run your thumb along the top edge and you'll feel each V. Working in good light helps a lot.
Decreases in plush yarn: Insert into the next stitch, pull up a loop, insert into the following stitch, pull up a loop, then yarn over and pull through all three loops. Keep your tension relaxed so the decrease doesn't pucker.
Avoid worming: Chenille can pop out little loops, called worms, if you pull too tightly or frog (rip back) repeatedly. Keep a gentle, even tension and try not to unravel the same section more than once.
Crocheting through two layers: For the ears and the tail closure, you put your hook through both thicknesses at once and work an SC, so the pieces join as you go. Check that you catch both layers on every stitch.
Safety eyes and nose: Push the post through the fabric from the outside, check the position from the front, then press the backing on from the inside until it clicks. Backings are very hard to remove, so always check placement first.
Whip stitch: Pass the needle through the edge of one piece and then the edge of the other, always going in the same direction, to sew them together with a neat spiral of stitches.
Crochet Bear Amigurumi Pattern
Body, Arms, and Legs (Caramel)
- Follow a low sew bear body base pattern in caramel; the original pattern sends you to its creator's separate multi animal body base, so the body counts aren't included here.
- Leave a long tail at the top of the body when you finish, because you'll use it to sew the head on later.
- Swap to a lighter accent colour at the base of each foot for sole pads if you like; I kept my feet fully caramel.
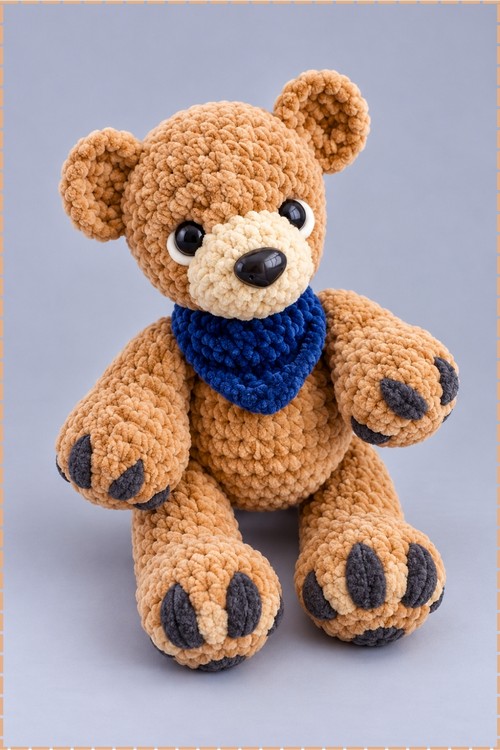
- On mine the bear sits with the legs stretched forward and the arms resting at the sides, which gives a stable, relaxed pose.
Foot Pads (Optional, Dark Grey or Accent Colour)
- Thread a length of dark grey plush yarn onto your embroidery needle.
- Insert the needle at the bottom of a toe about two stitches away from centre, and bring it out at the top centre point between the toes.
- Go back down on the opposite side the same distance away, and bring the needle out again at the top centre point.
- Repeat this back and forth motion to build up a triangle pad until it looks full enough to you.
- Tie the ends off securely at the bottom point and tuck the tails into the body; my photo shows the bear from the front, so the soles aren't visible, and this step is optional.
Claws (Dark Grey)
- Thread dark grey plush yarn onto your embroidery needle.
- Wrap the yarn tightly around a few rows across the front of an arm 2 to 3 times to form a small claw, and you should see a plump, oval bump of grey sitting on the paw.
- Move diagonally to make the next claw, aiming for about 4 claws per arm.
- Tie off and weave the ends into the arm, pulling them down into the stuffing so they don't work loose.
- Repeat the same wrapped claws across the front of each foot, spacing them evenly across the toes as on mine.
Tail (Caramel)
- Round 1: Work 6 SC into a magic ring (6 sts).
- Round 2: Inc in every stitch around (12 sts).
- Round 3: SC in every stitch around (12 sts).
- Round 4: Dec 6 times around (6 sts), and the tail is now a small, round bobble.
- Flatten the opening and work 3 SC through both sides at once to close it.
- Fasten off, leaving a long tail for sewing.
- Sew the tail centred on the lower back of the body; it sits behind the bear, so it doesn't show in my front photo.
Ears (Make 2, Caramel)
- Work 6 SC into a magic ring.
- Chain 1 and turn so you work back across the curved edge of the half circle instead of joining into a round.
- Starting in the second stitch from the hook, Inc 6 times (12 sts), and the piece now looks like a half moon.
- Chain 1, turn, and work 12 SC across (12 sts).
- Fasten off with no long tail, because the ears get crocheted directly into the head.
- Make a second ear the same way, and on mine they come out round and slightly cupped, which suits a teddy style bear.
Head (Caramel, with Cream Snout)
- Round 1: Work 6 SC into a magic ring (6 sts).
- Round 2: Inc 6 times (12 sts).
- Round 3: (1 SC, Inc) 6 times (18 sts).
- Round 4: (2 SC, Inc) 6 times (24 sts).
- Round 5: (3 SC, Inc) 6 times (30 sts).
- Round 6: (4 SC, Inc) 6 times (36 sts).
- Round 7: (5 SC, Inc) 6 times (42 sts), and the piece should be a flat disc that starts to cup at the edges.
- Round 8: SC in every stitch around (42 sts).
- Round 9: Work 11 SC.
- Round 9 continued: Fold the first ear down against the back of the head and work 5 SC through 5 ear stitches and 5 head stitches together.
- Round 9 continued: Work 9 SC.
- Round 9 continued: Fold the second ear down and work 5 SC through 5 ear stitches and 5 head stitches together.
- Round 9 continued: Work 12 SC to finish the round (42 sts), and both ears should now stand up on the top sides of the head, evenly spaced.
- Round 10: SC in every stitch around (42 sts).
- Round 11: 7 SC, 1 Dec, 22 SC, 1 Dec, 9 SC (40 sts).
- Round 12: 6 SC, 1 Dec, (3 SC, 1 Dec) 4 times, 2 SC, 2 Dec, 6 SC (33 sts).
- Round 13: 2 SC, 1 Dec, 5 SC, (1 Dec, 3 SC) 3 times, 5 SC, 1 Dec, 2 SC (28 sts).
- Round 14: 8 SC, 2 Dec, 4 SC, 2 Dec, 8 SC (24 sts).
- Round 15: 11 SC, 1 Dec, 11 SC (23 sts).
- Change to cream yarn here for the contrasting snout; the original pattern lists this colour change as optional, and on mine the cream makes up the whole muzzle.
- Round 16: SC in every stitch around in cream (23 sts).
Stuffing, Eyes, and Eye Rims
- Stuff the head firmly before placing the eyes, because the shape changes once it's full and that changes where the eyes look best.
- For the white rims on mine, cut two small felt circles slightly larger than the eyes and push each eye post through the centre of a circle, or stitch a few white straight stitches around the outer edge of each eye after it's in; on my bear the white shows mostly on the outer side of each eye.
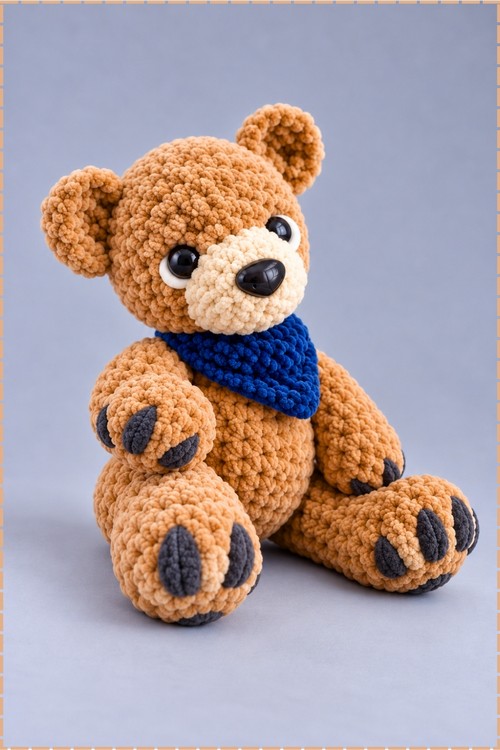
- Place the 20 mm safety eyes about 2 rows up from the current opening, with roughly 6 to 7 stitches of space between them, and keep them centred with the ears; on mine they sit just above the cream snout on either side.
- Snap the backings on securely from the inside once you're happy with the position.
Head Decreases and Snout (Cream)
- Round 17: (2 SC, Dec) 5 times, then 1 SC, 1 Dec (17 sts).
- Round 18: (1 SC, Dec) 5 times, then 1 Dec (11 sts), and the snout now narrows into a rounded muzzle.
- Add a little more stuffing into the snout.
- Round 19: Insert the 26 mm safety nose near the tip of the snout, then work 5 Dec and 1 SC; on mine the nose sits at the centre front of the cream muzzle.
- Add the final bit of stuffing into the small remaining hole.
- Fasten off, thread the tail through the front loops of the remaining 6 stitches, pull tight to close, and weave the end inside.
Face Shaping
- Thread a scrap of matching yarn onto your needle for the eye sculpting.
- Enter the head at the top inside corner of one eye and come out at the top inside corner of the other eye.
- Bring the needle back through at the bottom inside corners of the eyes to make a gentle pull, then tie the ends and hide them inside the head, which settles the eyes slightly into the face.
- For optional snout sculpting, insert cream yarn at the chin, bring it up to the base of one eye just above the nose, loop across to the other eye, and go back down to the chin.
- Pull firmly, tie off, and weave in the ends to define the muzzle; skip this if your snout already looks round enough, as mine does.
Bandana (Navy Blue)
- Chain with navy plush yarn until the chain wraps around the bear's neck with the ends meeting at the back.
- Work rows of SC back and forth across the centre section of the chain only, leaving the ends free as ties.
- Decrease 1 stitch at each end of every row until the rows narrow to a point, and the piece should look like a small triangle hanging from a cord.
- Fasten off and weave in the ends.
Assembly
- Pin or balance the finished head on top of the body, using an amigurumi stick to keep it steady if you have one.
- Use the long tail from the body to whip stitch the head on all the way around, picking up alternating stitches from the base of the head and the top of the body.
- Tie off and weave all remaining tails into the body.
- Wrap the bandana around the neck with the point hanging down at the front, as on mine, and tie or stitch the ends together at the back.
Tips and Troubleshooting
- Count every round of the head, especially Rounds 11 to 13 where the decreases are uneven. A stitch off here makes the snout sit crooked.
- If the ears lean to one side, count Round 9 again. The ears only line up when you start them after exactly 11 SC and separate them with exactly 9 SC.
- Don't overstuff the snout before Round 19, or you won't have room to push the nose post through.
- If your plush yarn sheds or worms, work slightly looser and avoid pulling stitches out more than once.
- Wrap the claws snugly but not so tight that they sink. They look best as plump ovals sitting on top of the fabric.
Customization Ideas
For a polar bear, work the whole bear in white and skip the snout colour change, or keep a white snout and use black for the claws and pads. A dark brown bear with a tan snout and tan sole pads looks lovely too. Try a red or plaid bandana for the holidays, a bow tie, or a tiny knitted scarf. For a baby or toddler, embroider the eyes and nose instead of using safety parts.
Yarn Substitution
Plush chenille gives the soft, velvety look of my bear, and the counts are written for chunky plush on a 5.0 mm hook. Regular worsted acrylic works on a smaller hook and makes stitches far easier to see, but the bear comes out much smaller. If you change the yarn weight, choose eyes and a nose that suit the smaller head.
Frequently Asked Questions
Can I make this as my first amigurumi? Yes. The head uses only SC, increases, and decreases, and the ears join straight into the round. The hardest part is the plush yarn itself, so take it slowly and use a stitch marker on every round.
I can't see my stitches in plush yarn. What should I do? Feel for the gap in the centre of each stitch with your fingertip and insert your hook there. Good lighting and a bright stitch marker help a lot.
Where do I find the body pattern? The original pattern uses a separate body base from its creator's reference video, linked in that video's description. Any low sew bear body base worked in the same yarn and hook size will fit this head.
How do I know where to put the safety eyes? Stuff the head first, then pin the eyes about 2 rows up from the opening with 6 to 7 stitches between them, lined up with the ears. Look at the face from the front before pressing the backings on.
My chenille keeps popping out loops. Is my yarn faulty? Usually not. Those loops, called worms, come from tight tension or frogging the same stitches several times. Relax your grip, and gently pull any worms back into place from the other side with your hook.
You've got this; one round at a time, and your bear will be sitting on your lap before you know it.