
Crochet Sun Keychain Free Pattern - Amigurumi Sunshine Charm
Hang the crochet sun keychain from its gold split ring on a backpack zipper, and eight pointed rays brighten every school run. Summer brings beach totes and picnic baskets out of storage, and an amigurumi sunshine charm clipped to a handle suits both of them.
Requests for the Crochet Sun Keychain start the moment someone notices those little paws on a bag strap. The smile reads across a room. It barely adds weight to keys. Makers who sell at craft stalls stitch the Crochet Sun Keychain in batches, since buyers return for a second one.
Crochet Sun Keychain

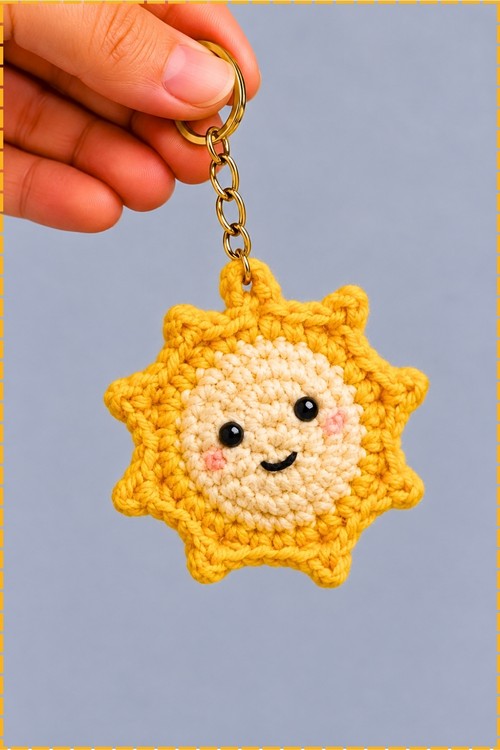
Two flat circles worked in the round, then seamed together with a pointed edging, give this little sun its shape and its rays in one pass. I made the center in soft cream yarn and switched to golden yellow for the outer round, so the face pops like a glowing middle. Small black beads form the eyes, while a tiny stitched smile and pink cheeks finish the expression. Clipped to my keys, it catches the eye every time I reach into my bag. You can usually finish this crochet sun keychain in one evening using scrap yarn. Light stuffing keeps it slim enough for pockets and zipper pulls.
Materials and Tools
- Cream yarn for the center of each panel
- Golden yellow yarn for the outer round and the rays
- Crochet hook sized for your yarn (I suggest 2.5mm or 3.0mm)
- Fiberfill stuffing, just a small pinch
- Two small black beads for the eyes
- Black embroidery thread for the smile
- Pink embroidery thread or yarn for the cheeks
- Gold keyring with a short chain and jump ring
- Tapestry needle and a sewing needle for the beads
- Scissors
- Small pliers (optional, for opening the jump ring)
Abbreviations (US Terms)
- MR: magic ring
- sc: single crochet
- dc: double crochet
- inc: increase (2 single crochet in the same stitch)
- slst: slip stitch
- ch: chain
- st(s): stitch(es)
Difficulty and Time
This is a beginner friendly project if you can already make a magic ring and work single crochet in the round. The only new move for most people is crocheting through two layers at once while shaping the rays. From my own makes, one sun takes roughly an hour to an hour and a half including the face, though your pace may differ.
Beginner Technique Notes
The magic ring lets you pull the center closed tight, so there is no hole in the middle of the face. Pull the tail firmly after Round 1 and give it one more tug before you weave it in.
Joining each round with a slip stitch and a chain 1 gives you flat, even circles rather than a spiral. Your join seam will show slightly, so keep it in line and turn it toward the top or the back.
Working through both panels means you insert the hook through the matching stitch on the front circle and the back circle together, then complete the stitch as normal. Keep the edges lined up stitch for stitch as you go so the rays sit evenly.
The ray point is worked all in one stitch: a double crochet, a chain, a slip stitch back into the top of that double crochet, and a second double crochet. That little cluster spreads outward and forms the pointed tip.
The Pattern
Sun Panels (Make 2)
- Make both panels the same way so the front and back match, using cream for Rounds 1 to 3 and golden yellow for Round 4, as I did on my sun.
- Round 1: With cream yarn, make a magic ring (MR) and work 6 single crochet (sc) into the ring (6 sts). Pull the ring closed snugly so the center looks like a tight little button.
- Round 2: Slip stitch (slst) to join, chain (ch) 1, then work 2 sc in every stitch around (12 sts). Your circle should lie flat with no ruffling at the edge.
- Round 3: Slst to join, ch 1, then work (1 sc, inc) and repeat all the way around (18 sts). The cream circle now forms the face area you see on my finished sun.
- Change to golden yellow yarn on the final slst of Round 3, pulling the new colour through so the colour line stays crisp.
- Round 4: Slst to join, ch 1, then work (1 sc, 1 sc, inc) and repeat all the way around (24 sts). You should now have a cream center framed by a single yellow ring, and the piece should still lie flat.
- First panel: Fasten off and weave in the end.
- Second panel: Do not fasten off, because you will keep this working yarn to join the two panels.
- Weave the cream colour change tails into the back of each panel so they stay hidden once the sun is closed.
Joining and Making the Rays
- Place the two panels wrong sides together so the neat sides face outward, with the panel you like best facing you as the front.
- Line up the stitches of both panels all the way around before you start, since uneven layers will tilt the rays.
- The edging sequence used for the border is 2 sc, 1 double crochet (dc), 1 ch, slst, 1 dc, 2 sc.
- Work 1 sc in each of the next 2 stitches, going through both panels.
- In the next stitch, make the ray point: 1 dc, ch 1, slst into the top of that dc, then 1 dc, all in the same stitch.
- Repeat 2 sc, then the ray point in the next stitch, around the circle.
- Stop when you have about 2 inches left unstitched.
- Stuff the inside of the sun lightly with fiberfill, using just enough to give it a gentle puff; my sun stays fairly flat so it hangs neatly on a keyring.
- Continue the ray pattern to close the remaining gap.
- Slst into the first stitch, fasten off, and weave the yarn tail inside the sun to hide it.
- Check that each ray stands as a small triangle around the yellow edge; a gentle pinch and pull at each tip helps them point outward evenly.
Face and Keychain
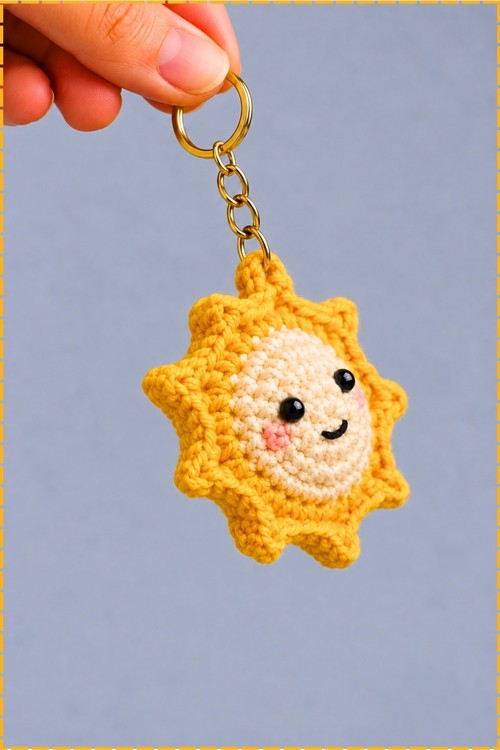
- Attach the keychain: Open the bottom jump ring of the chain with your hook or pliers, pass it through the top point of one ray, and close it securely.
- Choose the ray that sits straight above the face for the keychain, so the sun hangs upright with the smile level, as it does in my photo.
- Add the eyes: Thread your needle with black thread and sew the two small black beads onto the cream center, a little above the middle and spaced apart evenly.
- Embroider the smile: Using the same black thread, stitch a small curved line centered between and just below the eyes for a happy smile.
- Add the cheeks: With pink thread or yarn, work a few short stitches just below and outside each eye to create soft rosy cheeks, matching my version.
- Tie off all threads securely and hide the knots inside the sun's body.
Tips and Troubleshooting
- If your circles cup instead of lying flat, try going up a hook size for the panels; if they ruffle, go down one size.
- Leave a longer tail than usual on the cream yarn when you change colours, since it is easier to weave in neatly on such a small piece.
- If you find sewing through a stuffed sun fiddly, you can add the bead eyes, smile, and cheeks to the front panel before joining, which also lets you knot the threads on the inside.
- Keep the stuffing light, because overfilling pushes the rays out of shape and makes the face bulge.
- Use a nylon or polyester embroidery thread for the beads; it holds up better to daily handling on a keychain than cotton thread.
- Give the finished sun a quick steam with an iron held above it (not touching) to set the rays and smooth the face.
Yarn Substitution
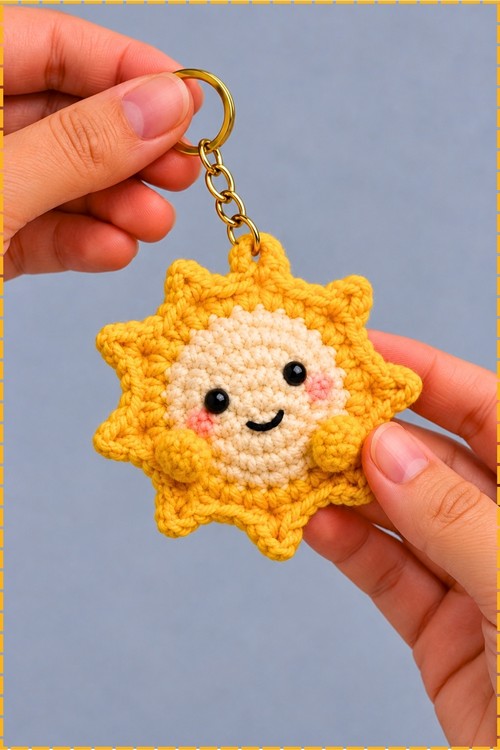
I prefer a smooth cotton or cotton blend in a light weight for this sun, because it shows the stitch texture clearly and wears well on keys. Acrylic works too and comes in plenty of sunny shades, though it can fuzz a little with heavy use. Whatever you choose, keep both colours the same weight so the panels match in size and the colour line stays even.
Customization Ideas
- Swap the cream center for white or pale peach to change the mood of the face.
- Use orange for the outer round and rays for a sunset version.
- Replace the bead eyes with embroidered eyes if the keychain is going to a small child.
- Add tiny embroidered eyelashes or a winking eye for a playful expression.
- Skip the keyring and sew a pin back on the reverse to turn the sun into a brooch.
- Attach a short loop of chains instead of the keyring and hang the sun from a car mirror.
FAQ
Can I make this sun without stuffing?
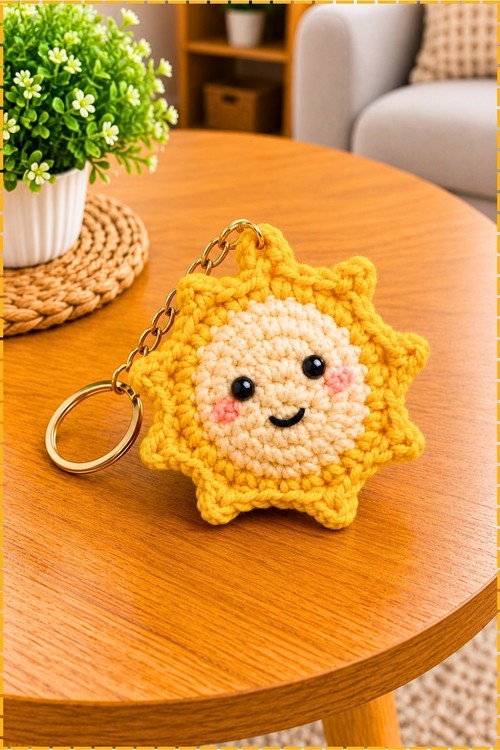
Yes. The two panels joined together already give it some body, so you can leave the stuffing out for a completely flat charm that slips easily into a bag pocket.
How big does the finished sun turn out?
Mine is small enough to hold between two fingers, sitting comfortably in my palm. Exact size depends on your yarn weight, hook size, and tension, so a heavier yarn will give you a larger sun.
Why are my rays uneven?
Uneven rays usually come from panels that slipped out of line during joining. Line up the stitches of both circles before you start, and check every few rays that you are still going through matching stitches.
Are the bead eyes safe for children?
Beads can come loose with heavy pulling, so for young children I recommend embroidered eyes in black thread instead. For an adult or older child keychain, beads sewn on tightly with strong thread hold up well.
Can I use safety eyes instead of beads?
Small safety eyes work if you add them to the front panel before joining, since you need access to the back to fit the washers. Pick a small size so they stay in proportion to the cream center.