
Crochet Rose Flowers Free Pattern In Your Desired Colors
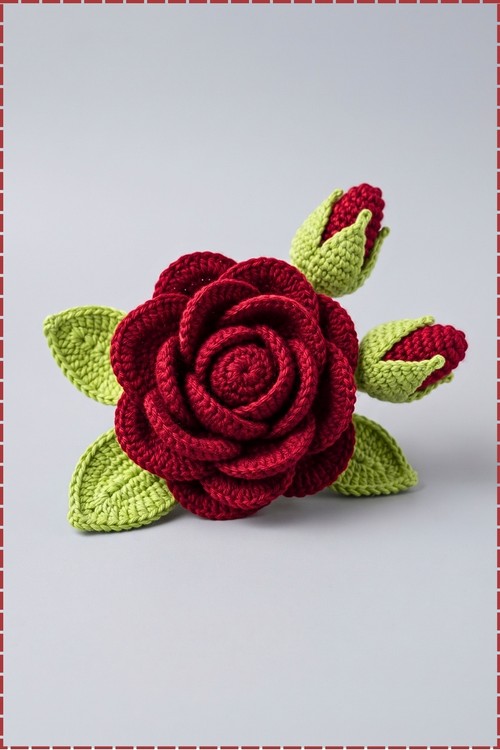
Through the long winter, a crochet rose flower keeps its colour on a coffee table or bookshelf, lying flat with its leaves fanned out around the bloom. Anniversary gift boxes have room for a handmade crochet rose that lasts for years and never drops a petal.
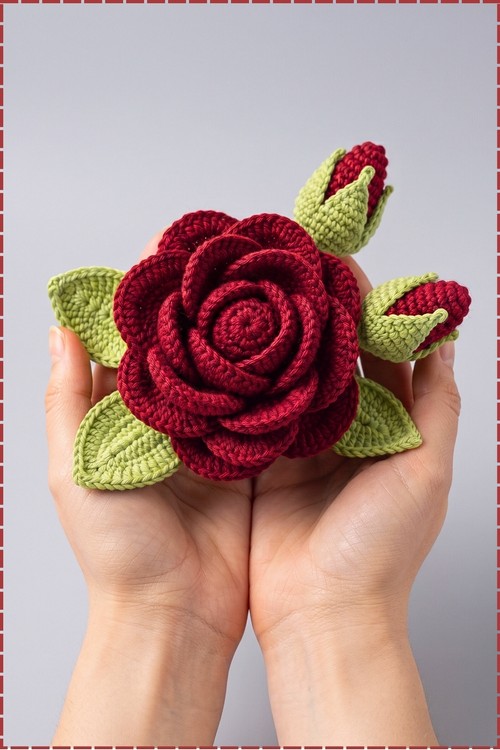
Your palms hold a crochet rose flower with two buds tucked beside its leaves. The bloom plays the confident one, petals spread, centre firm. Its buds stay shy, still wrapped and waiting. Makers who like a little drama will enjoy how each crochet rose flower pairs bold with bashful.
Crochet Rose Flower
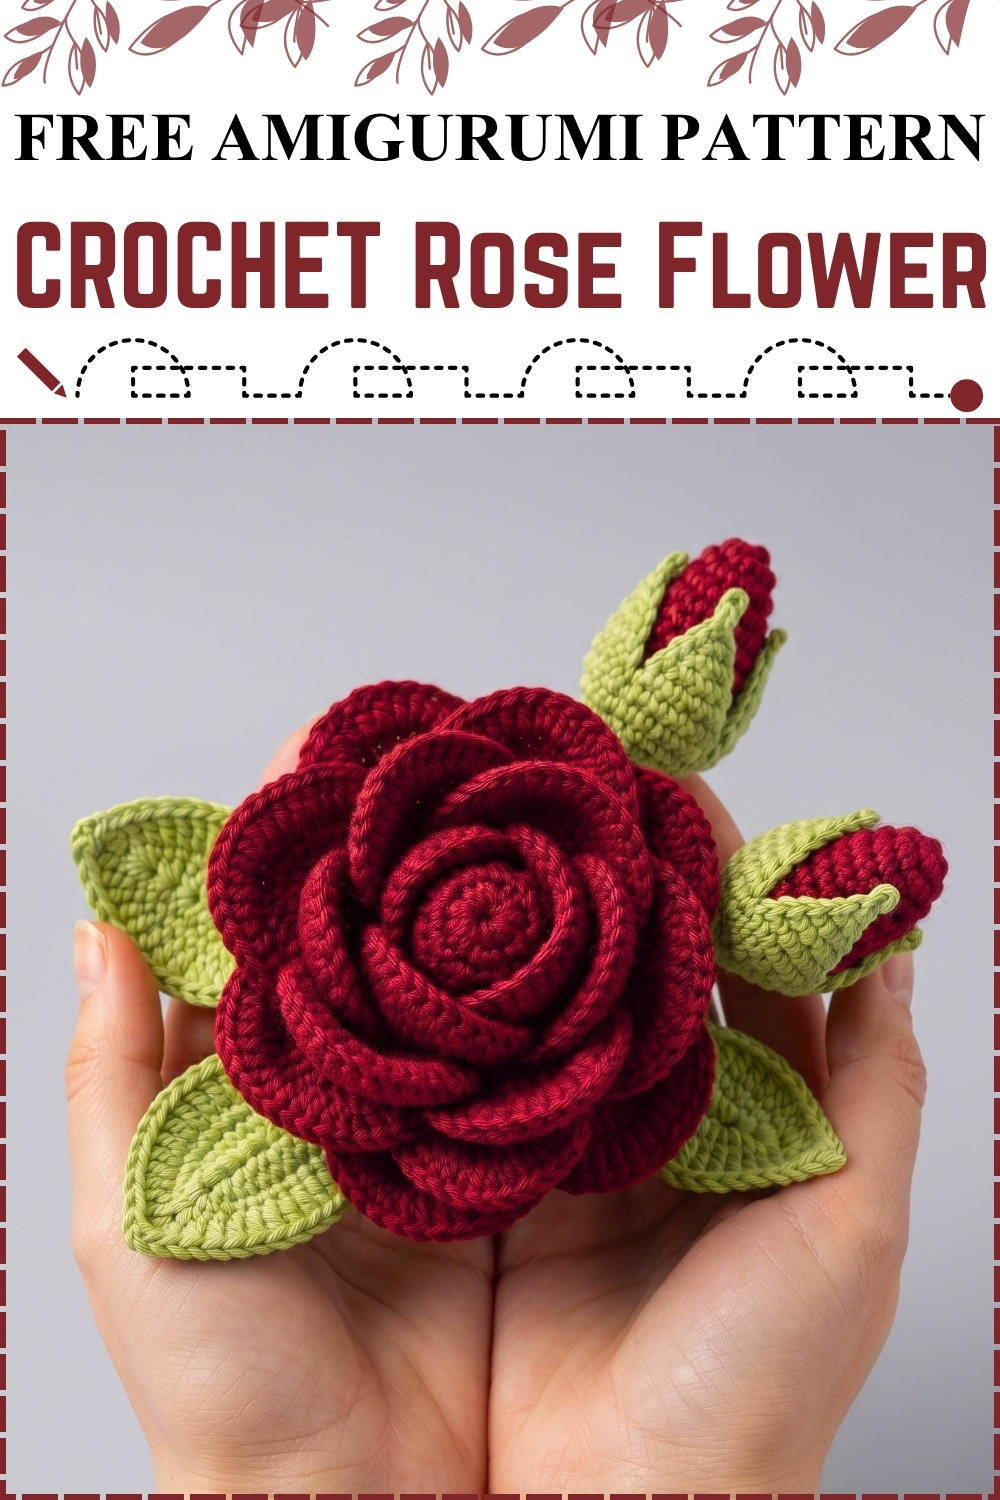
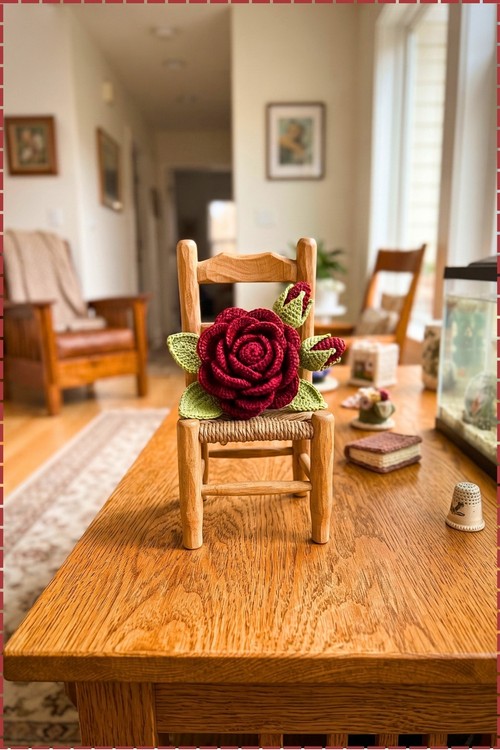
Twenty wired petals in three sizes build up around a small center cup to form this crochet rose flower, and each petal holds its curve because thin floral wire runs through its final round. My version came out in a deep wine red cotton with soft sage green leaves. I also added two closed rosebuds wrapped in green sepals, which give the whole piece a fuller, freshly picked look. Bending the wired edges by hand lets you open the bloom as wide as you like. Hot glue keeps every layer firm without any sewing. Below you will find the full pattern, my notes, and shaping tips.
Materials and Tools
- Burgundy or wine red cotton yarn, 5 ply or a smooth butter cotton, for the petals and rosebud tips
- Sage or light olive green cotton yarn (a summer yarn works well) for the leaves, calyx and bud sepals
- Crochet hook, 2.5 mm, a little smaller than the yarn label suggests so the fabric stays firm
- Thin floral wire for petals and leaves
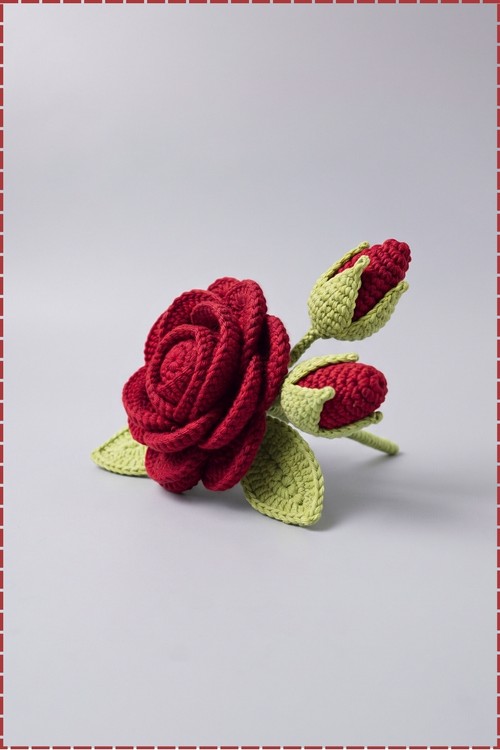
- Thicker floral wire for a stem (optional, my finished rose in the photo is shown without a visible stem)
- Hot glue gun, tapestry needle and scissors
Difficulty and Time
This one sits at an intermediate level. Nothing is hard on its own, but crocheting over wire and making twenty petals takes patience. In my experience the petals take a couple of evenings, and assembly adds roughly another hour or two, depending on how fussy you get with shaping.
Beginner Technique Notes
- Chain (ch): the foundation loop every petal starts from.
- Single crochet (sc), half double crochet (hdc), double crochet (dc) and treble crochet (tr): the petals grow taller from the base to the tip simply by moving up through these stitches.
- Slip stitch (sl st): used to join and to close each petal.
- Double crochet 2 together (dc2tog) and single crochet 2 together (sc2tog): decreases that narrow the bud cup and sepal tips.
- Picot: chain 2 and slip stitch back into the base stitch to form a small point.
- Crocheting over wire: lay the wire along the top edge and work each stitch around it, so the wire hides inside the stitches.
The Pattern
Large Petals (make 10 in red)
- Base Round: Ch 12, skip the first ch from the hook.
- Working down the chain, work 1 sc in the next 2 ch, 1 hdc in the next 2 ch, 1 dc in the next 6 ch.
- In the very last chain, work 5 dc.
- Working up the opposite side of the chain, work 1 dc in the next 6 ch, 1 hdc in the next 2 ch, 1 sc in the next 3 ch, bringing you back to the start; you should now have a narrow oval with a rounded top.
- Round 2: 1 sc in the next 2 sts, 1 hdc in the next 2 sts, 1 dc in the next 6 sts.
- Work 2 dc in each of the next 5 sts across the top curve [10 dc].
- 1 dc in the next 6 sts, 1 hdc in the next 2 sts, 1 sc in the next 3 sts; the top of the petal now flares slightly wider than the base.
- Round 3 (adding the wire): Lay thin floral wire along the edge and crochet over it for this whole round.
Shaping the Wired Edge
- 1 sc in the next 2 sts, 1 hdc in the next 2 sts, 1 dc in the next 4 sts.
- Work 2 dc in the next st.
- Work 2 tr in each of the next 5 sts.
- Work 2 dc in the next st.
- In the top center stitch, work 1 sc, ch 2 and sl st into the 2 loops of the sc to make a picot, then 1 sc in the same st; on my rose I pressed this picot flat into the curve, so the finished petal edges read as smooth and round in the photo.
- Work 2 dc in the next st.
- Work 2 tr in each of the next 5 sts.
- Work 2 dc in the next st.
- 1 dc in the next 4 sts, 1 hdc in the next 2 sts, 1 sc in the next 2 sts.
- Sl st into the next st, cut the yarn leaving a small tail, and twist the two wire ends tightly together at the base; the petal should now be a wide, rounded fan that holds any bend you give it.
Medium Petals (make 6 in red)
- Base Round: Ch 7, skip the first ch, work 1 sc in the next 6 ch.
- Work 1 more sc in the last chain, then turn to work down the opposite side.
- 1 sc in the next st, 1 hdc in the next 2 sts, 1 dc in the next 2 sts.
- In the bottom curve stitch, work 5 dc.
- 1 dc in the next 2 sts, 1 hdc in the next 2 sts, 1 sc in the next 2 sts; you should have a small teardrop shape.
- Round 2: 1 sc in the next 2 sts, 1 hdc in the next 2 sts, 1 dc in the next 3 sts.
- Work 2 dc in each of the next 4 sts.
- 1 dc in the next 3 sts, 1 hdc in the next 2 sts, 1 sc in the next 2 sts; the curved end widens into a gentle cup.
- Round 3 (adding the wire): Join the wire exactly as for the large petal.
- 1 sc in the next 2 sts, 1 hdc in the next 2 sts, 1 dc in the next 2 sts.
- Work 2 dc in the next st.
- Work 2 tr in each of the next 6 sts.
- Work 2 dc in the next st.
- 1 dc in the next 2 sts, 1 hdc in the next 2 sts, 1 sc in the next 2 sts.
- Sl st through all top loops to close, ch 2 and cut the yarn, then twist the wire ends together; each medium petal should be noticeably shorter and more cupped than a large one.
Small Petals (make 4 in red)
- Base Round: Work the same Base Round as the Medium Petal.
- Round 2 (adding the wire): Join the wire.
- 1 sc in the next 2 sts, 1 hdc in the next 2 sts, 1 dc in the next 2 sts.
- Work 2 dc in the next st.
- Work 2 tr in each of the next 4 sts (instead of 6).
- Work 2 dc in the next st.
- 1 dc in the next 2 sts, 1 hdc in the next 2 sts, 1 sc in the next 2 sts.
- Sl st, then chain a long length from the working yarn before cutting so you can pull it through the center bud later, and twist the wire; these tight little petals form the curled heart of the rose.
Center Bud Base (make 1 in red)
- Make a magic ring, ch 1.
- Round 1: 1 sc into the ring, ch 2 (counts as the first dc), then 11 more dc into the ring [12 dc], sl st to join.
- Round 2: Ch 2, dc2tog around [6 decreases], sl st to join.
- Fasten off and weave in the ends; you now have a small closed cup, and on my rose its round, spiral top shows right in the middle of the bloom, so keep the right side facing up.
Flower Calyx (make 1 in green, optional)
- Make a magic ring, ch 1.
- Round 1: 5 sc into the ring [5 sc], sl st to join.
- Round 2: Ch 1, 2 sc in each st around [10 sc], sl st to join.
- Round 3: Ch 1, (1 sc in the next st, 2 sc in the next) repeat around [15 sc], sl st to join.
- Rounds 4 to 6: Ch 1, 1 sc in each st around [15 sc], sl st to join; you should have a small green cup.
- Sepal points: Work 5 points along the rim, each using 3 stitches of the base.
- Row 1: Ch 1, 1 sc, 2 sc in the next st, 1 sc [4 sc], ch 1, turn.
- Row 2: 2 sc in the first st, 1 sc, 2 sc in the next st, 1 sc [6 sc], ch 1, turn.
- Row 3: 1 sc in each st [6 sc], ch 1, turn.
- Row 4: Skip the first st, 1 sc in the remaining 5 sts [5 sc], ch 1, turn.
- Row 5: Skip the first st, 1 sc in the remaining 4 sts [4 sc], ch 1, turn.
- Row 6: Skip the first st, 1 sc in the remaining 3 sts [3 sc], ch 1, turn.
- Row 7: Skip the first st, 1 sc in the remaining 2 sts [2 sc], ch 1, turn.
- Row 8: sc2tog, ch 3 and cut the yarn; one pointed sepal is done.
- Join the yarn to the next unworked stitch on the rim and repeat Rows 1 to 8 four more times for 5 sepals; the finished calyx looks like a small green star cup.
Rose Leaves (make 4 in green)
- Ch 16, skip the first ch.
- Side A: 1 sc in the next 2 ch, 1 hdc in the next 2 ch, 1 dc in the next 2 ch, 1 tr in the next 2 ch.
- Work 2 tr in each of the next 2 ch.
- 1 tr in the next 2 ch, 1 dc in the next 2 ch.
- In the last chain, work 3 dc.
- Side B (adding the wire): Lay floral wire down and crochet over it up the opposite side of the chain.
- 1 dc in the next 2 sts, 1 tr in the next 2 sts, 2 tr in each of the next 2 sts.
- 1 tr in the next 2 sts, 1 dc in the next 2 sts, 1 hdc in the next 2 sts, 1 sc in the next 2 sts.
- Ch 2, sl st at the bottom tip; the leaf now has a clear center line where the two sides meet, just like the vein on my green leaves.
- Border (optional serrated edge): Working around the leaf over the wire again, (ch 2, sl st in the next st) repeat up to the top point.
- At the top point, work 1 sc, ch 2 picot, sl st in the next st.
- Continue (ch 2, sl st in the next st) down the other side.
- Fasten off, leaving a long tail, and twist the wire ends together; I left the serrated border off for the smooth, rounded leaves you see in my photo, so simply fasten off after the bottom tip if you want the same look.
Rosebuds (my addition, make 2)
- For each bud, make a small closed red shape the same way as the Center Bud Base, then wrap one or two Small Petals around it and glue them into a tight oval cone; work until the bud looks closed and firm in your hand.
- Make a green sepal cup for each bud by working the Flower Calyx pattern and stopping when the cup and points reach about halfway up your bud; I let two or three sepal points curl up the sides so the red tip peeks out of the green, as in my photo.
- Glue each red bud into its green cup and twist any wire ends together at the base.
Assembly
- Form the center: Pull the long chains of the 4 Small Petals through the Center Bud cup and glue the petals snugly around it; on my rose the petals curl around the visible round bud top instead of closing into a tall cone.
- Attach the Medium Petals: Glue the 6 Medium Petals one at a time around the center, overlapping each by about half, keeping them close and slightly curled inward.
- Attach the Large Petals: Glue the 10 Large Petals around the outside in two loose rings and bend the wired tops outward and slightly down so the bloom opens wide and flat, like mine.
- Gather the base: Bundle all wire ends under the flower and wrap them tightly with green yarn; add thick wire for a stem only if you want a long stemmed rose.
- Add the calyx (optional): Push the calyx up under the bloom and glue it flush against the base of the petals.
- Attach the leaves: Glue the 4 leaves underneath the bloom so they fan out from behind it, two on the left, one at the lower right and one tucked under the buds, as seen in my photo.
- Attach the buds: Glue or wrap the two rosebuds at the upper right edge, angled outward, so they sit just above the leaves and frame the open rose.
Tips and Troubleshooting
- Keep tension tight; loose stitches let the wire show through and make the petals floppy.
- Bend the wire tip of a petal before you twist the ends, as it is far easier to tuck neatly that way.
- Glue a little at a time; a thin bead along the base holds better than a big blob and stays hidden.
- Lay all petals out by size before assembly so you never grab a medium where a large should go.
- If a petal edge curls the wrong way, steam it lightly and reshape it with your fingers while it cools.
Yarn Substitution
Any smooth cotton or cotton blend in a light weight works. Acrylic is fine, though it shapes less crisply and can melt slightly under hot glue. Avoid fuzzy yarns, since they blur the rolled petal edges.
Customization Ideas
- Swap the red for blush pink, ivory or coral for a wedding or spring look.
- Leave out the buds and stem and add a pin back to wear it as a brooch.
- Make several roses on long wire stems for a bouquet that lasts.
- Glue one onto a headband or hair clip.
FAQ
How big is the finished rose? Mine fits comfortably in two cupped hands, roughly palm sized, though your size will vary with yarn and tension.
Can I make it without wire? You can, but the petals will lie flat and lose their curl. Starch helps a little if you skip the wire.
Do I have to use hot glue? Sewing works too, just slower. Glue holds wired layers more firmly in my experience.
Why do my petals look different sizes from each other? Usually tension changes between sessions. Try making all petals of one size in a single sitting.
How do I clean it? Dust it with a soft brush or a hair dryer on cool. Avoid washing, since water can rust the wire.