
Crochet Raspberry Pattern Free Amigurumi
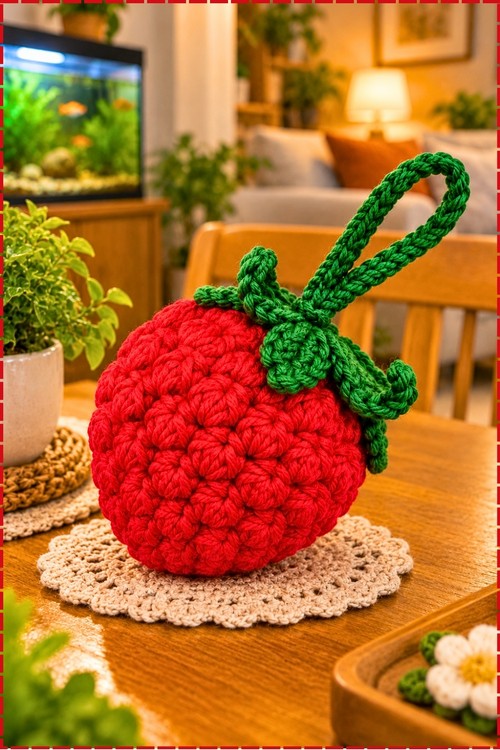
Forest green leaves and a long hanging loop crown the crochet raspberry amigurumi, giving it an easy hook for a cabinet knob, drawer pull or pantry door. When summer picnics roll around, a red crochet berry toy tucked into the basket blends right in with the real fruit.
Little hands in a play kitchen tend to grab the Crochet Raspberry Amigurumi first and carry it everywhere by the stem loop. Preschool teachers can pass it around during fruit lessons. Grandparents who stitch for toddlers can gift it, while berry pickers may want a Crochet Raspberry Amigurumi hanging by the kitchen window.
Crochet Raspberry Amigurumi
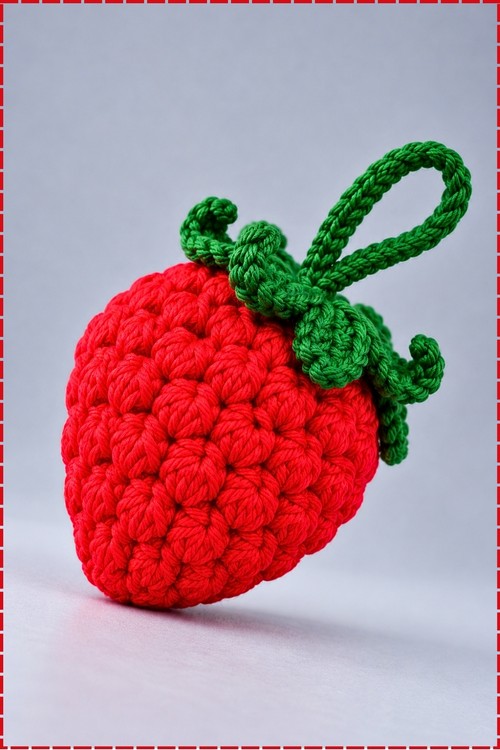
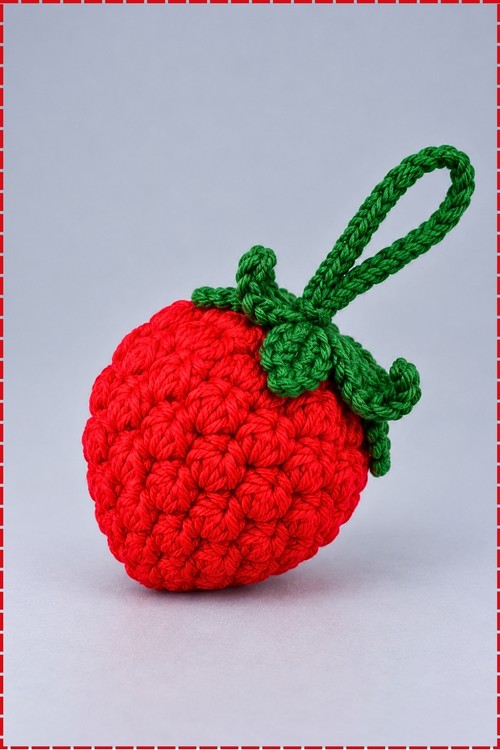
Eight single crochet stitches in a magic ring start this berry, and every round after that builds a raised cluster bump. I worked mine in a bright red cotton so the texture reads clearly from across the room. Five pointed green leaves sit on top with their tips curling outward, and a chain loop rises from the centre. My crochet raspberry amigurumi grows from the top down and closes into a soft rounded point at the bottom. Hot glue holds the leaf piece in place, so assembly goes quickly. Anyone comfortable with puff style stitches will find the rhythm within a couple of rounds.
What You Need
- 5 strand milk cotton yarn in bright red for the berry.
- 5 strand milk cotton yarn in deep green for the leaves and strap.
- Crochet hook, 2.5 mm.
- Filling cotton or fiberfill.
- Hot glue gun.
- Tweezers for pushing stuffing into place.
- Tapestry needle.
- Scissors.
- Stitch marker, optional.
Difficulty and Time
This is an easy project once the cluster stitch clicks. In my experience the berry body takes the most time, and the leaves and strap go fast. Mine came out about the size of a small fist ornament, but your tension and yarn will shift that.
Stitch Notes and Tips
- Magic Ring (MR): wrap the yarn into an adjustable loop, crochet into it, then pull the tail to close the centre. Pull it tight before joining, because a loose ring leaves a hole right under the leaves.
- Single Crochet (sc): insert the hook, pull up a loop, yarn over, and pull through both loops.
- Slip Stitch (sl st): insert the hook, yarn over, and pull through the stitch and the loop on the hook in one move.
- Chain (ch): yarn over and pull through the loop on the hook.
- Half Double Crochet (hdc): yarn over, insert the hook, pull up a loop, yarn over, and pull through all three loops.
- Double Crochet (dc): yarn over, insert the hook, pull up a loop, then yarn over and pull through two loops twice.
- Cluster: yarn over, insert the hook into the stitch or space, and pull up a long loop. Repeat this 5 times in the same stitch, then yarn over and pull through all loops on the hook. Chain 1 to lock the cluster. Pull every loop up to the same height so the bump stays round, and hold the loops loosely on the hook so the final pull through goes smoothly.
- Decrease Cluster: pull up loops across two neighbouring spaces, then pull through everything at once so the two spaces combine into a single cluster. Keep the loops even here too, or the decrease rounds look lumpy.
- From Round 3 on, work into the chain spaces between clusters rather than into the cluster tops. That placement staggers the bumps and gives the berry its texture.
- Clip a stitch marker into the first cluster of each round. The joins hide easily inside the bumps.
The Pattern
1. Raspberry Body
- Use the red yarn for the whole body.
- Round 1: Make a magic ring.
- Work 8 single crochets into the ring.
- Pull the ring tight and slip stitch into the first single crochet to join [8 stitches]; the centre should close fully, since this end becomes the top of the berry under the leaves.
- Round 2: Chain 2.
- Work 1 cluster into each stitch around.
- Slip stitch into the first cluster to join [8 clusters]; you should have a small flat circle of bumps.
- Round 3: Chain 2.
- Work 1 cluster in the next space, then 2 clusters in the following space.
- Repeat that sequence around.
- Slip stitch to join [12 clusters]; the circle starts to cup slightly at this point.
- Round 4: Chain 2.
- Work 1 cluster in each of the next 2 spaces, then 2 clusters in the following space.
- Repeat that sequence around.
- Slip stitch to join [16 clusters]; this is the widest round and forms the shoulders of the berry just below the leaves.

- Rounds 5 and 6: Chain 2.
- Work 1 cluster into every space around.
- Slip stitch to join [16 clusters in each round]; the sides should now drop straight down so the piece looks like a deep bowl.
- Round 7: Chain 2.
- Work decrease clusters all the way around.
- Slip stitch to join [8 clusters]; the berry now tapers toward the tip.
- Round 8: Chain 2.
- Work decrease clusters around once more [4 clusters]; the opening is small now and the bottom point is forming.
- Stuffing and closing: Stuff the berry firmly with filling cotton, using tweezers to push it up into the shoulders first.
- Cut the yarn, leaving a long tail.
- Thread the tail onto the tapestry needle and weave it through the final stitches.
- Pull tight to close the hole; the bottom should finish in a neat rounded point like the one on mine.
2. Leaves
- Switch to the green yarn.
- Centre ring: Make a magic ring and work 5 single crochets into it.
- Slip stitch to join [5 stitches].
- First leaf: Chain 9.
- Starting in the second chain from the hook, work back down the chain with 2 slip stitches, 2 single crochets, 1 half double crochet, and 3 double crochets [8 stitches].
- Slip stitch into the next single crochet on the centre ring to anchor the leaf; it should be slim at the tip and full near the ring.
- Remaining leaves: Repeat the first leaf steps 4 more times.
- Fasten off [5 leaves]; you should have a five point star, and the slip stitches at each tip make them curl just like the leaves on my berry.
3. Hanging Strap
- Keep using the green yarn.
- Chain 30.
- Slip stitch into the first chain to form a loop.
- Fasten off, leaving a tail for sewing.
- Sew the base of the loop securely to the centre of the leaf star; the loop should stand upright from the middle of the leaves, as it does on mine.
4. Assembly
- Apply a dab of hot glue to the top centre of the berry, right over the closed magic ring.
- Press the centre of the leaf star firmly onto the glue with the strap pointing straight up.
- Add small dots of glue under each leaf near its base, if you like, and leave the tips free; on my berry the leaf tips lift away from the sides and curl outward instead of lying flat.
Swapping Yarn
Any smooth cotton or cotton blend works, since the clusters need a yarn that holds a defined shape. Milk cotton gives a soft, slightly matte finish like mine. A thicker yarn needs a larger hook and makes a bigger berry, so adjust the strap length to suit. Skip fuzzy or brushed yarns, which blur the bumps.
Ways to Change It Up
- Use a deep purple for a blackberry or a soft yellow for a golden raspberry.
- Shorten the strap and add a split ring to turn it into a keychain.
- Make three in different sizes of yarn and hang them together as a kitchen garland.
- Skip the strap and add a few more berries to a play food basket.
FAQ
Can I sew the leaves on instead of gluing them?
Yes. Sew around the centre ring of the leaf star with green yarn and tack each leaf base with a stitch or two. Sewing is the better choice if a small child will play with the berry.
Stuffing through such a small opening is hard. Any fix?
Tweezers help a lot here. You can also push most of the stuffing in during Round 8, while the opening is still a little wider, and top it up before closing.
My berry ruffles instead of cupping. What went wrong?
Ruffling usually means the clusters went into the stitch tops instead of the spaces, or an increase landed in the wrong spot. Recount Round 3 and Round 4 against the totals before moving on.