
Free Oddish Pokémon Crochet Pattern for Beginners
Getting clean shaping on both ends of a piece is something many crocheters struggle with, and this design is a great example of how thoughtful increases and decreases create a balanced, rounded character.
Crochet Oddish Pokemon Amigurumi

From the curved feet that help it stand, to the layered leaves that give it personality, each section builds in a way that’s easy to follow once you understand what each step is doing.
Skill Level
Beginner to intermediate
Finished Size
Size will vary depending on yarn and hook, but expect a palm sized amigurumi with a rounded body and five leaves on top.
Materials
-
Yarn: Blue plush yarn (for the body/feet) and green plush yarn (for the leaves).
-
Hook: 5 mm crochet hook.
-
Eyes: 12 mm safety eyes (black or red).
-
Other: Stuffing, scissors, stitch marker, needle (plastic recommended for plush yarn).
Abbreviations
- sc: single crochet
- inc: increase (2 stitches in one stitch)
- dec: decrease (invisible decrease recommended)
- sl st: slip stitch
Helpful Notes Before Starting
- Work in continuous rounds unless stated otherwise.
- Use a stitch marker to keep track of your rounds.
- Invisible decreases will give a smoother finish, especially on visible areas like the body.
- Stuff gradually instead of all at once for better shaping.
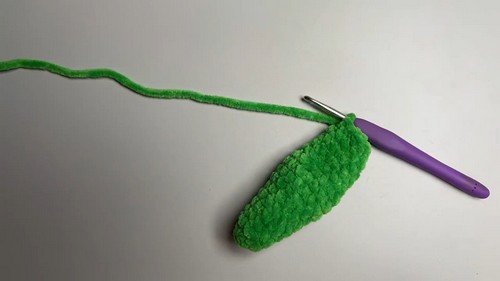
Construction Overview
This amigurumi is built in separate parts and then assembled:
- Two feet are made first and lightly stuffed
- Five leaves are crocheted and shaped
- The body is worked as one piece, with eye placement during the process
- Everything is sewn together, with attention to balance and symmetry
The overall look depends heavily on how well the feet are angled and how evenly the leaves are spaced.
Stitch and Shaping Clarity
- Increases in early rounds create the rounded base of the feet and body
- Back and forth shaping in the foot gives it a slightly flattened, stable base
- Decreases in the body pull the shape inward to form a smooth sphere
- Leaf shaping uses gradual increases and decreases to create a natural taper
Take your time with decreases, especially in visible areas, to avoid gaps.
Step by Step Pattern Instructions
STARTING A FOOT
- Make a slip knot and chain four.
- Single crochet twice in the second chain from the hook.
- Make three single crochet stitches in the last loop.
- Single crochet two more stitches down the other side of the chain.
- Make three single crochet stitches into the last stitch.
- For the next round, do two single crochet stitches followed by three increases.
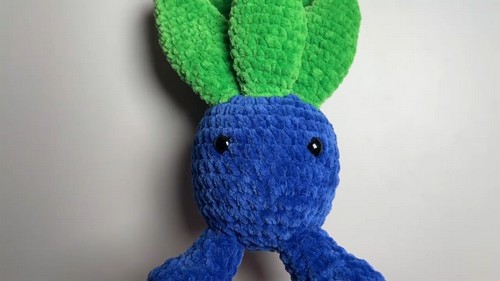
- Repeat this again for a total of 16 stitches.
- Crochet 16 single crochet stitches for the next round.
- Use a needle to sew up any holes at the bottom of the foot.
CREATING THE FOOT SHAPE
- Do two single crochet stitches, followed by three invisible decreases, and then eight single crochet stitches to get to 13 stitches.
- The next round is a single crochet and a decrease four times, ending with one single crochet, which will leave you with nine stitches.
- Then, do three rows of nine single crochet stitches.
- Finish with a slip stitch and cut the yarn, leaving a long tail for sewing.
- Add a little stuffing to the foot.
MAKING THE LEAVES
- You will need to make five leaves.
- Start with a magic ring of six single crochet stitches.
- For the next round, do a single crochet and an increase three times to get to nine stitches.
- The next round is nine single crochet stitches.
- Then, do two single crochet stitches and an increase three times to get to 12 stitches.
- Do two rows of 12 single crochet stitches.
- Next, do three single crochet stitches and an increase three times to get to 15 stitches.
- Follow with three rows of 15 single crochet stitches.
SHAPING THE LEAF
- Start decreasing by doing three single crochet stitches and a decrease three times to get down to 12 stitches.
- Do two more rows of 12 single crochet stitches.
- Next, do two single crochet stitches and a decrease three times to get down to nine stitches.
- Finish with one row of nine single crochet stitches.
- Finish with a slip stitch and leave a tail for sewing.
CROCHETING THE BODY
- Start with a magic ring of six single crochet stitches.
- Do six increases to get to 12 stitches.
- Single crochet and increase six times to get to 18 stitches.
- Do two single crochet stitches and an increase six times to get to 24 stitches.
- Do three single crochet stitches and an increase six times to get to 30 stitches.
- Do four single crochet stitches and an increase to get to 36 stitches.
- Do six rows of 36 single crochet stitches.
- Place the eyes between rows nine and ten, about six stitches apart.
- Do four single crochet stitches and a decrease six times to get to 30 stitches.
- Do three single crochet stitches and a decrease to get to 24 stitches.
- Do two single crochet stitches and a decrease six times to get to 18 stitches.
- Stuff the body with fiberfill.
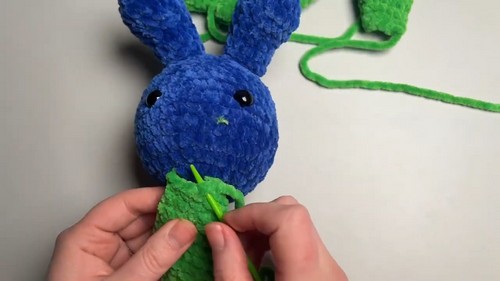
- Do a single crochet and a decrease six times to get to 12 stitches.
- Add more stuffing to the body.
- Do six decreases to close the hole.
- Add any final stuffing and sew the hole closed.
Assembly Guidance
Leg Placement
- Sew the legs onto the bottom of the body, just below each eye
- Angle the feet slightly outward to give a stable stance
- Check placement from the front before securing fully
Leaf Placement
- Start with one leaf centered at the front
- Add two leaves on each side, slightly angled outward
- Place the final two toward the back
Spacing matters here. Even placement creates a balanced, full look from every angle.
Eye and Facial Feature Placement
- Eyes go between rows nine and ten
- Keep them about six stitches apart
- Double check alignment before attaching, as this sets the entire expression
Stuffing Tips
- Stuff the feet lightly so they stay slightly flat
- The body should be firmly stuffed but not stretched
- Add stuffing in stages as you decrease to avoid lumps
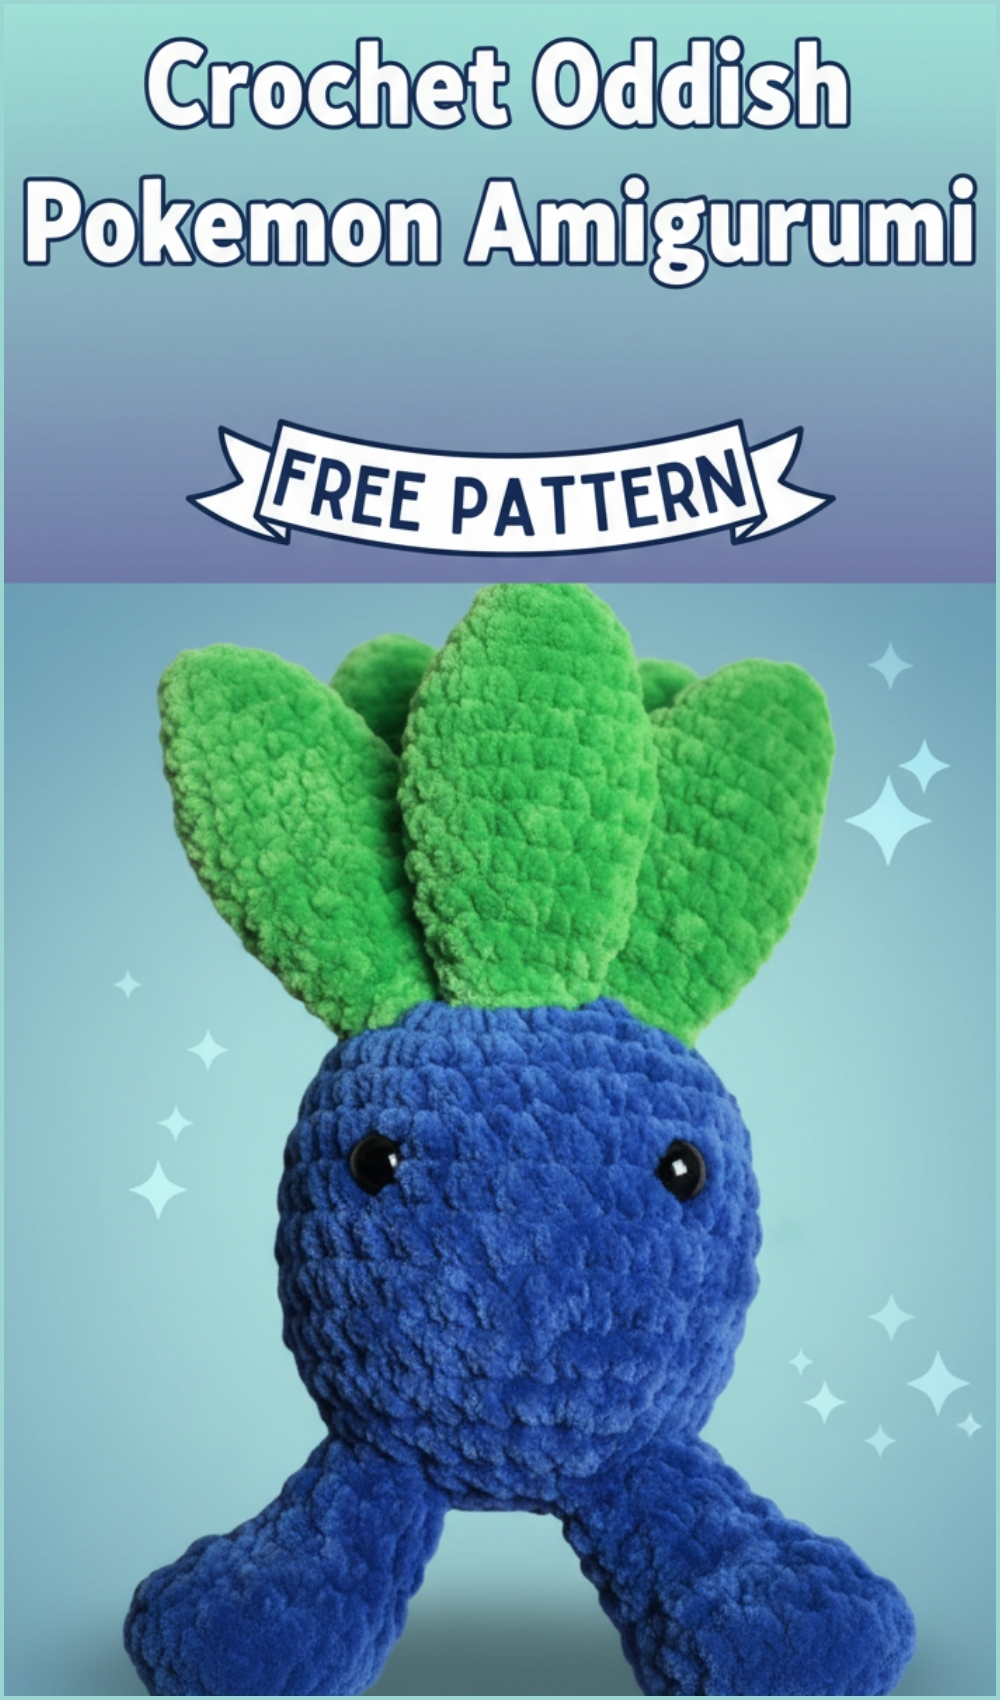
Finishing Notes
- Close all openings neatly with a yarn needle
- Hide yarn tails inside the body
- Adjust leaves slightly after sewing to create a natural spread
Beginner Notes
- Take your time with the first foot. Once you understand the shaping, the second will be much easier
- Count stitches at the end of each round to stay on track
- Practice invisible decreases if they feel unfamiliar
Troubleshooting
- Feet look uneven: Check that your increases were placed correctly in the oval base
- Body looks pointy instead of round: This usually means not enough stuffing or decreases pulled too tight
- Leaves look stiff or bulky: Try slightly lighter stuffing or none at all for a more natural drape
Customization Ideas
- Change leaf colors for different variations
- Add embroidered details like a mouth or blush
- Use different yarn weights to create larger or smaller versions