
Crochet Mike Stranger Amigurumi Pattern (Free)
Fans of character-inspired crochet builds will appreciate the Crochet Mike Mini Stranger Amigurumi pattern for how it transforms a recognizable on-screen personality into a textured, yarn-crafted figure with expressive detail and strong visual identity. This piece stands out through its bold facial features, structured proportions, and carefully shaped body that together recreate the character’s presence in a soft, handmade form. Beyond its appearance, it works well as a display item for themed collections, a personalized gift for fans, or even a storytelling prop that adds charm to shelves and creative setups.
Crochet Mike Mini Stranger Amigurumi

Its construction also gives crocheters a satisfying balance of shaping and assembly, where each section gradually reveals the character’s form through thoughtful increases, decreases, and finishing touches that bring personality to life in crochet form.
Skill Level
Beginner to Intermediate
Best suited for crocheters who are comfortable with single crochet, increases, decreases, and basic amigurumi shaping.
Finished Look Overview
This doll is constructed in four main parts:
- Arms (made separately)
- Legs joined into a single body
- Head worked continuously from the body
- Separate jacket and hair added during finishing
The shaping relies heavily on gradual decreases in the body and head, which creates a natural taper from feet to neck, then a rounded head.
Materials (Based on Pattern Details)
- Yarn in multiple colors: beige, green, white, skin tone, red, black
- Crochet hook suitable for amigurumi yarn
- Safety eyes
- Fiberfill stuffing
- Yarn needle for sewing and embroidery
- Stitch marker
Abbreviations
- sc = single crochet
- inc = increase (2 sc in one stitch)
- dec = decrease
- ch = chain
- hdc = half double crochet
Helpful Notes Before Starting
- Color changes happen mid-stitch in some rounds. Carry yarn neatly inside to avoid gaps.
- Stuff the legs and body firmly but not overly tight to maintain shaping.
- The head is worked continuously from the body, so stuffing gradually is important.
- Keep stitch counts accurate, especially during joining rounds, as this sets the foundation for the torso symmetry.
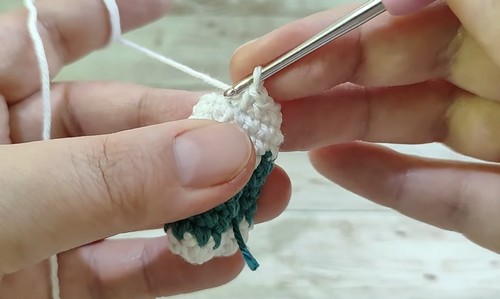
ARMS MAKE 2 (Original Pattern)
- ARMS MAKE 2
- Round 1: Make a magic ring with 6 single crochet
- Round 2: Crochet 6 single crochet and change color to beige in the last stitch
- Round 3: Crochet 6 single crochet
- Round 4: Crochet 6 single crochet
- Round 5: Crochet 6 single crochet
- Finishing: Flatten the top and close with 3 single crochet through both sides, leave a long tail for sewing
Construction Insight
The arms remain narrow and tube-like, which helps them sit neatly against the jacket later. Flattening the top allows for a clean seam when attaching to the shoulders.
LEGS AND BODY (Original Pattern)
- LEGS AND BODY
- Round 1: Make a magic ring with 4 single crochet worked loosely
- Round 2: Increase in each stitch for a total of 8 single crochet and change color to green in the last stitch
- Round 3: Crochet 8 single crochet
- Round 4: Crochet 8 single crochet and fasten off for the first leg
- Second Leg: Repeat rounds 1 to 4 but do not cut the yarn
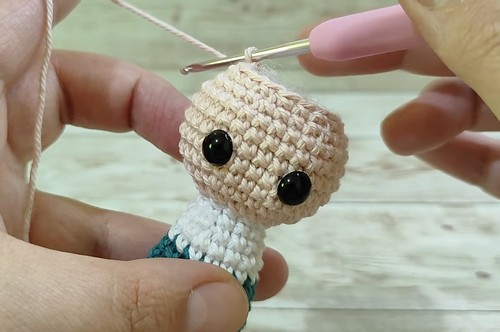
Joining Round:
Chain 1, join to the first leg, crochet 8 single crochet around the first leg, 1 single crochet in the chain, 8 single crochet around the second leg, and 1 single crochet in the back of the chain for 18 stitches
Body Shaping Rounds
- Round 6: Repeat 4 single crochet and 1 decrease three times for 15 stitches
- Round 7: Crochet 15 single crochet and change color to white
- Round 8: Crochet 15 single crochet
- Round 9: Crochet 15 single crochet
- Round 10: Repeat 3 single crochet and 1 decrease three times for 12 stitches
- Round 11: Crochet 12 single crochet
- Round 12: Crochet 12 single crochet and change color to skin tone
Construction Insight
The joining round is one of the most important structural steps. It transforms two separate legs into a single stable base. The gradual decreases in Rounds 6 and 10 begin shaping the waist, preparing for the head’s larger proportions above.
HEAD (Original Pattern)
- HEAD
- Round 13: Increase in each stitch for 24 single crochet
- Round 14: Repeat 3 single crochet and 1 increase around for 30 stitches
- Round 15: Crochet 30 single crochet
- Round 16: Crochet 30 single crochet
- Round 17: Crochet 30 single crochet
- Round 18: Crochet 30 single crochet
- Round 19: Crochet 30 single crochet
- Eye Placement: Insert safety eyes between rounds 16 and 17 with 5 stitches between them
- Round 20: Repeat 3 single crochet and 1 decrease around for 24 stitches
- Round 21: Repeat 2 single crochet and 1 decrease around for 18 stitches
- Round 22: Repeat 1 single crochet and 1 decrease around for 12 stitches
- Final Round: Crochet 6 decreases and close the opening
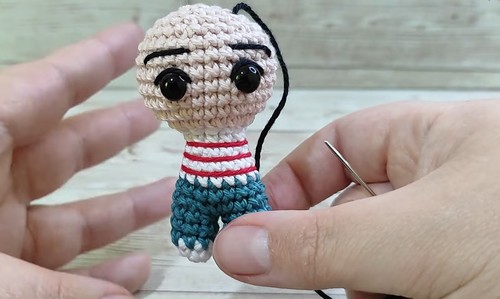
Construction Insight
The head expands quickly after the neck, then maintains a stable shape before tapering down. Eye placement between Rounds 16 and 17 ensures the face sits in the widest, most symmetrical part of the head for balanced expression.
JACKET (Original Pattern)
- JACKET
- Foundation: Chain 16 and start in the second chain from the hook
- Row 1: Crochet 15 single crochet, chain 1 and turn
- Row 2: Crochet 7 single crochet, 1 increase, 7 single crochet, chain 1 and turn
- Row 3: Crochet 2 single crochet, 1 increase, 10 single crochet, 1 increase, 2 single crochet, chain 1 and turn
- Row 4: Crochet 3 single crochet, 1 increase, 10 single crochet, 1 increase, 3 single crochet
- Edging: Crochet single crochet evenly around the sides and top to finish
Construction Insight
The jacket is shaped with gradual increases that create a slight flare, allowing it to wrap naturally around the torso without pulling or curling.
HAIR (Original Pattern)
- HAIR
- Base Round: Make a magic ring with 7 single crochet
- Round 2: Increase in each stitch for 14 single crochet
- Long Strands: Chain 12, work half double crochet back along the chain starting from the third chain, repeat for four long strands
- Short Strands: Chain 6, work half double crochet back along the chain starting from the third chain, make several short strands for bangs
- Total Strands: Create 13 strands using a mix of long and short pieces
Construction Insight
The hair is built from a small base circle, then individual strands are attached like modular pieces. Mixing strand lengths creates natural movement and helps frame the face.
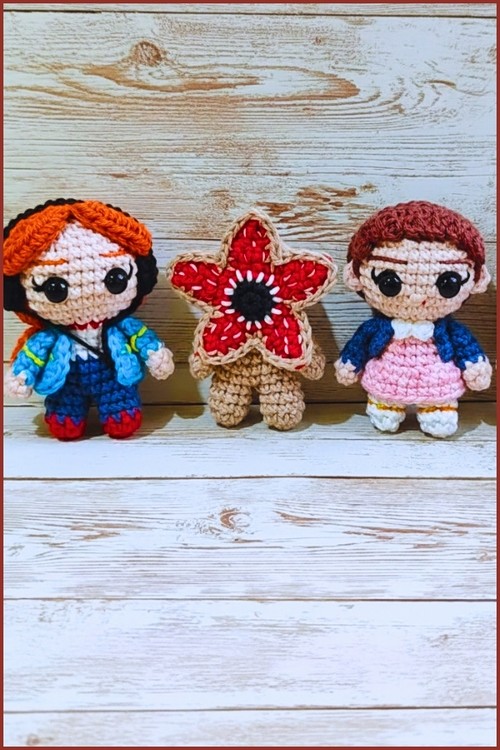
ASSEMBLY AND DETAILS (Original Pattern)
- ASSEMBLY AND DETAILS
Shirt Stripes: Wrap red yarn three times horizontally around the white shirt area
Face Details: Embroider a straight black line for the mouth and angled eyebrows one round above the eyes
Final Assembly: Sew the jacket around the neck, attach the arms over the jacket, sew the hair base to the head, and secure the strands toward the back
Assembly Guidance (Expanded Explanation)
- Sewing the jacket around the neck first helps define the upper body before attaching arms.
- Arms should sit slightly forward over the jacket seam for a natural resting position.
- Hair base should be centered on the crown before attaching strands to ensure even coverage.
- Strands can be gently positioned backward to avoid blocking facial details.
Stuffing Tips
- Stuff legs firmly to prevent wobbling when the doll stands or sits.
- Gradually add stuffing during body rounds to avoid lumps.
- The neck area should be slightly less stuffed than the head to maintain a natural transition.

Beginner Notes
- If the joining round feels confusing, place stitch markers at the center front and back of each leg first.
- Keep checking stitch counts after every decrease round to avoid misalignment.
- Color changes can be practiced on spare yarn before starting the body.
Troubleshooting
- Uneven head shape usually comes from inconsistent stuffing during neck rounds.
- Gaps in joining often happen if the chain stitch is too tight or too loose.
- Tilted eyes can be corrected by checking placement before securing backs.
Finishing Thoughts
This pattern is built on a strong structural flow from feet to head, with clear shaping transitions that give the doll its balanced proportions. Once assembled, the jacket, hair, and facial embroidery bring everything together into a fully finished character with depth and personality.