
Free Winnie Pooh Crochet Doll Pattern Amigurumi
Stitching through this Crochet Winnie The Pooh feels slow in the best way, each round bringing the belly rounder and the proportions more recognisable. The shirt band is the moment it clicks. Makers who grew up with the character will feel that at the hook.
Crochet Winnie The Pooh

The ears and belly shaping require some attention to get the silhouette right. Makers who have finished a basic bear will find the construction familiar with a few extra steps.
Skill Level
-
This project is perfect for confident beginners who have mastered the magic ring and basic increases and decreases.
Finished Size
-
Using a 2 mm hook and standard amigurumi yarn, the finished piece will typically stand around 4 to 5 inches tall, making it a perfect size for a keychain or a desk buddy.
Materials
-
Yellow yarn
-
Red yarn
-
Black yarn
-
2 mm crochet hook
-
Safety eyes
-
Stuffing
-
Yarn needle
-
Scissors
Abbreviations
-
R: Round
-
sc: Single crochet
-
inc: Increase (two single crochets in one stitch)
-
dec: Decrease (invisible decrease recommended for amigurumi)
-
Sl st: Slip stitch
Helpful Notes Before Starting
-
Use a stitch marker to keep track of the beginning of each round, as this pattern is worked in a continuous spiral.
-
When working with a 2 mm hook, keep your tension firm to ensure the stuffing does not peek through the stitches.
- The invisible decrease method is preferred over a standard decrease to maintain a smooth surface on the head and body.
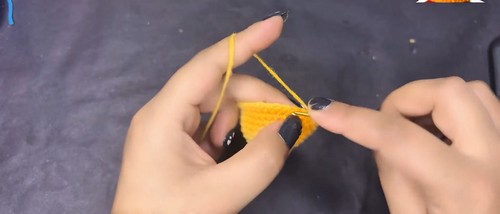
Construction Overview
-
The head and body are worked as separate pieces and joined later to allow for better control over the neck stability.
-
The legs are joined together to create the base of the body, which ensures the character can stand or sit upright with proper stuffing.
-
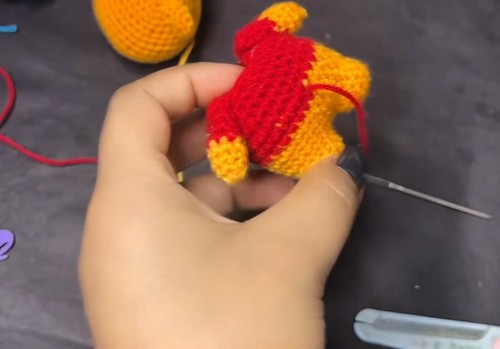
The color change from yellow to red on the body and arms creates a built-in shirt effect without needing to crochet separate clothing.
Stitch and Shaping Clarity
-
In the head section, the rounds between R9 and R15 provide the vertical height needed to create a rounded face rather than a flat disc.
-
The nose is a separate 3D piece rather than an embroidered flat surface, which adds depth to the character's profile.
-
For the arms, the color change happens midway to match the shirt line of the body, so ensure your yarn carries are neat on the inside.
Head Instructions
-
Magic Circle, chain 1
-
R1: 6 sc into circle
-
R2: inc around (12)
-
R3: (1 sc, 1 inc) repeat (18)
-
R4: (2 sc, 1 inc) repeat (24)
-
R5: (3 sc, 1 inc) repeat (30)
-
R6–R7: sc around (30)
-
R8: (4 sc, 1 inc) repeat (36)
-
R9–R11: sc around (36)
-
R12: (5 sc, 1 inc) repeat (42)
-
R13–R15: sc around (42)
-
R16: (5 sc, 1 dec) repeat (36)
-
R17: (2 sc, 1 dec) repeat
-
R18: (1 sc, 1 dec) repeat
-
R19: dec around to close
-
Sl st, cut yarn, leave tail
Ears (Make 2)
-
Magic Ring, chain 1
-
R1: 6 sc (6)
-
R2: inc around (12)
-
Sl st, chain 1, leave tail
Nose
-
Magic Ring, chain 1
-
R1: 6 sc (6)
-
R2: inc around (12)
-
R3: sc around (12)
-
Sl st, chain 1, leave tail
Head Assembly
-
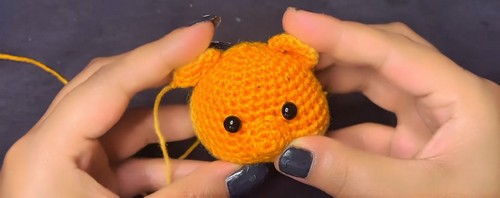
Insert safety eyes between R9–R10, ensuring they are centered relative to where you want the face to be.
-
Attach the nose between the eyes, stuffing it lightly before finishing the seam to give it a firm shape.
-
Sew the ears onto R4 of the head, tilting them slightly forward or keeping them straight for different expressions.
Legs (Make 2)
-
Magic Ring, chain 1
-
R1: 6 sc (6)
-
R2: inc around (12)
-
R3–R4: sc around (12)
-
First leg: finish off
- Second leg: do not cut yarn
Body
-
Join legs together by crocheting directly from the second leg into the first leg.
-
R6: sc around
-
R7–R9: sc around
-
R10–R13: change to red, sc around
-
Next: (1 sc, 1 dec) repeat
-
Sl st, cut yarn
Arms (Make 2)
-
Yellow yarn
-
Magic Ring
-
R1: 6 sc (6)
-
R2: (1 sc, 1 inc) repeat (9)
-
R3–R4: sc around (9)
-
Change to red
-
R5–R8: sc around (9)
-
R9–R10: sc around (9)
-
Sl st, cut yarn, leave tail
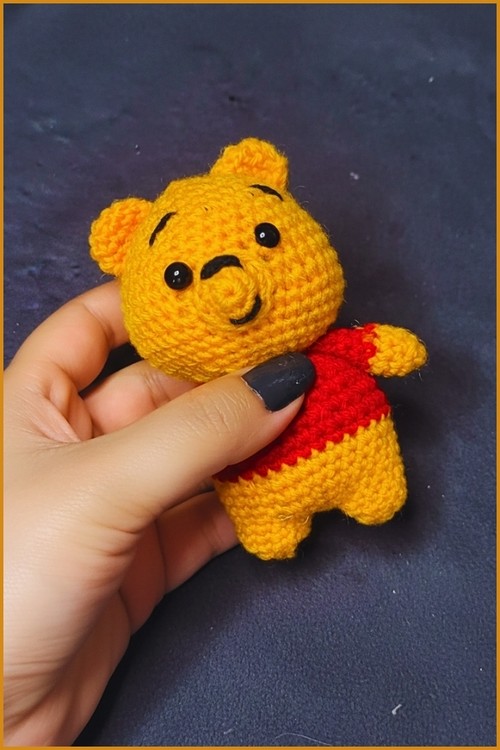
Assembly Guidance
-
Stuff the legs firmly before moving up into the body to prevent the character from becoming top-heavy.
-
When sewing the head to the body, use a whip stitch or mattress stitch through both sets of loops for a seamless connection.
-
Pin all parts in place before sewing to check for symmetry, especially with the arms and ears.
Eye and Facial Feature Placement
-
Safety eyes should be spaced about 5 to 7 stitches apart depending on the look you prefer.
-
Use the black yarn to embroider a small mouth or eyebrows if you want to add more emotion to the face.
-
Ensure the nose is positioned exactly in the middle of the eyes to maintain facial balance.
Stuffing Tips
-
Add stuffing in small clumps rather than one large ball to avoid lumps.
-
Use the back of your crochet hook to push stuffing into the corners of the legs and the tip of the nose.
-
The neck area should be stuffed very firmly to prevent the head from wobbling.
Finishing Notes
-
Weave in all loose ends inside the body of the toy using your yarn needle.
-
Squish and shape the head after stuffing to ensure it is perfectly round.
-
Check that all attachments are secure, especially if the toy is intended for a child.
Beginner Notes
-
If the legs look uneven, check your stitch count on R2; one extra stitch can make the leg wider.
-
Do not worry if your magic ring has a tiny hole; you can pull the tail tighter at the end and weave it through the center.
-
Keep your red and yellow yarn changes at the back of the toy so the "seam" isn't visible from the front.
Troubleshooting
-
If the head is drooping, you may need to add a small roll of felt or more stuffing into the neck joint.
-
If the safety eyes feel loose, ensure the washers are clicked all the way down until they are flush against the fabric.
-
If the arms seem too long, you can decrease the number of rounds in the red section.
Customization Ideas
-
Change the red yarn to blue or green for a different outfit style.
-
Use a larger hook and blanket yarn to turn this into a giant, jumbo version of the character.
-
Add a small crochet tail to the back of the body for extra detail.