
Crochet Chick Amigurumi Free Pattern With Bow & Bag Pattern
Easter baskets have a natural centerpiece in this crochet chick amigurumi, a white chick wearing a red polka dot bonnet and matching red bag. Little girls who love dress-up get a bonnet-wearing chick plush with a red bow and tiny purse ready for pretend play.
Bonnet, bow, and a little shoulder bag are why the crochet chick amigurumi keeps getting requested in comment sections. The accessories do it. Makers ask for the bag pattern on its own, then come back wanting the bonnet in other colours for the rest of the flock they have already started.
Crochet Chick Amigurumi
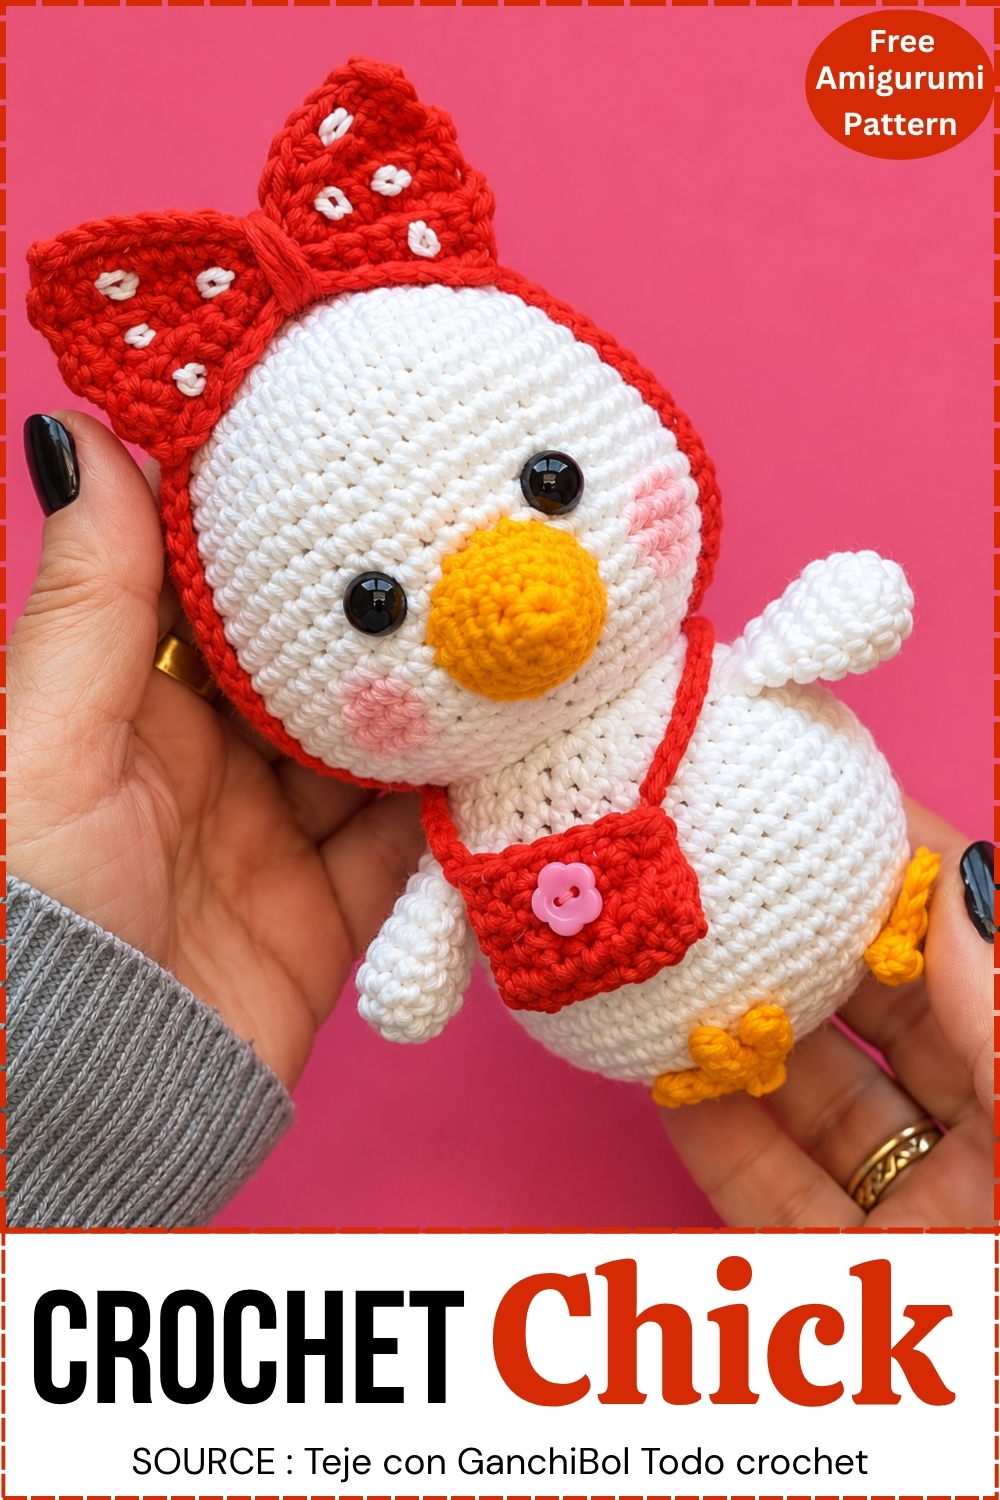
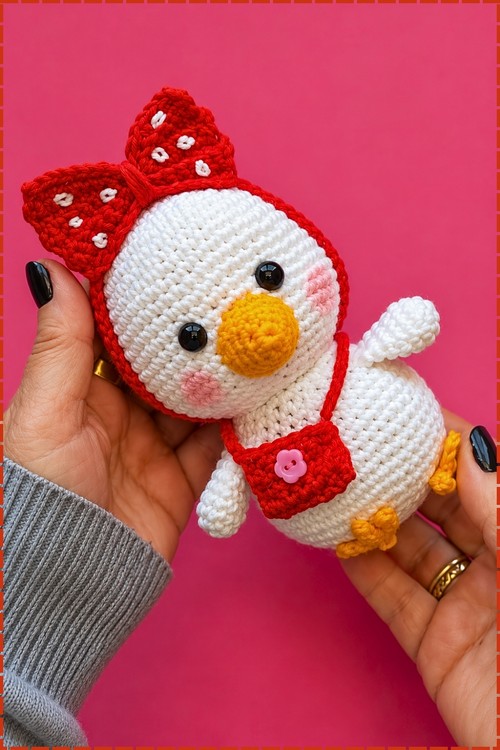
Dotted bonnet with a big bow sits over the head, tied under the chin and leaving only the face showing. The beak is worked in gold and sits high between two bead eyes, with pink cheek patches stitched either side. Body and head are two rounded balls stacked together, wings out to the sides, and small gold feet poking from the base. There is also a little shoulder bag with a button on the flap. Plenty of pieces to make, though each one is small. Colour changes on the bonnet and the bow need attention, and the bag and the embroidered dots are the finishing touches.
Quick Facts
- Finished size: approximately 12 to 16 cm tall when assembled (estimated — not stated in pattern)
- Difficulty: intermediate
- Estimated time: 4 to 6 hours including accessories and assembly
- Piece count: 11 (head, body, beak, 2 wings, tail, 2 feet, headband, bow, small bag)
- Hook: 2.5 mm
- Yarn: cotton in white, orange, and red
Colour and Customisation Ideas
- White is the default here, which reads immediately as a chick. Before you cast on, consider whether you want to stay with that or take the palette somewhere else. Yellow cotton in place of white gives a classic Easter chick look. Pale grey with a darker grey beak shifts the character toward a sparrow or pigeon. If you are making this as a gift for someone specific, swapping the bow colour is the fastest way to personalise it — the red bow and bag are the most visible things on the assembled toy, and they carry the whole colour story.
- The headband is a chain strip and takes almost no yarn. Worth making two or three in different colours and deciding at the end. The bag strap is long enough to wear across the shoulder or shorten and attach as a side bag — position it during final assembly rather than deciding in advance.
- One thing most makers do not expect: the bow is just a flat crocheted rectangle that gets pinched and wrapped. No special shaping, no complicated stitch. The pinched centre looks dramatic and takes about thirty seconds.
Materials and Tools
- Cotton yarn in white (head, body, wings, tail)
- Cotton yarn in orange (beak and feet)
- Cotton yarn in red (bow and small bag)
- 2.5 mm crochet hook
- 8 mm or 9 mm safety eyes
- Fiberfill stuffing
- Tapestry needle
- Stitch markers
- Scissors
- Optional: pink blush for cheeks
Abbreviations
- sc: single crochet
- inc: increase (2 sc in one stitch)
- dec: decrease
- ch: chain
- sl st: slip stitch
Pieces List
- Head: 1
- Body: 1
- Beak: 1
- Wings: 2
- Tail: 1
- Feet: 2
- Headband: 1
- Bow: 1
- Small bag with strap: 1
The Pattern
Head (White)
Work in continuous rounds. Use a stitch marker.
- R1: MR, 6 sc (6)
- R2: 6 inc (12). Checkpoint: flat tight circle, ring pulled fully closed.
- R3: (1 sc, 1 inc) repeat 6 times (18)
- R4: (2 sc, 1 inc) repeat 6 times (24)
- R5: (3 sc, 1 inc) repeat 6 times (30)
- R6: (4 sc, 1 inc) repeat 6 times (36). Checkpoint: a flat disc about the size of a large coin, no cupping or ruffling at the edge.
- R7: Sc in each stitch around (36)
- R8: Sc in each stitch around (36)
- R9: (5 sc, 1 inc) repeat 6 times (42)
- R10: Sc in each stitch around (42)
- R11: (6 sc, 1 inc) repeat 6 times (48)
- R12: Sc in each stitch around (48)
- R13: Sc in each stitch around (48). Checkpoint: the piece should now sit as a deep rounded bowl — sides clearly rising, base curving smoothly, no flat section visible at the bottom.
- R14: (7 sc, 1 inc) repeat 6 times (54)
- R15: Sc in each stitch around (54)
- R16: Sc in each stitch around (54)
- Insert safety eyes between rounds 14 and 15, with 8 stitches between them. Snap the backs on now, while the opening is still wide. This must happen before the decreases begin.
- R17: Sc in each stitch around (54)
- R18: Sc in each stitch around (54). Checkpoint: the head should look like a full rounded sphere at the top with a wide open base — this is the widest and tallest it will get before closing.
- R19: (7 sc, 1 dec) repeat 6 times (48)
- R20: (6 sc, 1 dec) repeat 6 times (42)
- R21: (5 sc, 1 dec) repeat 6 times (36)
- R22: (4 sc, 1 dec) repeat 6 times (30). Checkpoint: stuff firmly here — the opening is narrowing and will close fast over the next rounds if you forget.
- Stuff the head firmly.
- Fasten off, leaving a long tail for sewing.
For children under three: skip the safety eyes and embroider both eyes with black yarn in the same position between rounds 14 and 15, hiding tails inside before closing.
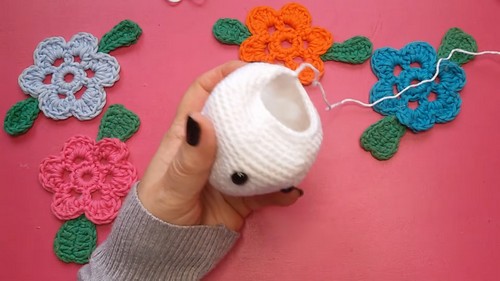
Body (White)
Work in continuous rounds. Use a stitch marker.
- R1: MR, 6 sc (6)
- R2: 6 inc (12)
- R3: (1 sc, 1 inc) repeat 6 times (18)
- R4: (2 sc, 1 inc) repeat 6 times (24)
- R5: (3 sc, 1 inc) repeat 6 times (30)
- R6: (4 sc, 1 inc) repeat 6 times (36)
- R7: (5 sc, 1 inc) repeat 6 times (42)
- R8: (6 sc, 1 inc) repeat 6 times (48). Checkpoint: a broad flat circle — the body widens more quickly than the head because all increases run consecutively without plain rounds between them.
- R9: Sc in each stitch around (48)
- R10: Sc in each stitch around (48)
- R11: Sc in each stitch around (48)
- R12: Sc in each stitch around (48). Checkpoint: a wide, even cylinder — deeper than a bowl but without the strong taper the head has. Sides should be straight at this point.
- R13: (6 sc, 1 dec) repeat 6 times (42)
- R14: Sc in each stitch around (42)
- R15: Sc in each stitch around (42)
- R16: (5 sc, 1 dec) repeat 6 times (36)
- R17: Sc in each stitch around (36)
- R18: Sc in each stitch around (36)
- R19: (4 sc, 1 dec) repeat 6 times (30)
- R20: Sc in each stitch around (30). Checkpoint: the body should now be clearly egg-shaped — wider in the middle, tapered at both ends.
- Stuff the body firmly, keeping it slightly softer than the head.
- Fasten off, leaving a tail for sewing.
Beginner crocheter? The video tutorial below guides you through every round of this plushie, and the written pattern is below for later!
Beak (Orange)
- R1: MR, 6 sc (6)
- R2: (1 sc, 1 inc) repeat 3 times (9)
- R3: (2 sc, 1 inc) repeat 3 times (12)
- R4: (3 sc, 1 inc) repeat 3 times (15). Checkpoint: a shallow cone shape — wider at the open end, pointed at the closed tip. Do not stuff or it will push the face out of shape.
- Fasten off, leaving a tail for sewing.
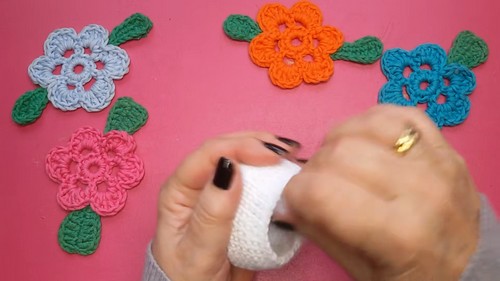
Wings — Make 2 (White)
- R1: MR, 6 sc (6)
- R2: 6 inc (12). Checkpoint: a small flat circle.
- R3: Sc in each stitch around (12)
- R4: Sc in each stitch around (12)
- R5: Sc in each stitch around (12). Checkpoint: a short open tube, like a thimble.
- R6: (2 sc, 1 dec) repeat 3 times (9)
- Flatten the wing.
- Crochet through both sides with sc to close the edge.
- Do not stuff.
- Fasten off, leaving a tail for sewing.
Tail (White)
- MR.
- (Ch 5, sl st back down the chain) repeat 3 times to form 3 tail feathers.
- Fasten off, leaving a tail for attaching.

Feet — Make 2 (Orange)
- MR.
- (Ch 5, sl st back down the chain) repeat to match the tail style.
- Fasten off, leaving a tail for attaching.
Headband (Red)
- Ch 45.
- Sl st across the chain.
- Fasten off, leaving tails for attaching or tying in place.
Bow (Red)
- Ch 15.
- Row 1: Sc across (14)
- Row 2: Sc in back loops only across (14)
- Row 3: Sc in back loops only across (14)
- Row 4: Sc in back loops only across (14)
- Row 5: Sc in back loops only across (14)
- Row 6: Sc in back loops only across (14)
- Row 7: Sc in back loops only across (14)
- Fasten off.
- Pinch the centre of the rectangle and wrap yarn tightly around the middle to form the bow shape. Secure firmly.

Small Bag (Red)
- Ch 7.
- Row 1: Sc across (6)
- Row 2: Sc across (6)
- Row 3: Sc across (6)
- Row 4: Sc across (6)
- Row 5: Sc across (6)
- Row 6: Sc across (6)
- Row 7: Sc across (6)
- Row 8: Sc across (6)
- Fold the piece into a small pouch.
- Sew the sides closed.
- Ch 40 for the strap.
- Attach the strap to the bag at both ends.
Assembly
- Sew the beak onto the head first, centred directly below the eyes, before attaching the head to the body — the face is easier to work on while the head is loose.
- Apply optional blush to the cheeks now, also while the head is loose and easy to rotate.
- Sew the head securely onto the body, checking from the front that it sits centred and upright. Pin before committing.
- Attach the wings to the sides of the body around round 2 below the neck, one on each side. Pin both before sewing either.
- Sew the feet to the bottom of the body around rounds 5 and 6.
- Sew the tail to the back of the body around rounds 10 and 11.
- Place the headband around the head and secure. Attach the bow to the headband or directly onto the head.
- Drape the bag strap across the shoulder and position the bag at the side before sewing the strap down.
Stuffing Guide
The head needs firm stuffing throughout — press it and it should push back solidly without denting. Add fill gradually as the decrease rounds close, starting at around round 19. The body goes in slightly softer, which keeps the assembled toy balanced rather than top-heavy. Both the beak and wings take no stuffing. Overstuffing shows on the head at the decrease rounds first, where stitches spread and you can see white through the structure. If that happens, pull a little out before the opening closes.
Tips
- Stuff the head continuously through the decrease rounds rather than in one push at the end — waiting until the opening is small means uneven lumps with no way to smooth them out.
- Pin every piece before sewing it. The beak especially — one stitch off centre reads immediately on the finished face.
- Position the bag and headband last, once the full character is assembled and you can see how everything sits together. The strap length is forgiving, but the bow placement relative to the eyes matters.
Toy Safety
Safety eyes are not appropriate for children under three. Use the embroidered swap described in the head section. Also check the chain-based feet, tail feathers, and bag strap — any long yarn chain on a toy for young children needs to be very firmly anchored, and long strands present a tangle risk. For a young child's version, consider replacing the chain features with small embroidered or sewn-on details instead.
FAQ
- The beak looks too big for the face. The beak reaches 15 stitches at round 4, which is moderately sized relative to a 54-stitch head. Do not stuff it — an unstuffed beak sits flat against the face and reads as the right scale. A stuffed one puffs out and looks oversized.
- How do I keep the wings flat? After round 6, flatten the wing with your fingers so the two layers align, then crochet through both layers together to close it. The double layer is what gives it a natural, slightly curved flat shape rather than staying round.
- Can I make the bag bigger? Yes — just add more rows before folding. The stitch count stays the same, so the proportions hold. Lengthen the strap chain to match.
- My head and body look like different sizes. The head peaks at 54 stitches and the body at 48, so the head is intentionally larger. If they look dramatically mismatched, check your tension — the body rounds up to 48 stitches in 8 consecutive increase rounds, while the head staggers increases with plain rounds between them, so the body may come out less rounded if tension shifts between pieces.