
Crochet Bambolina Doll Keychain Pattern With Hair Cap
On the first day of school, kids can clip this crochet bambolina doll keychain to a backpack zipper by its metal clasp and ring. Best friends and sisters can split a matching pair of bambolina doll keychains, one for each pencil case or set of house keys.
Sleeping stitched eyes and a rainbow dress make the crochet bambolina doll an easy one to hand to a child who names everything she owns. Good for a niece. Good for a friend who collects small dolls and keeps them clipped to her bag instead of on a shelf.
Crochet Bambolina Doll

Closed eyes are embroidered in a single dark curve across the face, so the doll looks asleep while it hangs. Long looped strands of brown hair fall past the shoulders, topped with a small flower at the crown. The dress is worked in variegated yarn that shifts colour as it goes, and the legs end in two round ball feet striped in the same shifting shades. Arms hang loose at the sides in cream. Pieces include head, dress body, arms, the two feet, the hair strands, and the flower, plus a clasp and ring at the top. The hair takes the longest, since each strand is worked and attached separately.
Materials and Tools
- Yarn in your preferred hair colour
- Yarn in your preferred body colour
- Yarn for the flower decoration
- Crochet hook suitable for your yarn weight
- Fiberfill stuffing
- Tapestry needle
- Scissors
- Keychain ring
The pattern names no yarn weight or hook size. Fingering or sport weight at 2 to 2.5 mm gives a small, detailed keychain. DK at 3 mm gives something a little chunkier and faster to work.
Approximate Size and Time
- Finished height: roughly 8 to 11 cm estimated from the pattern, depending on yarn weight and the chain lengths used for the limbs.
- Time: around 2 to 3 hours, not counting assembly and embroidery.
Pieces List
- Hair base cap: 1
- Hair strands: 2
- Flower decoration: 1
- Arms: 2
- Legs: 2
Abbreviations
- sc: single crochet
- hdc: half double crochet
- inc: increase (2 sc in the same stitch)
- dec: decrease (sc 2 together)
- sl st: slip stitch
- ch: chain
The Pattern
Hair Base Cap
- Round 1: Make a magic ring and work 6 sc into it. [6]
- Round 2: Work 1 inc in each stitch. [12]
- Round 3: 1 sc, 1 inc repeat 6 times. [18]
- Round 4: 2 sc, 1 inc repeat 6 times. [24]
- Round 5: 3 sc, 1 inc repeat 6 times. [30]
- Round 6: 4 sc, 1 inc repeat 6 times. [36] Checkpoint: a flat, even disc at this point, no cupping or rippling. This is the crown of the hair cap.
- Round 7: Work 1 sc in each stitch. [36]
- Round 8: Work 1 sc in each stitch. [36]
- Round 9: Work 1 sc in each stitch. [36]
- Round 10: Work 1 sc in each stitch. [36]
- Round 11: Work 1 sc in each stitch. [36]
- Round 12: Work 1 sc in each stitch. [36] Checkpoint: the cap now forms a deep dome, like a small bowl. The open rim is where it will sit on the head once a head piece is made.
- Fasten off leaving a long tail for sewing.

Hair Strands (Make 2)
- Make a slip knot and chain 42.
- Starting from the second chain from the hook, work 1 hdc in each stitch across. [41] Checkpoint: a long flat strip that wants to curl slightly along its length. This is the hair strand; two of them are sewn along the top of the cap.
- Fasten off.
- Sew both strands to the top of the hair cap.
Working in continuous rounds for the first time? No problem at all, the video tutorial below makes it easy to keep track!
Flower Decoration
- Make a magic ring.
- Chain 3, sl st into the ring repeat 5 times to create 5 petals. Checkpoint: 5 small chain loops fan out from the centre.
- Secure and fasten off.
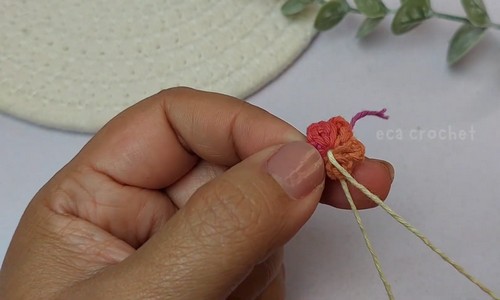
- Create a centre detail using French knot style wraps of contrasting yarn.
- Sew the flower onto the hair.
Arms (Make 2)
- Round 1: Make a magic ring and work 6 sc into it. [6]
- Round 2: Work 1 inc in each stitch. [12] Checkpoint: a small flat disc.
- Round 3: Work 1 sc in each stitch. [12]
- Round 4: Work 6 dec. [6]
- Lightly stuff.
- Round 5: Work 3 dec. [3]
- Chain 6.
- Fasten off leaving a long tail for sewing. Checkpoint: a small stuffed disc with a short chain extending from one end. The disc becomes the hand; the chain is the wrist and lower arm.
Legs (Make 2)
- Round 1: Make a magic ring and work 6 sc into it. [6]
- Round 2: Work 1 inc in each stitch. [12]
- Round 3: 1 sc, 1 inc repeat 6 times. [18] Checkpoint: a flat disc, wider than the arm disc. This is the foot.
- Round 4: Work 1 sc in each stitch. [18]
- Round 5: Work 1 sc in each stitch. [18] Checkpoint: the foot disc curls up slightly at the sides. Stuff lightly now while the opening is wide.
- Round 6: Change colour. 1 sc, 1 dec repeat 6 times. [12]
- Stuff with fiberfill.
- Round 7: Work 6 dec. [6]
- Round 8: Work 3 dec. [3]
- Chain 10.
- Fasten off leaving a long tail. Checkpoint: a stuffed foot shape with a chain leg above it. The chain 10 gives the leg its length and flexibility.

Eyes and Toy Safety
- This pattern uses embroidered features only. Eyes, nose and mouth are all stitched on with yarn after assembly. Use black yarn for the eyes, keeping stitches small and tightly knotted on the inside. Check that no tails are loose or accessible before use.
- For a keychain going to a child under three, check that the keychain ring is firmly attached to a strong loop of yarn running through the hair cap rather than just a surface stitch, and that all embroidery is secured from inside. The chain limbs are long enough to present a small entanglement risk for very young children.
Stuffing Guide
The arms stuff lightly, just enough to give the disc end a little roundness before the decreases close it. The legs stuff from round 6 downward through the foot, filling the foot disc firmly so it holds its round shape. Neither piece should feel stiff. The hair cap is not stuffed. The chain portions of the arms and legs get no stuffing at all. If you make a separate body or head , stuff both firmly enough that they hold their shape when the limbs and cap are sewn on.
Assembly
- If making a body and head piece, sew the head to the top of the body first. Two full circuits of stitching prevents tilting.
- Sew the hair cap onto the head, crown upward. Run the long tail all the way around the rim. The cap should sit snug without gaps.
- Sew the hair strands to the top centre of the cap. Lay them first without sewing to check the placement, then tack the centre of each strand to the cap before sewing the ends down.
- Sew the flower onto the hair near one side of the parting.
- Sew both arms to the sides of the body, chain end downward.
- Sew both legs to the base of the body, chain end downward.
- Embroider the face on the front of the head with a needle and yarn. Eyes first, then nose, then mouth.
- Attach the keychain ring to the top of the head through a loop of strong yarn sewn into the hair cap. Give it a firm tug to test the hold before use.

Troubleshooting
- The hair cap domes up instead of lying flat. Your tension on the increase rounds is too tight, or you skipped a repeat. Count stitches at the end of round 6; you need exactly 36.
- The hair strands buckle and won't lie flat. Hdc stitches in fingering weight chain can twist if worked at uneven tension. Block the strip flat before sewing by dampening it and pinning it to a foam mat to dry.
- The arm disc is too floppy after round 4. You need a tiny amount of stuffing before the round 5 decreases, even if it seems too small to bother with. Without any fill the decrease rounds pull the fabric into a pinch rather than a rounded tip.
- The leg chain curls upward. Chain tension is almost always tighter than sc tension. Work the chain 10 with a hook one size larger than the body, or simply stretch and smooth it once finished.
- The keychain ring pulls the cap to one side. The ring needs to attach to a structural loop, not a surface stitch. Before closing the cap, thread a doubled strand of strong yarn through the magic ring end (the crown) and sew both ends down firmly inside, leaving a loop at the top for the ring.
- The body piece is missing and I don't know what size to make. A cylinder of 12 sc worked for 6 to 8 rounds in your body colour, with both ends sewn closed and lightly stuffed, gives a small torso proportional to the limbs.

Yarn Substitution and Size Scaling
At fingering weight with a 1.75 to 2 mm hook the finished doll sits comfortably at keychain scale. Sport weight at 2.5 mm makes it slightly larger and easier to handle during construction. Going larger than DK makes the piece too bulky for a keychain, though it works as a small bag charm. Keep the hook small relative to the yarn to get a firm fabric with no gaps.
FAQ
- Can I use the hair cap as the head without making a separate piece? It depends on how you want the face to look. The cap is a dome of about 36 stitches at the widest, which gives enough surface area to embroider a face on. Sewing the embroidery through the cap fabric directly and skipping a separate head is a viable shortcut for a small keychain.
- How do I attach the keychain ring securely? Don't rely on a surface stitch. Thread a short loop of strong yarn through the crown of the cap before closing, sew both ends of that loop down on the inside, and clip the ring to the loop. The loop spreads the pull load and holds far better under the weight of keys.
- Can I make this in cotton instead of wool? Yes, and it may actually hold the cap shape better since cotton has less stretch. Use the same hook size and adjust if the fabric feels too stiff or too open.
- The pattern has no body. Do I really need one? For a flat keychain doll where the hair cap is the whole visible part, you could sew the limbs directly to the underside of the cap rim and skip the body. It gives an abstract doll silhouette rather than a full figure, but at keychain scale that reads fine.
- Where exactly does the face go? On the front of the dome, roughly from round 8 downward toward the rim. The eyes sit at about round 9 to 10, the nose at round 11, and the mouth at round 12. Keep everything close together so the face reads as a unit rather than scattered features.