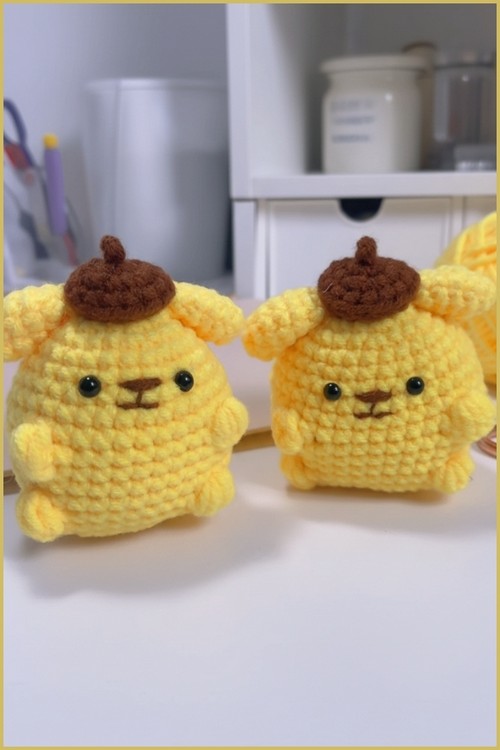
Cute Pompompurin Crochet Pattern - Adorable Plushie Amigurumi
Texture and shaping come together in a really satisfying way in this design. The rounded yellow body builds gradually with evenly spaced increases, then those bobble stitches add personality and dimension right where the face sits.
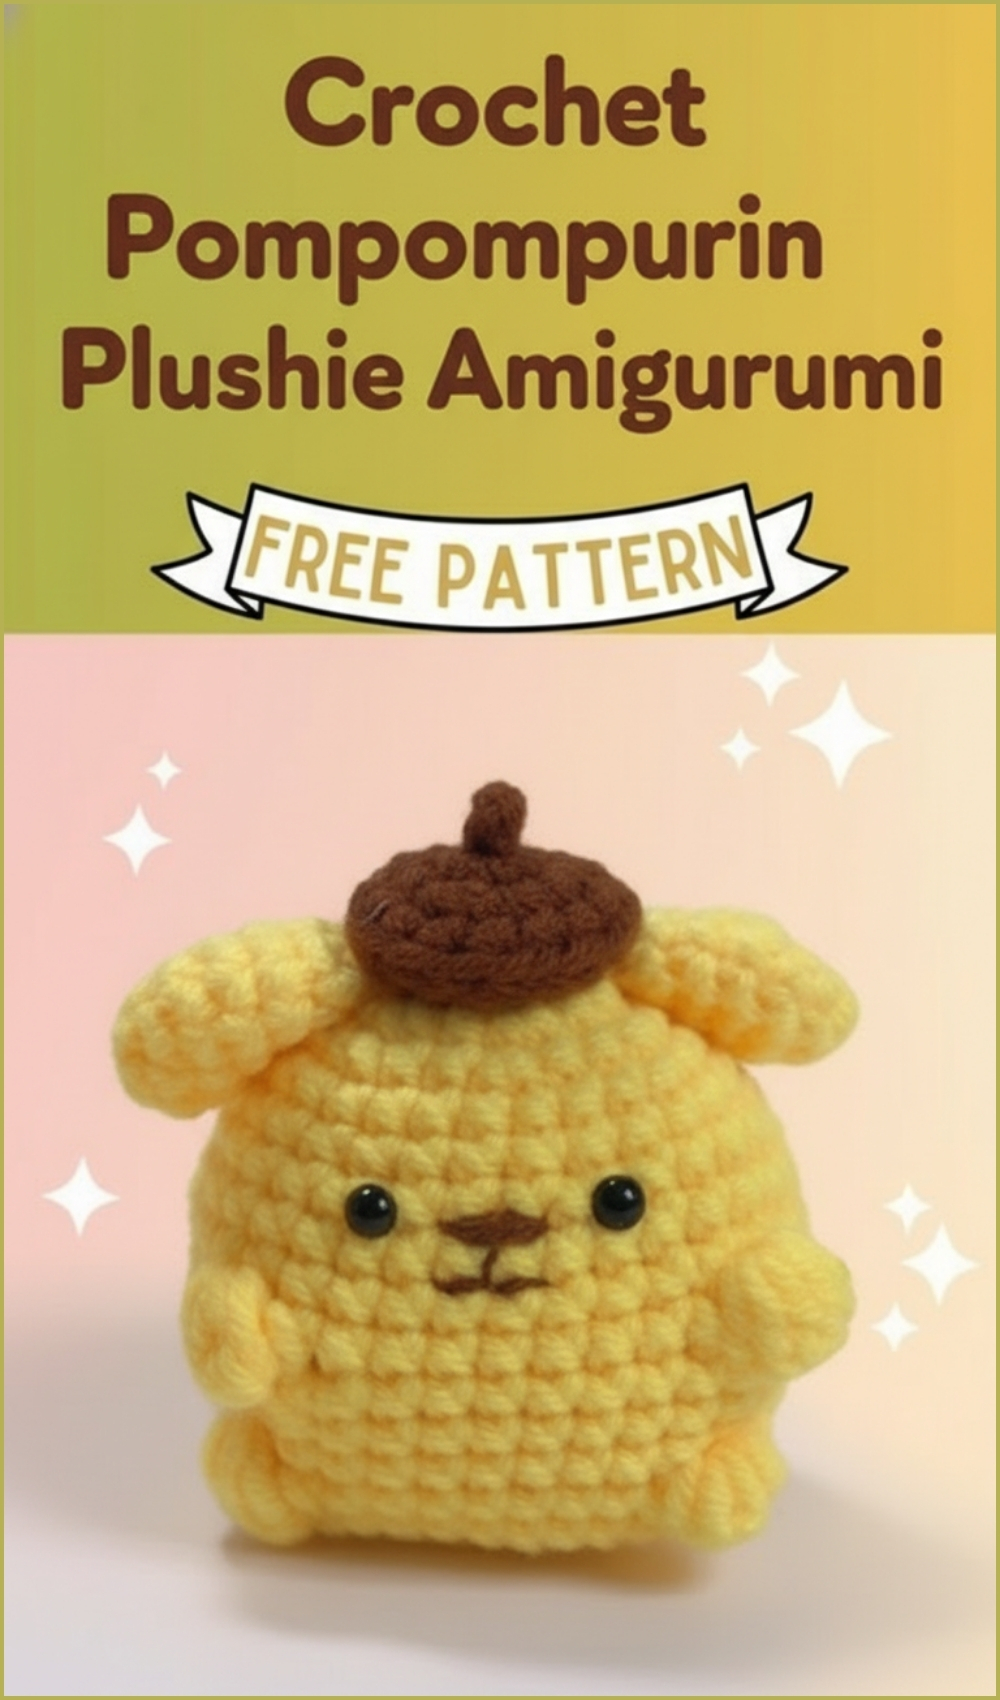
Crochet Pompompurin Plushie
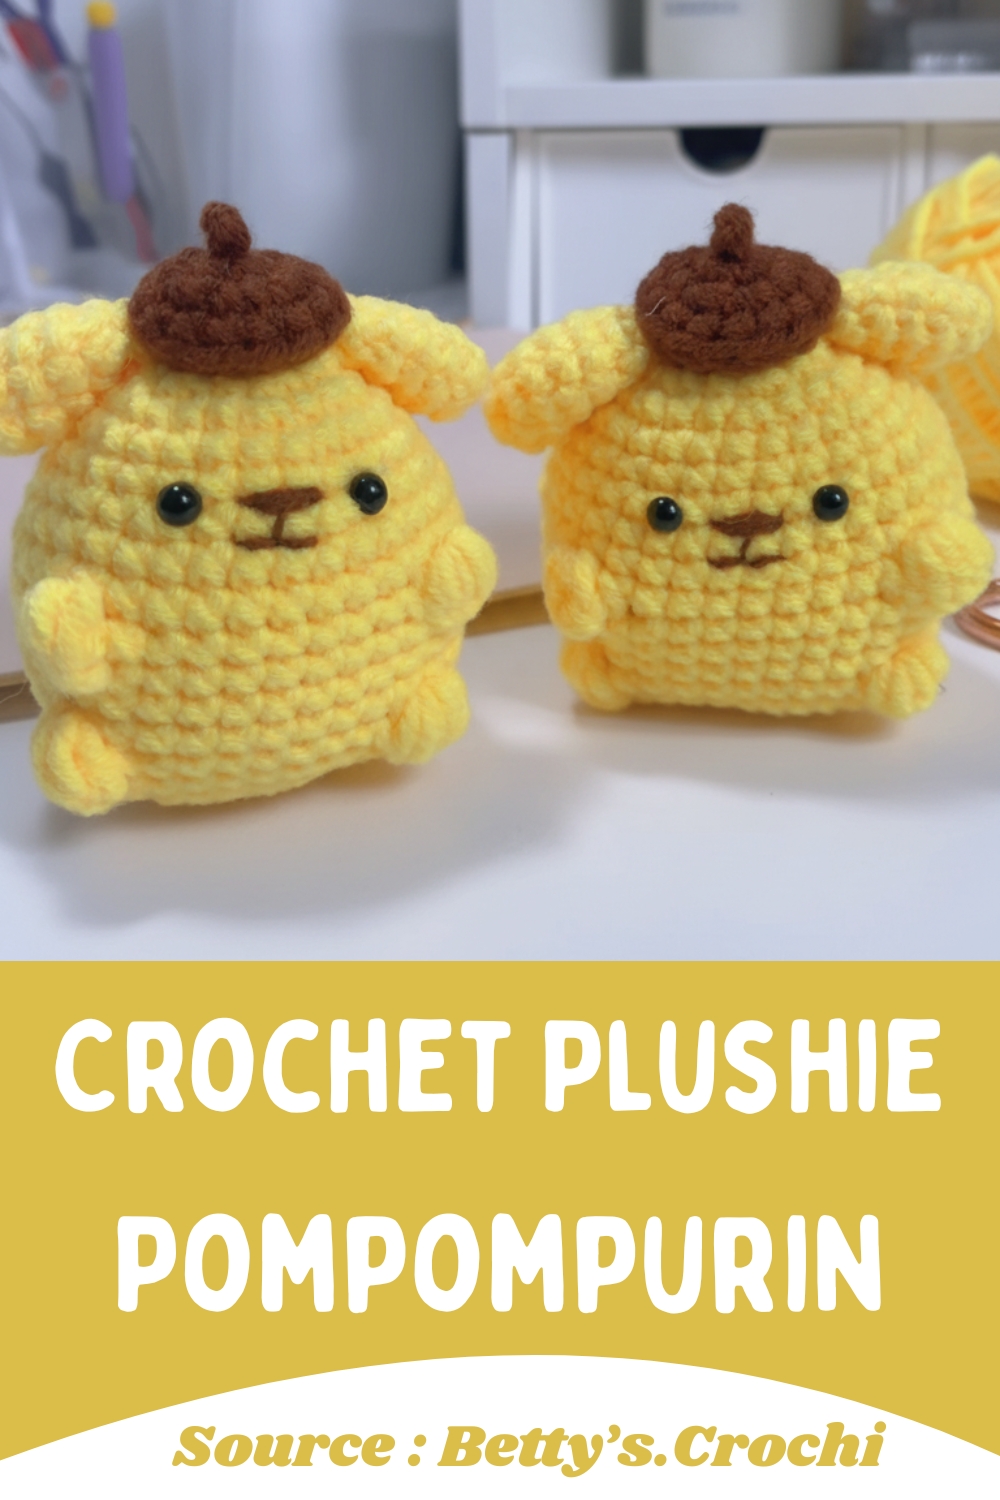
Topped with a snug brown hat and simple ears, the final piece feels expressive without complicated construction, making it a great project for crocheters who want to improve shaping and placement skills.
Skill Level
Beginner to intermediate
You should be comfortable with:
- Working in the round
- Basic increases and decreases
- Magic ring
- Bobble stitches (explained below)
Finished Size
Size will vary depending on your yarn tension and hook, but expect a compact, palm-sized amigurumi.
Materials
- 5-ply milk cotton yarn
- 2.5 mm crochet hook
- Glue
- Sewing needle
- Scissors
Abbreviations
- R (round/row)
- Ch (chain)
- mr (magic ring)
- st (stitch)
- sc (single crochet)
- inc (increase)
- dec (decrease)
- dc (double crochet)
- hdc (half double crochet)
- SLST (slip stitch)
- FLO (front loop only)
- BLO (back loop only)
Helpful Notes Before Starting
- Each round begins with SLST and chain 1, which acts as a joining and turning point. This means you are not working in a continuous spiral, so keep your joins consistent for a neat seam.
- Use a stitch marker at the beginning of each round if needed to track placement.
- The bobble stitches in Round 10 create raised features on the front of the body, so pay attention to their placement.
- Stuff gradually, especially before the final rounds, to maintain a smooth shape.
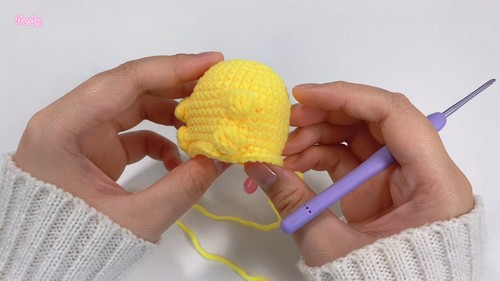
Construction Overview
This piece is built in separate parts and then assembled:
- The body is worked from the bottom up, shaped with increases and decreases, and includes textured bobble stitches.
- The hat is worked separately and sewn onto the top.
- The ears are small pieces attached just below the hat.
- Facial features are added at the end with glue and shaping.
Stitch and Shaping Clarity
- Increases (inc): Add width and create the rounded base and sides of the body.
- Decreases (dec): Pull the shape inward to close the top neatly.
- Bobble stitches: These create raised texture. When you place 5 bobble stitches in one stitch, you are building a cluster that pops outward, forming a feature area on the face.
- The pattern uses evenly spaced repeats (often 7 times), which keeps the body symmetrical.
Step by Step Pattern Instructions
BODY (YELLOW YARN)
- R1: Magic ring with 7sc (7 stitches)
- R2: SLST, 1Ch, 7inc (14 stitches)
- R3: SLST, 1Ch, repeat (1sc, 1inc) 7 times (21 stitches)
- R4: SLST, 1Ch, repeat (1sc, 1inc, 1sc) 7 times (28 stitches)
- R5-R6: SLST, 1Ch, 28sc (28 stitches)

- R7: SLST, 1Ch, repeat (3sc, 1inc, 1sc) 7 times (35 stitches)
- R8-R9: SLST, 1Ch, 35sc (35 stitches)
- R10: SLST, 1Ch, (5sc, {5 bobble stitches in one stitch}, 9sc, {5 bobble stitches in one stitch}, 12sc) (35 stitches)
- R11-R13: SLST, 1Ch, 35sc (35 stitches)
- R14: SLST, 1Ch, repeat (1sc, 1dec, 1sc) 7 times (28 stitches)
- R15: SLST, 1Ch, 28sc (28 stitches)
- R16: SLST, 1Ch, repeat (3sc, 1dec, 1sc) 7 times (21 stitches)
- Stuff the body with fiberfill.
- R17: SLST, 1Ch, repeat (1sc, 1dec, 1sc) 7 times (21 stitches)
- R18: SLST, 1Ch, repeat (1sc, 1dec) 7 times (14 stitches)
- R19: SLST, 1Ch, 7dec (7 stitches)
- Finish off by cutting the yarn and sewing the top closed.
HAT (BROWN YARN)
- R1: Magic ring with 7sc (7 stitches)
- R2: SLST, 1Ch, 7inc (14 stitches)
- R3: SLST, 1Ch, 14sc (14 stitches)
- R4: SLST, 1Ch, 14sc working in the BLO (14 stitches)
- R5: SLST, 1Ch, 7sc, 1inc, 6sc (15 stitches)
- Finish off, cut the yarn, and sew the hat onto the top of the body.
EARS (YELLOW YARN)
- R1: Magic ring with 6sc (6 stitches)
- R2: SLST, 1Ch, 3sc, 1inc, 2sc (7 stitches)
- R3-R5: SLST, 1Ch, 9sc (9 stitches)
- R6: SLST, 1Ch, repeat (1sc, 1dec) 2 times, 6sc (6 stitches)
Make two ears and sew them onto the body just below the hat.
Assembly Guidance
- Sew the hat centered on the top of the body. Make sure it sits evenly and does not tilt.
- Attach the ears just below the hat, one on each side. Keep them symmetrical by counting stitches from the center.
- Use pins before sewing if needed to check placement.
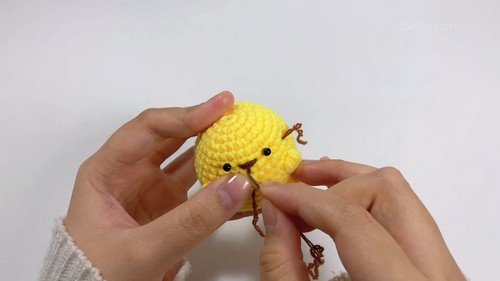
Eye and Facial Feature Placement
- Place the eyes and nose between rows 6 and 7.
- This aligns them just above the textured bobble stitches, giving the face a natural position.
- Make sure both eyes are evenly spaced from the center line.
Creating the Smile Shape
Using a needle, gently pull the corners of the mouth downward.
- This creates a subtle curved expression.
- Adjust tension slowly to avoid distorting the stitches.
Stuffing Tips
- Stuff firmly but not tightly.
- Focus on keeping the shape smooth, especially around the bobble stitch area.
- Add extra stuffing before closing to avoid a flattened top.
Finishing Notes
- Glue the eyes and nose securely after confirming placement.
- Weave in all ends neatly inside the body.
- Check symmetry from all angles before final adjustments.
Beginner Notes
- If bobble stitches feel tricky, practice them on a scrap piece first.
- Keep your tension consistent, especially during decreases to avoid gaps.
- Don’t rush assembly—placement makes a big difference in the final look.
Troubleshooting
- Body looks uneven: Check that each repeat section has the correct stitch count.
- Bobble stitches look flat: Make sure you are completing all loops before closing the stitch.
- Hat doesn’t fit well: Adjust sewing placement slightly rather than forcing alignment.
Customization Ideas
- Change yarn colors to create different character variations
- Add embroidered details like eyebrows or blush
- Modify the hat shape or add accessories