Crochet Bunny to Turn Any Bottle Pattern Into A Cute Storage
This crochet pattern allows you to transform a simple empty bottle into a charming and functional bunny-themed storage container. Perfect for adding a whimsical touch to your home decor or gifting to friends and family, this project combines creativity with practicality.
Crochet Bunny to Turn Any Bottle


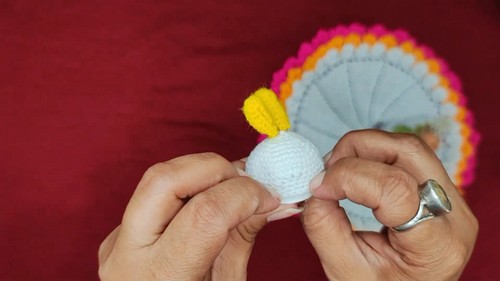


Breathe whimsical new life into your recycling bin using the ingenious Crochet Bunny to Turn Any Bottle resource, which effortlessly masks plain glass in soft, yarn-crafted charm. Showcasing sweet embroidered details and long floppy ears, this snug sleeve serves as a fantastic non-slip grip and surface protector. It hands makers a delightful artistic opportunity to fashion personalized, eco-friendly holiday decorations.
Skill Level
-
This project is ideal for advanced beginners who are comfortable with the magic ring, basic stitches, and working in the round, while offering a gentle introduction to shaping pieces around a solid core.
Finished Size
-
The final dimensions of your bunny will depend entirely on the height and width of the specific color bottle you choose to upcycle, as the crochet work is customized to fit its unique shape.
Materials
-
Empty color bottle
-
Yarn in white and yellow
-
Crochet hook
-
Needle
-
Scissors
-
Hot glue gun
Abbreviations
-
MR: Magic ring
-
SC: Single crochet
-
HDC: Half double crochet
-
DC: Double crochet
-
Sl st: Slip stitch
-
Inc: Increase (two stitches in the same loop)
Helpful Notes Before Starting
-
Keep your tension consistent and slightly firm so that the plastic texture or color of the bottle does not peek through the stitches of the white yarn.
-
Having the physical bottle right next to you while you work is essential, as you will need to frequently slide the crochet sleeve onto it to test the fit.
Construction Overview
-
The bunny is built by creating a custom-fit white cylindrical sack that snugly encases the main body of the bottle.
-
The ears are worked separately in flat rows using yellow yarn, utilizing a clever progression of stitch heights to create a natural, tapered leaf shape.
-
The facial features and decorative carrot are embroidered directly onto the fabric before final assembly to ensure clean stitch placement.
-
The bottle lid receives its own separate crochet cover, and all the individual components are secured using a mix of traditional sewing and hot glue for stability.
Stitch and Shaping Clarity
-
The body transitions quickly from a tight 5-stitch circle to a 10-stitch circle to establish a flat bottom before expanding into a working cylinder.
-
The ears use a specific sequence of single, half double, and double crochet stitches to create a gradual slope, while the 6 double crochets in the final loop act as a pivoting fan to smoothly turn the corner and work back down the opposite side of the chain.
Step by Step Pattern Instructions
Creating the Body of the Bunny
-
Start with white yarn and make a magic ring.
-
Make 5 single crochet stitches in the ring.
-
Slip stitch to join.
-
Increase each stitch in the next row to have 10 single crochet stitches.
-
Crochet 1 single crochet in the first loop, 2 in the next, repeating across the row.
-
Continue crocheting without increasing to form a cylinder that fits the bottle.
-
Check the fit on the bottle as you go.
-
Once the bottle is covered, the piece should resemble a small sack.
Creating the Ears
-
Use yellow yarn to chain 8 stitches.
-
In the 7th chain, make a single crochet stitch; in the next stitch, make a half double crochet.
-
Make 4 double crochet stitches.
-
In the last loop, make 6 double crochet stitches and work back down the chain.
-
Repeat to create a second ear.
Assembly Guidance
-
Take your time when placing the main crochet sleeve over the bottle, smoothing out any bunching so the fabric sits evenly against the plastic surface.
-
When working on the small rounded piece for the lid, ensure it matches the diameter of the cap perfectly so the glue can bond securely later.
-
Before picking up your embroidery needle, use dressmaker pins to mark out the exact spots for the eyes, mouth, and carrot to ensure everything is perfectly centered and symmetrical.
-
Sew the facial features and the red carrot base with the green top firmly into the white fabric, securing your knots on the inside of the sleeve where they will be completely hidden by the bottle.
-
Position the yellow ears symmetrically on top of the head piece, stitching through both the foundation chain of the ears and the top loops of the head for a sturdy upright hold.
-
Apply the hot glue carefully to the bottle lid before pressing the crochet cover down, taking care not to use too much glue to prevent it from seeping through the stitches.
-
Attach the head piece securely to the main body to complete the bunny silhouette, ensuring the face lines up beautifully with the front of the project.
Eye and Facial Feature Placement
-
Place the eyes roughly one-third of the way down from the top of the head piece, leaving enough space between them for a balanced, cute expression.
-
Position the embroidered red carrot directly underneath the eyes, centering it perfectly to act as a playful focal point on the bunny's body.
Stuffing Tips
-
This project does not require traditional polyester fiberfill stuffing because the rigid plastic bottle acts as the internal support structure.
-
Make sure the crochet fabric is pulled taut over the bottle curves so it mimics the plump, smooth look of a traditionally stuffed amigurumi toy.
Finishing Notes
-
Weave in all loose yarn tails thoroughly on the inside of the pieces before gluing them down to prevent any unraveling during use.
-
Give the bunny a gentle squeeze once the glue is dry to verify that all the components are firmly attached and completely stable.
Beginner Notes
-
If your cylinder feels too tight to slide onto the bottle, try relaxing your hand tension slightly or switching to a hook that is one size larger for the body rows.
-
Do not worry if your ears curl slightly when making the turn around the chain; they will flatten out beautifully once they are sewn to the head.
Troubleshooting
-
If the white sleeve is wrinkling or sliding off the bottle, the crochet tube may be too wide, meaning you might need to reduce the number of stitches in your base increase row.
-
If you notice the plastic bottle showing through your stitches, your hook size may be too large for your yarn weight, and dropping down a hook size will close up those gaps.
Customization Ideas
-
You can experiment with different pastel yarn colors for the ears to create a whole family of colorful spring bunnies.
-
Consider embroidering small pink rosy cheeks next to the eyes to give your upcycled bunny an extra touch of personality and charm.