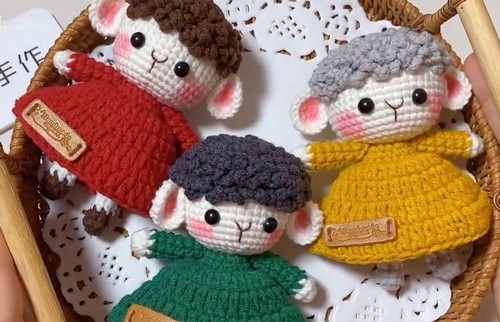
How To Crochet Cute Sheep Amigurumi Pattern
Creating expressive handmade figures becomes much more approachable with a Crochet Doll Amigurumi pattern that guides you through shaping, detailing, and assembly in a clear way. Gentle curves, defined limbs, and added elements like textured hair or layered outfits give the finished doll a polished and character filled look.
Crochet Sheep Amigurumi

Beyond how it appears, this type of project is useful for building confidence in joining pieces, balancing proportions, and refining finishing techniques, making it both a practical learning experience and a meaningful item for gifting or display.
Skill Level
Beginner to intermediate
You should be comfortable with:
- Magic ring
- Single crochet and basic increases
- Working in continuous rounds
- Simple assembly and sewing
Finished Size
Size will vary depending on yarn and hook, but expect a small handheld doll suitable for display or gifting.
Materials
- Yarn in multiple colors (for body, hair, dress, and details)
- Crochet hook suitable for your yarn
- Yarn needle
- Stuffing
- Brown thread for facial features
Abbreviations
- MR: Magic Ring
- SC: Single Crochet
- INC: Increase (2 SC in one stitch)
- SL ST: Slip Stitch
- CH: Chain
Helpful Notes Before Starting
- This pattern uses back loop only (BLO) in several sections. This creates a subtle ridge that helps define shaping and texture, especially for the head and body transitions.
- Work in continuous rounds unless otherwise stated.
- Keep your stitches tight and even to avoid gaps when stuffing.
- Prepare all yarn colors in advance to make transitions smoother.
Construction Overview
This doll is built in separate sections and then assembled:
- Head is worked first with shaping and hair added directly
- Arms and ears are made separately
- Legs are created individually, then joined to form the body
- Dress is added onto the body
- Final assembly brings everything together
Understanding this flow will help you visualize how each part connects.
Head
Pattern Instructions
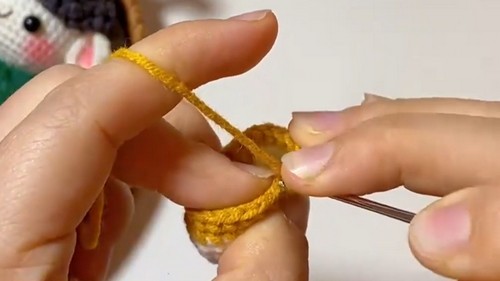
- Round 1: Create a magic ring with six single crochets. Close the ring and slip stitch into the first crochet.
- Round 2: Increase in all six stitches of Round 1, for a total of 12 stitches, by inserting the hook through only the back loop.
- Rounds 3-7: Continue repeating the step of inserting the hook through only the back loop.
Stitch and Shaping Clarity
- The increase round expands the head evenly from the center outward.
- Working in back loops only from Round 2 onward creates a defined edge that subtly shapes the head and gives a cleaner surface for facial features.
- Since there are no decreases, the head remains rounded and slightly open at the base for sewing later.
Hair
Pattern Instructions
- Change to new yarn for the curly hair.
- Chain four and then slip stitch into the next stitch. Repeat this pattern (chain four, slip stitch) until the end of the sixth round.

Explanation
- Each chain loop forms a curl.
- Keeping the chain length consistent ensures even texture.
- If your curls feel too loose, reduce the chain length slightly; if too tight, loosen your tension.
Ears and Arms
Pattern Instructions
- Ears: Use white yarn and follow the chart shown in the video.
Arms:
- Create a magic ring with seven single crochets. Close the ring with a slip stitch.
- Arm Round 2: Single crochet into each stitch.
- Arm Round 3: Change to a new yarn and single crochet into each stitch.
Explanation
- Arms are kept simple and cylindrical for easy attachment.
- The yarn change in Round 3 adds a visual detail, often used for sleeves.
- Keep stuffing minimal or skip it to allow arms to lie naturally against the body.
Legs and Body
Pattern Instructions
Legs:
- Use gray yarn to create a magic ring with seven single crochets for the first leg.
- Make the second leg similarly.
Connecting the Legs:
- Chain three, connect to the second leg, and then crochet seven single crochets into the first leg.
- Crochet three more single crochets into the chain.
BODY:
- Round 11: Increase on each side of the hips by crocheting two increased stitches, for a total of 22 stitches.
- Round 12: Repeat the same increase as the previous round, for a total of 24 stitches.
- Change to a new yarn and continue crocheting one single crochet into each stitch.
- Insert the hook through only the back loop and make one single crochet into each stitch.
Stitch and Shaping Clarity
- Each leg starts as a separate tube, then the chain bridge joins them into one piece.
- The chain between legs forms the inner thigh space.
- Increases at the hips widen the body, giving a more natural doll shape.
- The BLO round creates a clear separation, often used as the waistline or transition to clothing.
Dress
Pattern Instructions
- Grab a new yarn and put the needle in the appropriate spot to start crocheting the dress.
- Chain three, make one double crochet in the first stitch, and then two double crochets in the next stitch.
Explanation
- The dress is worked directly onto the body.
- Double crochets add volume and create a flared shape.
- The increase pattern helps the skirt spread outward naturally.

Assembly Guidance
- Sew the head to the body carefully, aligning the center of the face with the front of the body.
- Attach arms evenly on both sides just below the head.
- Place ears symmetrically if using them.
Take time here—good placement makes a big difference in the final look.
Eye and Facial Feature Placement
Pattern Instructions
Use brown thread to embroider the eyes, nose, and facial features.
Tips
- Place eyes slightly below the midpoint of the head for a balanced expression.
- Keep spacing even by counting stitches from the center.
- Embroider lightly first, then adjust before securing.
Stuffing Tips
- Stuff the legs and body firmly at the base for stability.
- Use lighter stuffing near the top to avoid distorting the head shape.
- Shape with your fingers as you go to keep proportions smooth.

Finishing Notes
- Check all seams and secure ends tightly.
- Adjust hair curls and dress shape for a neat finish.
- Slight repositioning of features can completely change the character’s expression.
Beginner Notes
- Take your time with joining the legs—this is often where confusion happens.
- Use stitch markers to track rounds, especially when working continuously.
- Practice consistent tension to keep stitches even.
Troubleshooting
- Uneven body shape: Check increase placement and stitch counts
- Gaps in stitches: Use a smaller hook or tighten tension
- Crooked assembly: Pin pieces in place before sewing
Customization Ideas
- Change yarn colors for different outfits
- Add accessories like hats or bows
- Adjust hair length by increasing chain length
- Experiment with embroidered expressions for personality