Crochet Tiny Pumpkin Appliqué Free Pattern For Halloween Decor
The Easy Pumpkin Appliqué crochet pattern is a simple and charming project perfect for fall and Halloween-themed creations. Designed to work up quickly, this pattern is ideal for beginners as well as experienced crocheters looking for a fast decorative element.
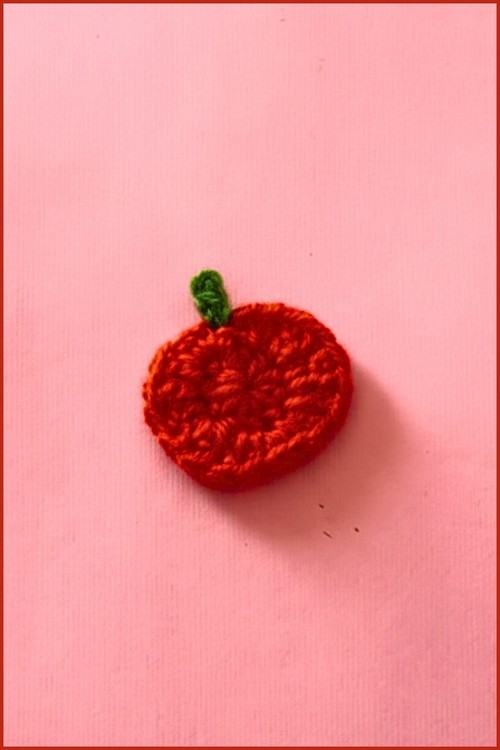
Crochet Pumpkin Appliqué

The finished pumpkin appliqué can be used to embellish blankets, bags, hats, garlands, clothing, or seasonal home décor. With minimal yarn requirements and easy shaping, this pattern is great for using leftover yarn while still achieving a polished and festive result. Color choices can easily be customized to match different autumn palettes or creative themes.
Easy Pumpkin Appliqué
Supplies
- Orange yarn for the pumpkin body
- Green yarn for the stem
- Crochet hook suitable for your yarn
- Scissors
Round 1 The Base
- Make a magic ring using orange yarn
- Chain 1 and work 10 half double crochets into the ring
- Pull the tail to close the ring and join with a slip stitch to the first stitch

Round 2 Shaping the Pumpkin
- Chain 1 and place 1 single crochet in the same stitch
- In the next stitch work 1 half double crochet and 1 double crochet
- In the next stitch work 2 double crochets
- In the next stitch work 2 double crochets
- In the next stitch work 1 double crochet and 1 half double crochet
- In the next stitch work 2 single crochets
- In the next stitch work 1 half double crochet and 1 double crochet
- In the next stitch work 2 double crochets
- In the next stitch work 2 double crochets
- In the final stitch work 1 double crochet and 1 half double crochet

Adding the Stem
- Change to green yarn on the final half double crochet
- Slip stitch into the first single crochet of the round
- Cut the orange yarn
- Chain 3
- Slip stitch into the second chain from the hook
- Slip stitch into the first chain
- Slip stitch back into the pumpkin body


Finishing
- Cut the yarn leaving a tail for sewing if needed
- Weave in all ends securely