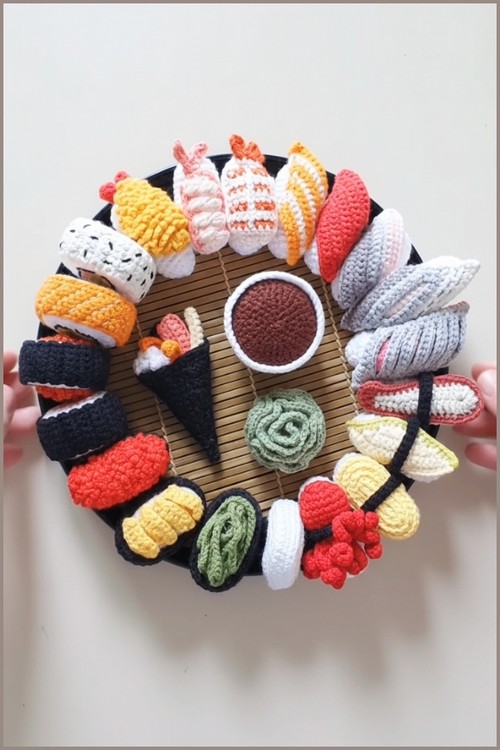
Crochet Sushi Octopus Nigiri Amigurumi Pattern For Sushi Lovers
Playful food themed creations always catch attention, and the Crochet Octopus Sushi Amigurumi pattern brings that charm into a soft, handmade form that feels both decorative and expressive. The rounded rice base gives it a clean, structured look, while the octopus top adds character through its gentle shaping and curling tentacles.
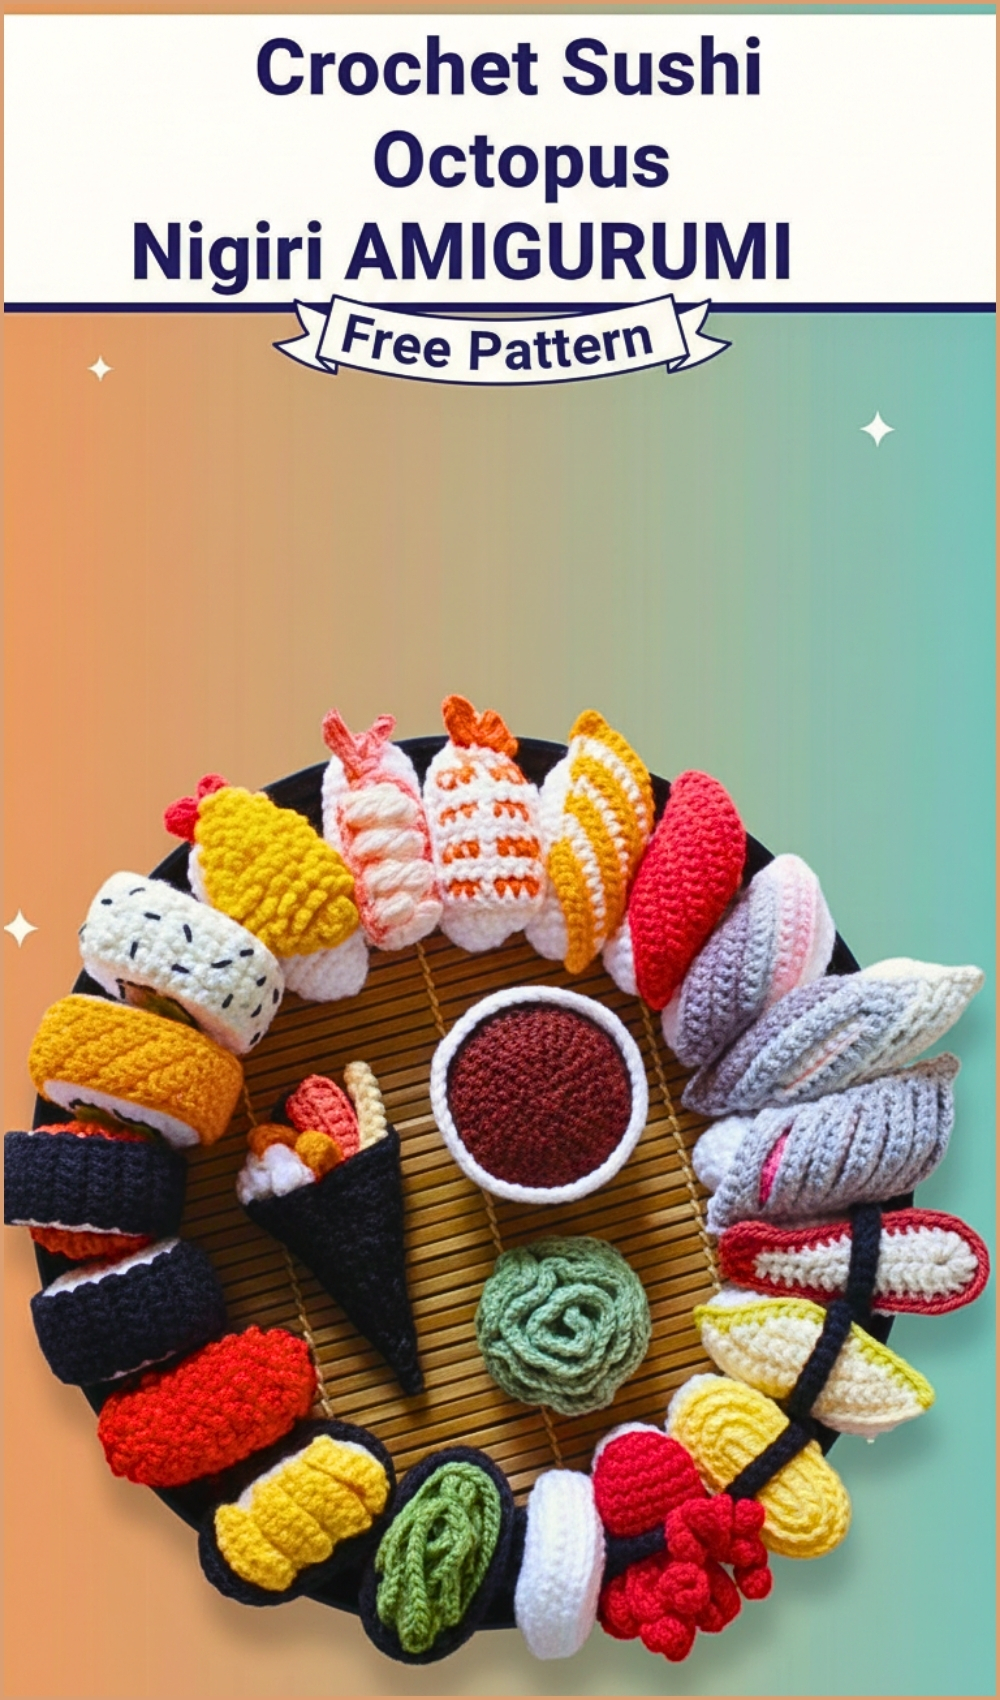
Crochet Sushi Octopus Nigiri Amigurumi
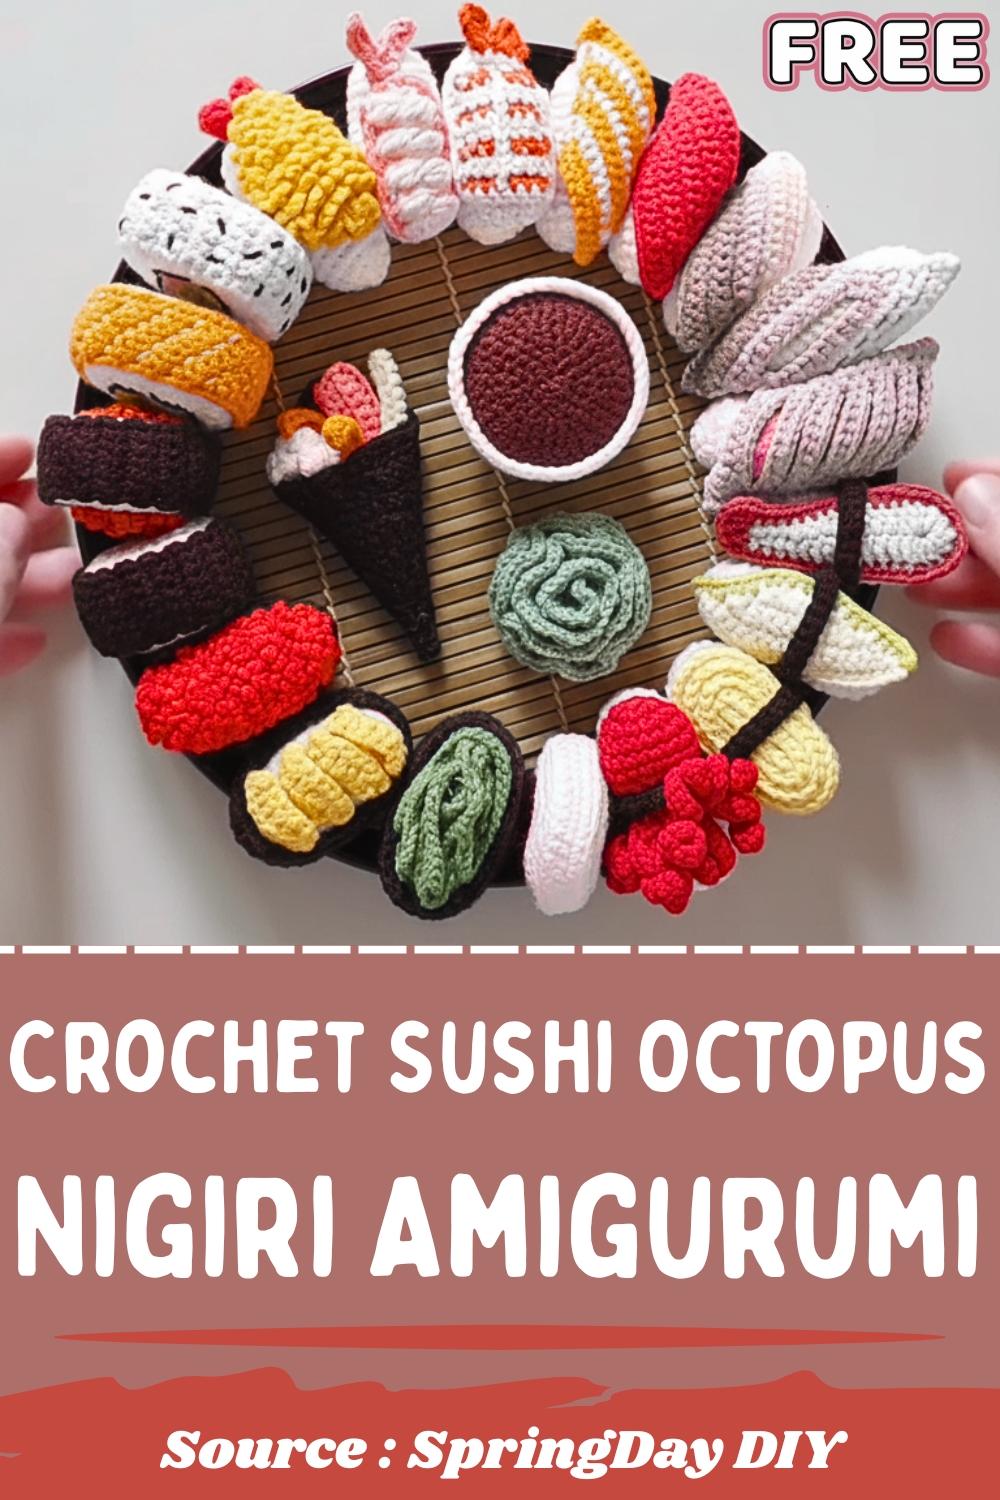
This design works beautifully as a desk companion, a cute display piece, or even a thoughtful handmade gift, especially for anyone who enjoys quirky, character inspired crochet. The balance between simple construction and eye catching detail makes it satisfying to create and fun to showcase once finished.
Skill Level
Beginner to Intermediate
This project uses basic stitches like single crochet, increases, and decreases, but the shaping, tentacle placement, and assembly require a bit of attention to detail.
Finished Size
Depends on your yarn and hook choice, but typically small enough to fit in your palm, similar to a bite-sized sushi piece.
Materials
- Yarn (red for octopus, white for rice, black for seaweed)
- Fiberfill stuffing
- Crochet hook (appropriate for your yarn)
- Yarn needle
- Stitch marker
- Scissors
Abbreviations
- MR: Magic Ring
- X: Single Crochet
- V: Increase (2 single crochet in one stitch)
- A: Decrease
- SL ST: Slip Stitch
- CH: Chain
Helpful Notes Before Starting
- Work in continuous rounds unless otherwise specified.
- Use a stitch marker to keep track of your rounds.
- Keep stitches tight to prevent stuffing from showing through.
- When making tentacles, consistency in chain tension will help them curl evenly.
Construction Overview
This amigurumi is built in three main parts:
- The octopus head (worked first and partially closed)
- Tentacles (attached directly to the head)
- Rice base (a separate cylindrical piece)
- Seaweed strip (a band that holds everything together)
The final look depends heavily on how neatly these parts are aligned and assembled.
HEAD
- R1: 6X in MR = 6 stitches
- R2: V * 6 times = 12 stitches
- R3: (1X, V) * 6 times = 18 stitches
- R4-R6: 18X (single crochet in each stitch for 3 rows)
- At this stage, you’re forming the rounded top of the octopus. These even rounds create the smooth dome shape.
- R7: (1X, A) * 6 times = 12 stitches
- This is where the head begins to taper inward.
- Stuff with fiberfill.
- Make sure the stuffing is firm but not overpacked. A slightly rounded shape works best so the head sits naturally on the rice.
- R8: A * 6 times = 6 stitches
- This closes the head tightly.
- R9: V * 6 times = 12 stitches
- This final round creates a base edge where the tentacles will be attached.
TENTACLES
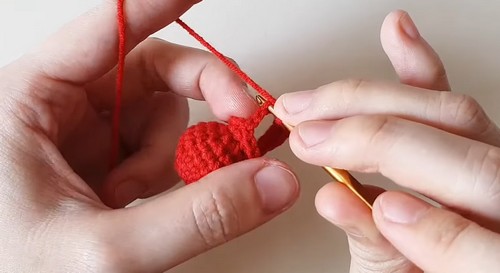
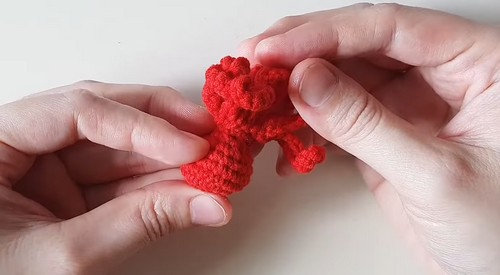
- Starting from the 9th round of the head, crochet 8 tentacles directly onto the head.
- Each tentacle: chain 13, then 12 single crochet and 1 slip stitch.
- Repeat 8 times for 8 tentacles.
- Weave in the remaining yarn to hide it.

Shaping Tip
- As you work back along the chain with single crochets, the tentacles naturally curl. Try to keep your tension consistent so all tentacles curl in a similar way. Uneven tension can make some tentacles look tighter or looser than others.
- Even spacing is important here. Spread the 8 tentacles evenly around the base so the octopus sits balanced.
SEAWEED STRIP (BLACK YARN)
- Chain 28 stitches.
- Join with a slip stitch to the first chain to form a ring.
- R1: 28X (single crochet)
- Finish off and weave in the ends.
Fit Tip
This strip should be snug but not tight. It acts like a band that holds the octopus and rice together, so if it’s too loose, the structure won’t stay secure.
RICE (WHITE YARN)
- R1: 6X in MR = 6 stitches
- R2: V * 6 times = 12 stitches
- R3: (1X, V) * 6 times = 18 stitches
- R4-R15: 18X (single crochet in each stitch for 12 rows)
- These rounds create a cylinder shape, forming the body of the sushi rice.
- R16: (1X, A) * 6 times = 12 stitches
- This begins closing the base.
- Stuff with fiberfill.
- Keep the shape slightly firm and flat on the bottom so it can sit upright.
- R17: A * 6 times = 6 stitches
- Finish off and sew the opening shut.
Shaping Tip
- Flatten the bottom slightly with your fingers after stuffing. This helps the finished piece sit nicely without wobbling.
ASSEMBLY
- Slide the black seaweed strip over the white rice piece.
- Position the red octopus head on top of the rice, holding it in place with the seaweed strip.
Assembly Guidance
- Center the octopus head carefully so it sits evenly on the rice.
- The tentacles should spread naturally over the edges, not bunch up on one side.
- Adjust the seaweed strip so it holds both pieces firmly without distorting their shape.
If needed, you can add a few hidden stitches between the head and rice for extra security, especially if the piece will be handled often.
Stuffing Tips
- Head: slightly rounded and soft, but still structured
- Rice: firmer, with a flat base for stability
Balancing firmness between the two parts helps the finished piece look clean and well-proportioned.
Beginner Notes
- Take your time with decreases to avoid gaps.
- Use invisible decreases if you want a smoother finish.
- Count stitches at the end of each round to avoid shaping issues.
Troubleshooting
- Head looks pointy instead of round: You may need more even stuffing or slightly looser tension.
- Tentacles look uneven: Check your chain count and maintain consistent tension when working back.
- Seaweed strip too loose or tight: Adjust your chain count slightly depending on your yarn thickness.
Customization Ideas
- Add small embroidered eyes for expression
- Use blush yarn or thread for cheeks
- Try different octopus colors for a fun variety
- Make multiple pieces for a full sushi set