Crochet Puppy Dog Amigurumi Free Pattern For Beginners
This beginner-friendly puppy amigurumi crochet pattern is perfect for anyone who loves making cute handmade toys. The pattern guides you through creating a sweet crochet puppy by working each part separately, including the head, body, ears, tail, and legs, before assembling them into a finished plush.
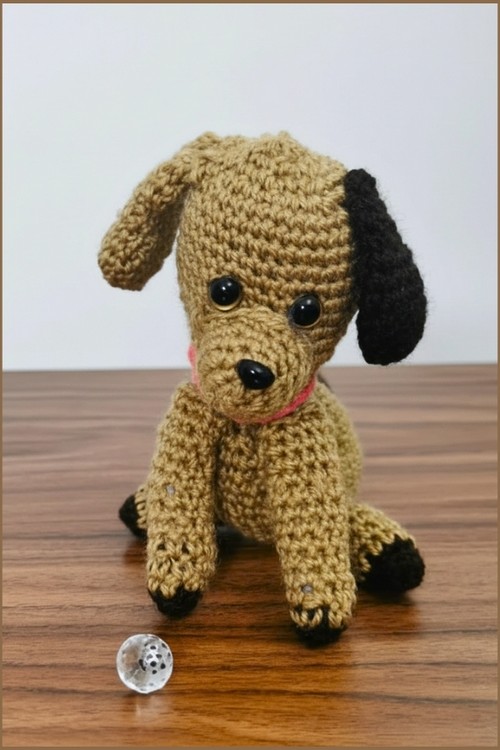
Crochet Puppy Amigurumi

Designed with simple stitches and clear shaping, this project is ideal for beginners who want to practice amigurumi basics while still achieving an adorable result. The finished puppy makes a charming gift, a nursery decoration, or a fun crochet collectible, and you can easily customize it by changing colors, facial expressions, or size.
Head
- R1 Create a magic ring and crochet 8 single crochet
- R2 Increase in every stitch around for 16 stitches
- R3 1 single crochet, increase repeated around for 24 stitches
- R4 2 single crochet, increase repeated around for 32 stitches
- R5 to R11 Single crochet in each stitch around for 7 rounds
- R12 2 single crochet, decrease repeated around for 24 stitches
- R13 to R14 Single crochet in each stitch around
- R15 1 single crochet, decrease repeated around for 16 stitches
- R16 Single crochet in each stitch around
- Finish Stuff the head firmly and fasten off leaving a long tail for sewing
Muzzle
- R1 Create a magic ring with 5 single crochet
- R2 Increase in every stitch for 10 stitches
- R3 1 single crochet, increase repeated around for 15 stitches
- R4 Single crochet in each stitch around
- Finish Attach or embroider the nose and sew the muzzle to the head

Body
- R1 Create a magic ring with 10 single crochet
- R2 Increase in every stitch for 20 stitches
- R3 Single crochet in each stitch around
- R4 1 single crochet, increase repeated around for 30 stitches
- R5 to R11 Single crochet in each stitch around
- R12 4 single crochet, decrease repeated around for 25 stitches
- R13 Single crochet in each stitch around
- R14 3 single crochet, decrease repeated around for 20 stitches
- R15 Single crochet in each stitch around
- R16 2 single crochet, decrease repeated around for 15 stitches
- R17 Single crochet in each stitch around
- Finish Stuff the body and fasten off

Tail
- R1 Create a magic ring with 4 single crochet
- R2 Increase in every stitch for 8 stitches
- R3 to R15 Single crochet in each stitch around
- Finish Fasten off and leave a tail for sewing

Ears (Make 2)
- R1 Create a magic ring with 8 single crochet
- R2 Increase in every stitch for 16 stitches
- R3 to R5 Single crochet in each stitch around
- R6 6 single crochet, decrease repeated twice for 14 stitches
- R7 Single crochet in each stitch around
- R8 5 single crochet, decrease repeated twice for 12 stitches
- R9 Single crochet in each stitch around
- R10 4 single crochet, decrease repeated twice for 10 stitches
- R11 Single crochet in each stitch around
- Finish Flatten slightly and fasten off
Legs (Make 4)
- R1 Create a magic ring with 4 single crochet using dark color
- R2 Increase in every stitch for 8 stitches
- R3 Single crochet in back loops only
- R4 Single crochet in each stitch around switching to light color at the end
- R5 to R7 For hind legs single crochet in each stitch around
- R5 For front legs complete only one round of light color
- Finish Lightly stuff and fasten off

Assembly
- Sew the ears to each side of the head
- Attach the front legs to the upper body and hind legs to the lower body
- Sew the head securely onto the body
- Attach the tail to the back of the body