Crochet Witch Hat Free Pattern Bookmark You Can Make In One Sitting
The Cute Crochet Witch Hat Bookmark pattern is a fun and creative project that adds a magical touch to your reading routine. Designed to be lightweight and compact, this crochet bookmark sits neatly between pages while showcasing a charming witch hat shape with a playful dangling tail.
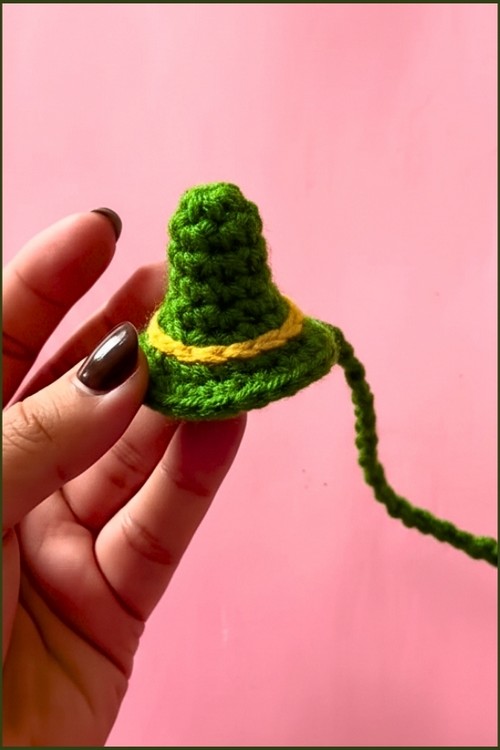
Crochet Witch Hat Bookmark

It’s perfect for Halloween, fall décor, or year-round use for anyone who loves whimsical handmade accessories. The pattern works up quickly, uses simple stitches, and allows easy customization in size, color, and embellishments, making it suitable for beginners and experienced crocheters alike.
Hat Body
- Round 1: Create a magic ring and work 6 single crochet into the ring, pull tight, and join with a slip stitch.
- Round 2: Chain 1 and work 1 single crochet in each stitch around for a total of 6 stitches, then join with a slip stitch.
- Round 3: Chain 1, work 1 single crochet in the first stitch, then increase in the next stitch, repeat around to reach 9 stitches, and join with a slip stitch.
- Round 4: Chain 1 and work 1 single crochet in each stitch around for a total of 9 stitches, then join with a slip stitch.

- Round 5: Chain 1, work 1 single crochet in the first stitch, then increase in the next stitch, repeat around to reach 14 stitches, and join with a slip stitch.
- Round 6: Chain 1 and work 1 single crochet in each stitch around.
- Round 7: Chain 1 and repeat a pattern of 1 single crochet followed by 1 increase around.
- Round 8: Chain 1 and work 1 single crochet in each stitch around.
- Note: Continue alternating one increase round with one plain round until the hat reaches your desired size.


Bookmark Tail and Bubble
- Chain: Without cutting the yarn, create a long chain to form the bookmark tail.
- Bubble: At the end of the chain, work a bobble stitch by yarn over and inserting the hook into the last chain multiple times until the bubble reaches your desired thickness, then pull through all loops and secure.

Finishing Touches
- Decorative band: Reattach yarn two to three rounds from the bottom of the hat and work surface slip stitches all the way around to create a decorative band.
- Ending: Cut the yarn, pull the tail through to the inside of the hat, and neatly hide all loose ends.