Crochet Pikachu Loom Band Free Pattern For Beginners
This Pikachu loomigurumi pattern is designed for makers who love creating detailed characters using Rainbow Loom bands and a hook-only technique. Inspired by the iconic look of Pikachu, the pattern walks you through each component step by step, from expressive eyes and signature ears to the recognizable zigzag tail.
Crochet Pikachu Loom Band
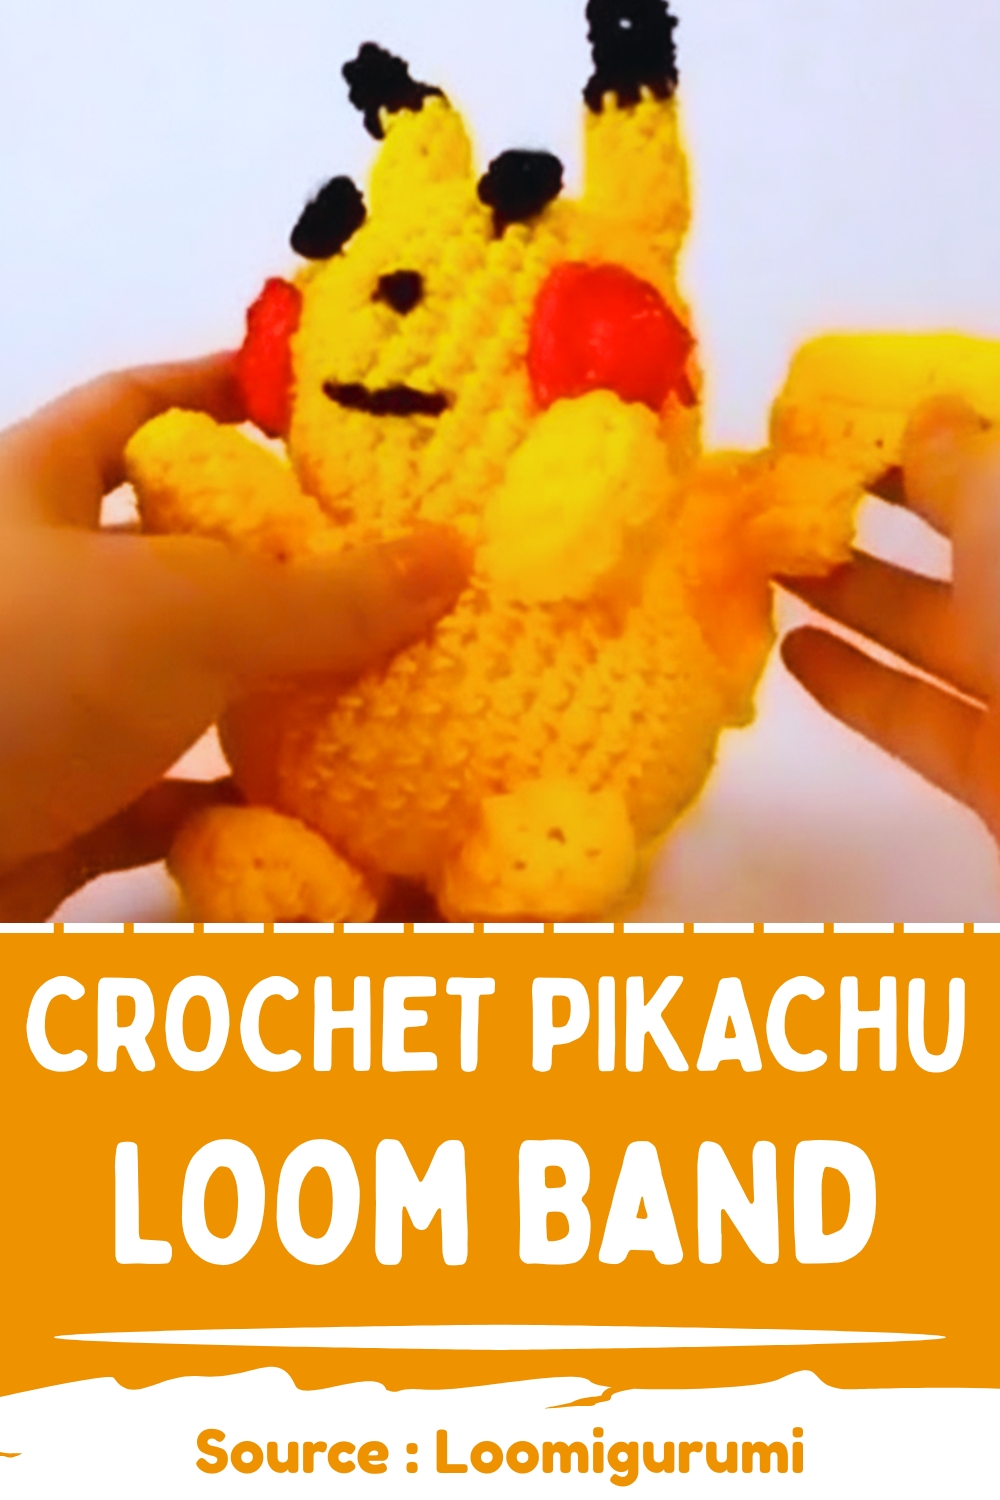

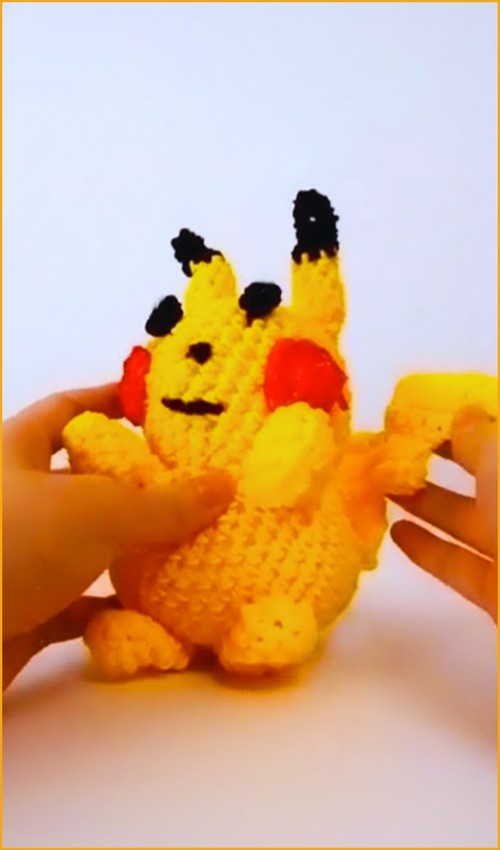

Nothing beats the thrill of mastering a Crochet Pikachu Loom Band method that intricately interlocks flexible rubber loops into a charming, pocket-sized companion. Capturing the character's signature chubby shape and vivid yellow hue, this pocket monster acts as a weather-resistant pendant for backpacks or a quirky token for collectors, providing a deeply rewarding, highly imaginative crafting escape for fans of all ages.
Skill level
-
This project is best suited for intermediate crocheters or adventurous beginners who have mastered the basic single crochet stitch and feel comfortable manipulating small, elastic bands instead of yarn.
Finished size
-
Depending on the specific brand and elasticity of the bands you use, your completed figure will stand approximately four to five inches tall, making it an ideal size for a desk companion or a bag charm.
Materials
-
Yellow loom bands for the main body, arms, feet, and tail
-
Black loom bands for the tips of the ears, eyes, and facial details
-
White loom bands for the eye highlights
-
Red loom bands for the cheeks
-
Brown loom bands for the back stripes and the base of the tail
-
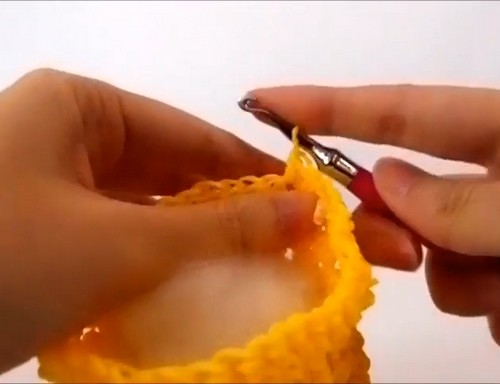
Crochet hook size 2.5mm or 3.0mm, ideally a strong metal hook that can handle the tension of multiple bands
-
Fiberfill stuffing
-
Stitch markers to keep track of your continuous rounds
Abbreviations
-
sc: single crochet
-
inc: increase (two single crochets worked into the same stitch)
-
dec: decrease (combining two stitches into one single crochet)
-
st: stitch
Helpful notes before starting
-
Loom bands exert more structural tension than yarn, so using a sturdy metal hook is highly recommended to prevent bending or snapping.
-
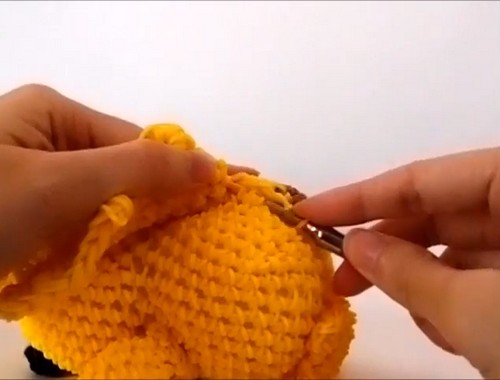
Unlike yarn, which stretches and compresses easily, bands will show gaps if your tension is too loose, so keep your stitches firm and snug.
-
Always use a stitch marker in the first stitch of every round because counting loops visually can be tricky with glossy rubber bands.
-
When counting stitches, look at the top horizontal V shapes just like you would with traditional yarn crochet.
Construction overview
-
The head and body are crocheted in a single, continuous piece from the top down, which eliminates the need to sew the neck together later and prevents a floppy head.
-
The limbs, ears, and facial details are created as separate components and then joined to the main body during the final assembly phase.
-
The feet are intentionally flattened and sealed to provide a stable, flat base for the doll to sit nicely on flat surfaces.
-
The tail relies on double-band thickness and a specific branching technique to mimic the classic, sharp zigzag geometry of the character.
Stitch and shaping clarity
-
The increases throughout the body are spaced evenly to create smooth, rounded spheres rather than polygonal shapes.
-
Decreases should be worked tightly to prevent the internal fiberfill stuffing from peeking through the gaps between the bands.
-
The ears utilize a gradual increase pattern on only the final stitch of the early rounds, which causes them to flare out into a pointed, conical shape instead of expanding symmetrically.
-
The eyes combine a capping technique with traditional stitches to anchor a bright white highlight directly inside a solid black pupil without needing separate embroidery.
Step by step pattern instructions
Eyes Make 2
-
Wrap a white band around the hook three times to create four loops
-
Chain three with black bands, pulling the white capping band onto the first black band
-
Single crochet into the second chain from the hook
-
Single crochet into the last chain containing the white band
-
Rotate and single crochet into the same chain on the opposite side of the white band
-
Fasten off with a slip stitch
Arms Make 2
-
Round 1 create a magic ring of six yellow bands
-
Round 2 single crochet in each stitch for a total of six
-
Round 3 work one single crochet and one increase around for a total of nine
-
Rounds 4 to 6 single crochet in each stitch keeping nine stitches per round
-
Lightly stuff and fasten off
Feet Make 2
-
Round 1 create a magic ring of six yellow bands
-
Round 2 work one single crochet and one increase around for a total of nine
-
Rounds 3 to 7 single crochet in each stitch keeping nine stitches per round
-
Do not stuff flatten the foot and single crochet across the opening to seal it flat
Ears Make 2
-
Round 1 with black bands create a magic ring of four
-
Round 2 single crochet in the first three stitches and increase in the last for a total of five
-
Round 3 single crochet in the first four stitches and increase in the last for a total of six
-
Round 4 single crochet in the first five stitches and increase in the last for a total of seven
-
Round 5 change to yellow and single crochet in each stitch for seven
-
Round 6 single crochet in the first six stitches and increase in the last for a total of eight
-
Round 7 single crochet in the first seven stitches and increase in the last for a total of nine
-
Round 8 single crochet in each stitch keeping nine stitches
-
Round 9 work one single crochet and one decrease around for a total of six
-
Lightly stuff and fasten off
Tail
-
Use double bands throughout the entire tail
-
Start with a chain of nine in yellow
-
Work rows of single crochet with eight stitches per row chaining one to turn
-
To form the zigzag shape chain four out from the side of a row and work back across
-
Switch to brown bands for the final rows to create the tail base
Body and Head One Piece
-
Round 1 create a magic ring of six yellow
-
Round 2 increase in each stitch for a total of twelve
-
Round 3 work one single crochet and one increase around for a total of eighteen
-
Round 4 single crochet in each stitch keeping eighteen stitches
-
Round 5 work two single crochets and one increase around for a total of twenty four
-
Round 6 work three single crochets and one increase around for a total of thirty
-
Rounds 7 to 12 single crochet in each stitch keeping thirty stitches per round
-
Round 13 work three single crochets and one decrease around for a total of twenty four
-
Round 14 work two single crochets and one decrease around for a total of eighteen
-
Attach the eyes and stuff the head
-
Round 15 work two single crochets and one increase around for a total of twenty four
-
Round 16 work three single crochets and one increase around for a total of thirty
-
Round 17 work four single crochets and one increase around for a total of thirty six
-
Round 18 work five single crochets and one increase around for a total of forty two
-
Rounds 19 to 21 single crochet in each stitch keeping forty2 stitches per round
-
Round 22 work five single crochets and one decrease around for a total of thirty six
-
Round 23 work four single crochets and one decrease around for a total of thirty
-
Round 24 work three single crochets and one decrease around for a total of twenty four
-
Round 25 work two single crochets and one decrease around for a total of eighteen
-
Stuff the body firmly
-
Round 26 work one single crochet and one decrease around for a total of twelve
-
Round 27 decrease all around for a total of six and fasten off
Assembly
-
Create cheeks with a magic ring of six red then work one single crochet and one increase around for nine stitches
-
Make back stripes by chaining eight for the lower stripe and five for the upper stripe using brown bands
-
Attach arms legs ears tail and cheeks to the body using slip stitches
-
Add a small black band for the nose and stitch a W shape for the mouth
Assembly guidance
-
Pin all your pieces onto the body using sewing pins before securing them with slip stitches to ensure everything is symmetrical and correctly proportioned.
-
Align the ears on top of the head between rounds 3 and 6, tilting them slightly outward for a lively expression.
-
Attach the arms directly below the neckline on round 16, pointing forward or slightly down.
-
Secure the flat-sealed feet to the bottom of the body between rounds 23 and 25, spacing them wide enough apart to give the doll a sturdy tripod base to sit on.
-
Anchor the tail to the lower back centered between the two brown stripes, positioning it so it can arch upward.
Eye and facial feature placement
-
Insert the eyes onto the head between rounds 9 and 10, leaving a clear gap of roughly five or six stitches between them so the face looks wide and welcoming.
-
Position the red cheeks directly below and slightly to the outside of each eye, overlapping the bottom edge of the eye piece slightly.
-
Place the small black nose right between the eyes on round 11, centered perfectly horizontally.
-
Embroider the classic W-shaped mouth directly underneath the nose using a single black band split or threaded through the stitches of round 12.
Stuffing tips
-
Gently tease apart your fiberfill stuffing before inserting it to remove hard clumps and ensure a smooth, lump-free shape.
-
Stuff the head firmly so it holds its round shape against the pull of the facial features, but do not overstuff to the point where the yellow bands begin to separate and reveal the white filling.
-
When stuffing the body at round 25, pack the bottom half densely to give the base weight and stability, ensuring the piece does not tip forward when sitting.
-
Keep the limbs stuffed very lightly at the tips and completely empty near the attachment points so they lay naturally against the torso instead of sticking out rigidly.
Finishing notes
-
Weave in your remaining band tails by pulling them deep into the center of the stuffed body cavity using your crochet hook.
-
Give the entire plushie a gentle squeeze and massage after fastening off to distribute the internal stuffing evenly and settle the elastic bands into their permanent positions.
Beginner notes
-
If you find your hook slipping out of the rubber loops, try using a hook with a deeper throat or a pointier tip to catch the elastic securely.
-
If your magic ring feels too tight or the bands are resisting, you can alternatively chain two and work your initial six single crochets directly into the second chain from your hook.
Troubleshooting
-
If you notice large gaps revealing the white stuffing underneath your stitches, drop down to a smaller hook size or consciously pull your loops tighter as you work.
-
If your counts are off at the end of a round, check the previous round for accidental extra stitches, as rubber bands can easily split or twist, creating the illusion of a stitch where one does not exist.
Customization ideas
-
You can scale this entire project up significantly by substituting the single loom bands with worsted weight yarn and a 3.5mm hook, following the exact same stitch patterns.
-
Adjust the tilt and angle of the ears or give the tail a more dramatic bend by inserting a short piece of vinyl-coated craft wire through the center of the limbs before closing them up.