
Crochet Kitten Amigurumi Free Pattern With Shining Eyes
Cream white fur with black patches gives this crochet kitten amigurumi a clean monochrome look on a minimalist shelf or in a neutral nursery. Cat owners can set a small kitten plush with shining blue eyes beside a framed photo of their own black and white cat.
Striped tail up and blue jewel eyes, the crochet kitten amigurumi has you counting spots as you go. Marking those patches mid round is the whole job. You put the tail on last and it suddenly stands up straight, which is the moment the thing stops being a ball of yarn.
Crochet Kitten Amigurumi

Tail stands straight up off the back of the head, striped in black bands and taller than the body underneath. The body is one rounded shape with pointed ears worked into the top and dark markings scattered across the sides and forehead. Faceted blue eyes catch the light, and the nose is a single dark stitch between them. Small feet sit flat at the base so it stands without support. Parts are the body, the tail, and the two eyes pushed in. The stripes and the spots come from colour changes worked as you go, which is where the pattern asks for concentration.
Colour and Customisation Ideas
These come first because they are worth thinking through before you wind your yarn.
- Classic white or cream for a clean look that reads clearly from a distance
- Warm ginger for a tabby feel, with black embroidery thread on the face
- Grey with a lighter grey held together on alternate rounds for a subtle stripe
- Pale lilac or dusty blue, which photograph well against neutral backgrounds
- Black yarn with a white bow tie for a formal look
- Two colours alternated at the legs and tail tip for a bicolour finish
The bow tie lands best in a colour that contrasts the body. A red or mustard bow on a grey kitten reads instantly; a bow in the same yarn as the body disappears.
Quick Facts
- Finished size: approximately 5 to 6 inches tall, estimated
- Difficulty: beginner to intermediate
- Estimated time: 3 to 5 hours
- Piece count: 8 pieces, or 9 with the bow tie
What You Will Need
- Yarn in your chosen kitten colour, approximately 40 to 50 g estimated
- A crochet hook suited to your yarn, usually 2.5 mm to 3.0 mm
- Fiberfill stuffing
- Safety eyes, or black embroidery thread if preferred
- Black embroidery thread for the nose and mouth
- Optional contrast yarn for the bow tie
- Stitch marker
- Yarn needle
- Scissors
Pieces List
- Head, make 1
- Body, make 1
- Legs, make 4
- Ears, make 2
- Tail, make 1
- Bow tie, make 1 optional
Safety Eye Timing
- The assembly section places the safety eyes between Round 8 and Round 9 of the head. That is after the straight rounds are finished and before the decreases start at Round 11, so the opening is still wide enough to fit a washer through without difficulty. Do it at that point, not later.
- Space the eyes roughly 6 stitches apart on the front of the head at the widest part. Look at the face straight on before clicking the washers. Once the washers are on, nothing moves.
- For any kitten going to a child under three years old, skip safety eyes entirely and embroider both eyes with black thread. Knot every end inside the head and tug the embroidery firmly to confirm it is anchored.
Abbreviations
- sc, single crochet
- inc, increase, meaning two single crochet in the same stitch
- dec, decrease, meaning single crochet two together
- MR, magic ring
- dc, double crochet
- ch, chain
- sl st, slip stitch
- R, round
The Pattern
Head
- R1: make a magic ring and work 6 sc into the ring (6)
- R2: work 2 sc in each stitch around (12)
- R3: work 1 sc then 1 inc, repeat 6 times (18)
- R4: work 2 sc then 1 inc, repeat 6 times (24)
- R5: work 3 sc then 1 inc, repeat 6 times (30). The piece should still lie mostly flat here with the edge just starting to curve upward, like a shallow plate
- R6: sc in each stitch around (30)
- R7: sc in each stitch around (30)
- R8: sc in each stitch around (30). By now the walls should stand straight and the head reads as an open bowl that holds its shape on the table
- R9: sc in each stitch around (30)
- R10: sc in each stitch around (30). The head should look like a deep open cup at this point, taller than it is wide
- R11: work 3 sc then 1 dec, repeat 6 times (24)
- R12: work 2 sc then 1 dec, repeat 6 times (18)
- R13: work 1 sc then 1 dec, repeat 6 times (12). A clear round ball shape should be visible now with the opening reduced to a small circle
- Stuff the head firmly with fiberfill before the opening closes further
- Fasten off and leave a long tail for sewing

Body
- R1: make a magic ring and work 6 sc into the ring (6)
- R2: work 2 sc in each stitch around (12)
- R3: work 1 sc then 1 inc, repeat 6 times (18)
- R4: work 2 sc then 1 inc, repeat 6 times (24). The base should read as a flattish disc with the edge just starting to lift, correct for this stage
- R5: sc in each stitch around (24)
- R6: sc in each stitch around (24)
- R7: sc in each stitch around (24)
- R8: sc in each stitch around (24). The body should now stand as an open cylinder with straight walls and a flat base
- R9: work 2 sc then 1 dec, repeat 6 times (18)
- R10: sc in each stitch around (18)
- R11: sc in each stitch around (18)
- R12: work 1 sc then 1 dec, repeat 6 times (12). The top pulls in to a narrow shoulder opening and the body narrows noticeably above the waist
- R13: sc in each stitch around (12)
- Stuff the body firmly with fiberfill
- Fasten off and leave a long tail for sewing
Don't let the stitch counts scare you off! Beginners can follow the video tutorial below and crochet this plushie right along with me.
Legs, Make 4
- R1: make a magic ring and work 6 sc into the ring (6)
- R2: work 1 sc then 1 inc, repeat 3 times (9)
- R3: sc in each stitch around (9)
- R4: sc in each stitch around (9). Each leg should be a short compact tube, wider at the base than a pencil and slightly flattened if you press it lightly, which helps it sit flush against the body
- Stuff lightly if desired
- Fasten off and leave a long tail for sewing
Ears, Make 2
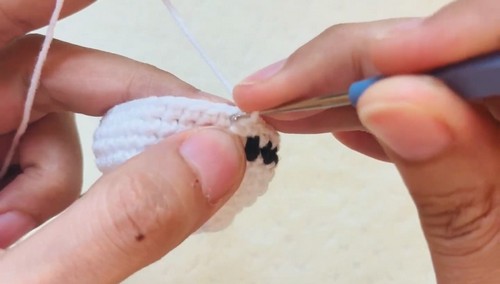
- R1: make a magic ring and work 4 sc into the ring (4)
- R2: work 1 sc then 1 inc, repeat 2 times (6)
- R3: work 1 sc then 1 inc, repeat 3 times (9)
- R4: work 2 sc then 1 inc, repeat 3 times (12). The ear should read as a small rounded triangle, wider at the open base and slightly pointed at the tip
- Fasten off and leave a long tail for sewing
Tail
- R1: make a magic ring and work 6 sc into the ring (6)
- R2: sc in each stitch around (6)
- R3: sc in each stitch around (6)
- R4: sc in each stitch around (6)
- R5: sc in each stitch around (6)
- R6: sc in each stitch around (6)
- R7: sc in each stitch around (6)
- R8: sc in each stitch around (6)
- R9: sc in each stitch around (6)
- R10: sc in each stitch around (6)
- R11: sc in each stitch around (6)
- R12: sc in each stitch around (6). The finished tail is a long slim tube that should be flexible enough to curve naturally when attached at a slight angle
- Fasten off and leave a long tail for sewing
Bow Tie, Optional
- Make a magic ring
- Ch 3, work 3 dc into the ring, ch 3, sl st into the ring. This forms the first half of the bow
- Repeat the same sequence once more into the same ring to form the second half
- Pull the magic ring tight to close the centre
- Wrap yarn several times around the centre of the two halves to create the knot shape and secure the end
- Fasten off and leave a tail for attaching

Assembly
- Place safety eyes between Round 8 and Round 9 of the head before continuing. This is the step most people miss when reading the pattern from top to bottom.
- Embroider the nose and mouth in a small Y shape using black thread. Work this before sewing the ears on so the front of the head is easy to access.
- Pin both ears to the top of the head, centred between Rounds 2 and 6, and look from the front before sewing. Slightly uneven ears are the most obvious mistake on a finished cat.
- Sew both ears firmly in place.
- Attach the body to the bottom of the head, matching the openings. Both close at 12 stitches so they should align cleanly.
- Pin all four legs to the bottom of the body before sewing any of them. Space them evenly so the kitten sits level, then sew each one.
- Attach the tail to the back of the body, low near the base, at a slight downward angle so it can drape rather than stick straight out.
- If using the bow tie, attach it just below the head where the neck seam sits.
Stuffing Guide
- Head: firm. The ears add weight and the head needs to hold its shape through handling.
- Body: firm, but not stretched. Stop adding fiberfill when the fabric feels dense without the stitches separating.
- Legs: light. A pinch each is enough to keep the tube from collapsing. Overstuffed legs splay outward and the kitten loses the ability to sit flat.
- Ears and tail: no stuffing needed. Both hold their shape from the fabric alone at this stitch count.
The one place overstuffing shows on this kitten is the body waist. Rounds 9 and 12 both decrease, giving the body a slight hourglass shape, and too much fiberfill below Round 9 pushes against those decreases and makes the midsection look bloated.
Tips
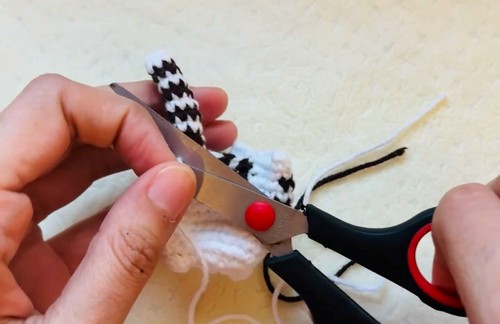
- Make all four legs in one session so your tension stays consistent across the set. A leg worked two days after the others often comes out slightly tighter or looser.
- Leave a much longer tail than you think you need on the ears. The placement between Rounds 2 and 6 means you are sewing into a curved surface and the tail runs out faster than on a flat seam.
- Read the assembly section before you start the head. The eye placement note lives there rather than in the head rounds, and missing it means closing the head before the eyes are in.
Yarn Substitution and Size Scaling
The counts never change regardless of yarn weight. Only the finished size does.
- Fingering weight at a 2.0 mm hook gives a very small kitten around 3 inches tall. Sport or DK at 2.5 mm to 3.0 mm lands at the 5 to 6 inch estimate above. Worsted with a 3.5 mm hook pushes toward 7 or 8 inches, which is a good size for play but makes the small pieces like ears and the bow tie a little easier to work.
- Stay one hook size smaller than the ball band recommends. Amigurumi fabric should be stiff enough that stuffing cannot be seen through it.
- Cotton yarn gives crisper stitch definition and a firmer finished toy. Acrylic is softer and more forgiving on tension. Either works here.
Toy Safety
- Safety eyes must be in place before the head is stuffed. There is no safe way to add them through a stuffed and closed piece.
- Tug every sewn piece hard before giving the toy to a child. Legs are the first attachment to loosen under regular play.
- Weave every end into the stuffed interior, not along the surface.
- Skip glue on anything meant for a child. Stitch all additions including the bow tie.
- Hand wash only in cool water. Press the water out gently rather than wringing and reshape while still damp.

FAQ
- Why does the head look elongated instead of round? The five straight rounds between R5 and R10 can make it look barrel shaped before it is stuffed. Once you fill it and the decreases close over the top it rounds out. Press it between your palms while you stuff to speed that along.
- Can I make the tail shorter? Yes. The pattern runs 12 plain rounds at 6 stitches, so just stop when you are happy with the length. Every round is identical so stopping at Round 7 or Round 8 changes nothing about the construction.
- My bow tie looks lopsided. What went wrong? Usually one side of the magic ring got pulled tighter than the other before the wrapping was done. Redo the wrap a little firmer and more evenly around the centre, and make sure the ring is fully closed before you wrap.
- Do I need all four legs or can I make just two? The pattern specifies four legs for a four legged kitten pose, but two legs work fine if you want a seated doll with the body resting directly on a flat base. The body base is flat enough to sit without support.