
Crochet Amigurumi Stegosaurus Free Pattern With Pink Spikes
Toddler bookshelves and dinosaur nurseries both have room for this crochet stegosaurus amigurumi, a flat palm-sized dino in bright blue. Little dinosaur fans can slip a soft stegosaurus plush into a coat pocket or a party favor bag after a dino birthday.
Pink plates down a blue spine are why the crochet stegosaurus keeps showing up in dinosaur round ups and beginner recommendation threads. People screenshot it. The flat body makes it fast, the colour contrast makes it photograph well, and that combination is exactly why it travels so far on Pinterest.
Crochet Stegosaurus

Pink plates run along the spine in a row of rounded bumps, sitting up clearly against the blue body below. The shape is flat rather than fully three dimensional, worked in two halves joined together with the plates sewn along the top seam. Four stubby legs poke out from the underside, and a short tail curves out at one end while the head sits low and small at the other. Parts are the two body panels, the legs, and each plate attached separately. The flat construction means less stuffing and faster finishing, and the plates are small individual pieces that work up quickly once you have made the first one.
Materials and Tools
- Blue yarn for the body, tail, head and legs
- Pink yarn for the spikes
- Black yarn for embroidering the eyes
- 4.0 mm crochet hook
- Fiberfill stuffing
- Stitch marker
- Yarn needle
- Scissors
Approximate finished size is around 7 to 9 inches long from nose to tail tip, estimated from experience with flat-construction amigurumi at this gauge and yarn weight. Time is approximately two to three hours including the second body piece and the seaming. Both figures are estimates, not measurements from the pattern itself.
Abbreviations Used
- sc: single crochet
- hdc: half double crochet
- dc: double crochet
- tr: treble crochet
- dec: decrease, two stitches worked together into one
- ch: chain
- Stitch counts in brackets where given
Pieces List
- Body panel: 2 identical pieces, worked flat in rows
- Spike ridge: worked directly onto the back edge of one body panel, not a separate piece
- Tail: worked as an extension of the body edge, not a separate piece
- Head: worked as an extension of the body edge, not a separate piece
- Legs: 2 legs per body panel, worked directly onto the body edge
Both body panels are made identically. The tail, head, legs and spike ridge are all built into the edge of each panel as you work rather than sewn on afterwards.
Eye Safety Note
This pattern uses embroidered eyes worked in black yarn after assembly, which makes it safe for children of all ages including under three. There are no safety eyes, buttons or glued-on parts anywhere in the construction. If you prefer the look of safety eyes for a display piece made for an adult, insert them into one body panel before seaming, between rows 3 and 4 on the head section.
The Pattern
This is a flat construction pattern, worked in rows. Make two identical body panels, then assemble them by sewing together and stuffing. Read through the full pattern before starting, since the tail, head and legs are all built into the edge of each body panel.
Body, Make Two Identical Panels
- Row 1: create a magic ring then chain 2, work 5 hdc into the magic ring [5]. Checkpoint: a small fan of five half double crochet stitches spreading from the ring, sitting flat like a wedge
- Row 2: chain 2 and turn, work 2 hdc in each stitch across [10]. Checkpoint: the panel is widening with straight sides and a flat edge, roughly the size of a large coin at this point
- Row 3: chain 2 and turn, work 2 hdc in the first stitch then 1 hdc in the next stitch, repeat this pattern across the row [15]
- Row 4: chain 2 and turn, work 2 hdc in the first stitch then 1 hdc in each of the next 2 stitches, repeat across the row [20]. Checkpoint: a flat trapezoidal panel sitting level, wider at the open edge than at the magic ring end
- Row 5: chain 2 and turn, work 2 hdc in the first stitch then 1 hdc in each of the next 3 stitches, repeat across the row [25]. Checkpoint: the body panel is now fully shaped and reads as a broad flat oval wedge, the largest point along the top edge where the spike ridge will sit

Tail
- Chain 9 from the edge of the body at the narrow tail end
- Starting in the second chain from the hook, work 1 sc in the first 2 chains [2]
- Work 1 hdc in the next 2 chains [2]
- Work 1 dc in the next 2 chains [2]
- Work 1 treble crochet in the last 2 chains [2]. Checkpoint: the tail tapers from a thick base near the body to a fine pointed tip, using the stitch height progression to create the taper naturally
- Count 4 stitches up along the body edge
- Slip stitch the tail to the body to anchor it
- Fasten off the yarn
If magic rings and invisible decreases sound like another language, start with the video tutorial below, it makes everything click!
Head
- Attach yarn at the opposite end of the body from the tail
- Row 1: chain 2 then work 1 hdc in the next 4 stitches [4]. Checkpoint: a small flat band extending from the front of the body at the wider end of the panel
- Row 2: chain 1 and turn, work 1 sc in the first stitch, work 1 hdc in each of the next 3 stitches [4]
- Row 3: chain 1 and turn, work 1 sc in the next 2 stitches, work a decrease in the last 2 stitches [3]. Checkpoint: the head tapers at the snout end, giving the stegosaurus its characteristic small rounded head shape
- Slip stitch and fasten off
Legs
Turn the piece so the flat lower edge of the body faces downward before working the legs.
First Leg
- Attach yarn where the body meets the tail
- Chain 2
- Work 5 hdc across [5]
- Chain 2 and turn
- Work 5 hdc across [5]
- Chain 1 and turn
- Work 5 sc across [5]. Checkpoint: a short flat rectangular leg shape with three rows of stitches sitting at the base of the body
- Slip stitch back to the body
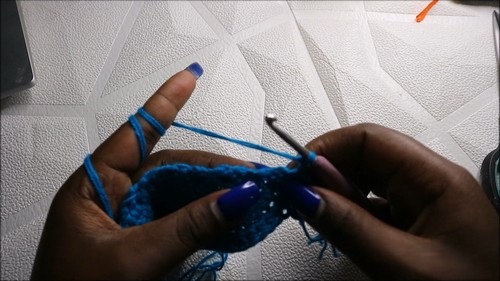
Belly Bridge
- Work 3 sc along the body edge moving toward the centre
- Work 4 hdc along the centre belly area
- Work 3 sc to reach the front leg position. Checkpoint: a continuous line of stitches running along the bottom edge between the two leg positions, keeping the belly edge neat
Second Leg
- Repeat the same steps as the first leg at the front of the body near the head
Spike Ridge
- Attach pink yarn near the head end of the back edge
- Skip 1 stitch
- Work 5 dc into the next stitch to create a shell
- Skip 1 stitch
- Work 1 sc in the next stitch
- Repeat the shell pattern all the way across the back edge toward the tail. Checkpoint: a row of raised pink shell fans sitting along the full spine of the dinosaur, each shell separated by a sc at the base.
- Fasten off pink yarn

Assembly
- Crochet a second identical body panel with tail, head, legs and spike ridge worked in exactly the same way as the first.
- Place both panels together with the spike ridges facing outward on each side.
- Pin around the entire blue body edge before sewing, checking that the head and tail ends align and the legs sit level on both sides.
- Sew along the blue body edges using a yarn needle and matching blue yarn, leaving an opening along the underside large enough to fit your hand through for stuffing.
- Do not sew through the spike stitches.
- Stuff the body lightly through the opening before closing the seam. See stuffing guide below.
- Continue sewing until the body is fully closed.
- Use black yarn to embroider the eyes on both sides of the head, placing them at the same position on each panel for symmetry.
Stuffing Guide
- Body: light. The pattern specifies light stuffing, and this is the right call for a flat construction toy. Heavy stuffing in a sewn-flat body pushes the panels apart and distorts the silhouette, making the stegosaurus look swollen rather than scaled.
- Legs: not stuffed. They are flat tab shapes and stay that way.
- Head and tail: not stuffed, as these are worked extensions of the flat body panel.
- The spikes: leave completely free. They are surface stitches and stuffing cannot enter them.
One thing that surprises makers: because the two panels are identical, the belly bridge and leg construction ends up on the inside of the toy when the panels are held together face-to-face. Make sure the leg and belly stitches on both panels sit on the correct inner-facing sides before you begin seaming.

Troubleshooting
- My body rows are not lying flat. The chain-2 turning chain for hdc can pull the edges inward if worked too tightly. Loosen your grip on the turning chains only, then work the stitches in the row normally.
- The head section is too wide and does not look like a snout. Row 3 of the head should taper noticeably because of the decrease at the end. If it reads as the same width as row 2, the decrease was likely missed or worked as a plain hdc. Check the row before seaming.
- The spike shells are uneven. This usually means the skip-stitch spacing drifted during the repeat. Count your skips carefully on the first two shells, then eyeball the rest of the edge by matching that interval. Minor unevenness reads as texture rather than error once the toy is assembled.
- The tail curls upward instead of lying flat. The stitch-height taper from sc to tr naturally adds some curve. Blocking lightly with a damp cloth and leaving it flat to dry will reduce this. You can also slip stitch the tail tip to the body edge to hold it in position.
- The two panels do not match exactly. Small differences in row tension between the first and second panel are normal. Align the outside edges when pinning before seaming and ease any excess into the seam rather than trying to redo a panel.
- The stuffing shows through the seam. Either too much stuffing was used or the seam stitches are too widely spaced. Use a mattress stitch or whip stitch close together and reduce the stuffing. Light really does mean light with this construction.

Yarn Substitution and Size Scaling
Any smooth DK or light worsted yarn on a 4.0 mm hook will give you a similar result. Avoid textured yarns for the body because the row structure is already subtle and a fuzzy or bouclé yarn will hide the shape entirely. The spike section in particular reads much better in a smooth yarn where each shell stitch is visible.
To scale up, move to a heavier yarn and a larger hook while keeping all the row counts identical. The stitch counts per row will stay the same but each stitch will be physically larger, giving you a proportionally bigger dinosaur. Scaling down works the same way in reverse.
FAQ
- Do I need to make the tail and head as separate pieces? No. They are built directly into the edge of the body panel, not added afterwards. The pattern constructs the whole body, tail and head in one connected piece per panel.
- Can I use safety eyes instead of embroidered eyes? You can, but you would need to insert them into one panel before assembly, positioned on the head section between rows 2 and 3. Safety eyes cannot be added after the two panels are sewn together. Embroidered eyes are safer for children and simpler to place symmetrically on both sides.
- My legs look too short. The legs are intentionally stubby tab shapes, three rows of stitches each. The stegosaurus sits low to the ground in the reference animal and the short legs are part of the silhouette. If you want longer legs, add one or two more hdc rows to each leg section on both panels before working the belly bridge.
- How do I keep the spike ridge consistent between the two panels? Count and mark the starting stitch position on the second panel before attaching the pink yarn. Beginning the first shell at the same point on both panels is the main variable. The shell repeat will adjust naturally if you started consistently.
- The seam is visible along the belly. Use a mattress stitch with blue yarn in a matching shade and keep your tension even. Working into the back loops of the edge stitches rather than the full stitch can help the seam sit flatter and less visibly.