
Crochet Shiba Inu Amigurumi Free Pattern Step by Step
Tuck this tiny crochet Shiba Inu amigurumi into a gift box for a Shiba owner, or sit a matching pair side by side on a desk shelf. Shiba Inu fans who miss their pup at work can keep a mini Shiba Inu plush by the monitor, where it takes up less space than a coffee mug.
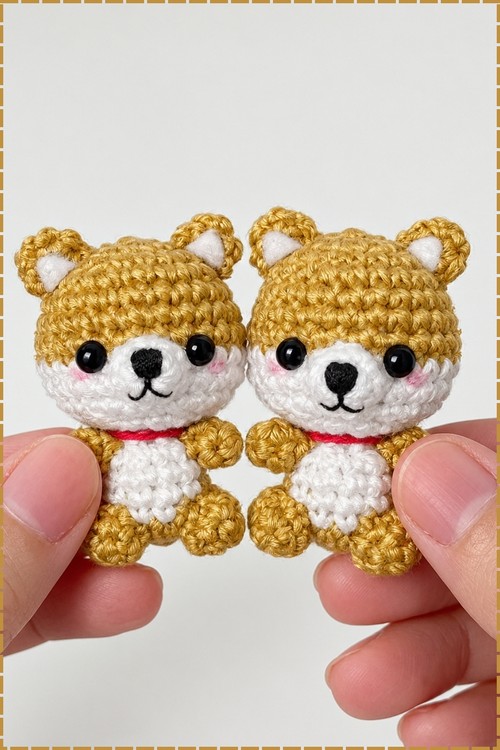
Heart nose and a red collar are why this crochet Shiba Inu amigurumi plush lands in so many pattern requests. Shiba owners want their own dog in yarn. The white muzzle markings match the real breed closely enough that people notice. Makers keep asking for the miniature size specifically.
Crochet Shiba Inu Amigurumi Plush
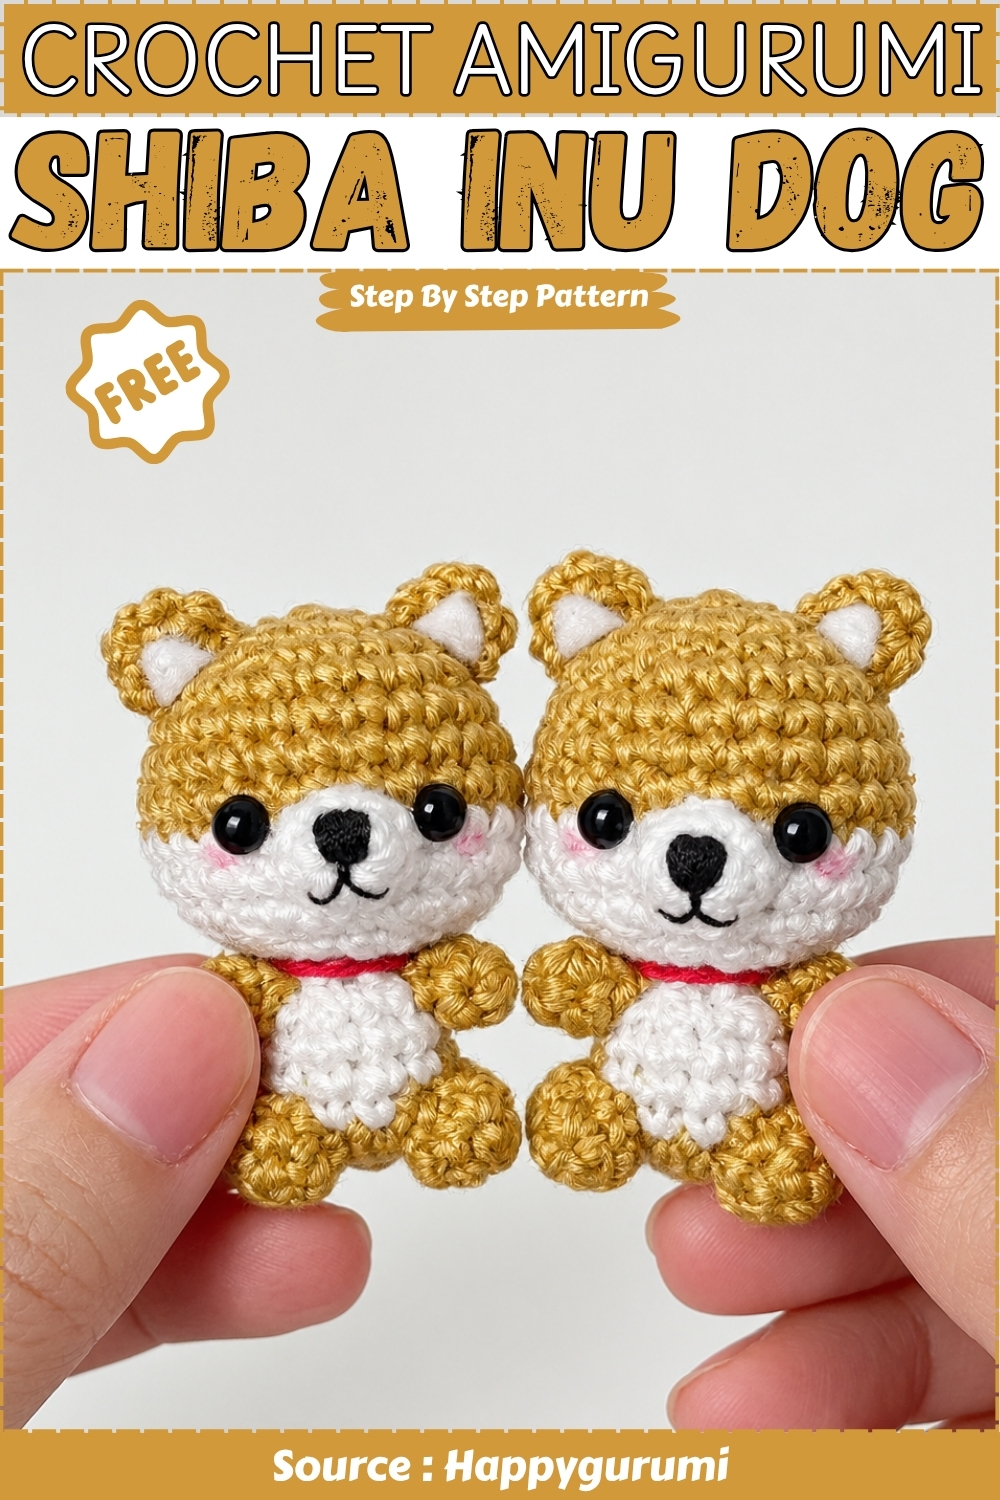
Everything here fits between two fingertips, with the head taking up more room than the body and limbs combined. Golden tan covers the back, ears, arms, and legs, while white fills the muzzle, chest, and the inner ear triangles. The nose is a black heart shape with a curved line under it, pink cheeks sit beside the eyes, and a thin red collar runs around the neck. Head, body, ears, and four small limbs work separately at this scale. Tiny pieces mean less yarn but tighter stitching. Sewing limbs onto something this small, without the joins showing, is the part that decides the finish.
Materials and Tools
- Orange yarn
- Cream yarn
- Black yarn for the face embroidery
- A crochet hook suitable for your yarn
- Fiberfill stuffing
- Safety eyes
- Yarn needle
- Stitch marker
- Scissors
The pattern gives no hook size, yarn weight, or eye size. Worsted weight with a 3.5 mm hook is the sensible default at these stitch counts, which should give a dog around 18 to 20 cm tall. Treat that as approximate rather than something the designer specified.
A word on the orange. Most yarns sold as orange read as pumpkin, which pushes the finished dog toward fox territory. What you actually want is closer to a light rust or a caramel. Hold the skein next to a photo of a real shiba before you commit to two hundred grams of it.
Abbreviations
- MR: magic ring
- sc: single crochet
- inc: increase, meaning 2 sc worked into one stitch
- dec: decrease, meaning sc 2 stitches together
- sl st: slip stitch
- ch: chain
Pieces List
- Head: make 1, in orange
- Muzzle: make 1, in cream
- Ears: make 2, in orange
- Body: make 1, in orange
- Legs: make 4, in orange
- Tail: make 1, in orange
Nine crocheted pieces in total. The head and body take the bulk of the time, and the four legs are almost identical to the tail, so batch them together in one sitting.
Size and Timing
Estimates based on the yarn and hook suggested above, not on anything stated in the pattern. A 36 stitch head usually lands somewhere near 9 cm across, with a finished dog around 18 to 20 cm sitting. Allow three to four hours in total. The head is roughly an hour of that, and the small pieces go quickly once you have the rhythm.
Helpful Notes Before Starting
- Use a stitch marker and move it up at the start of each round. The head runs five plain rounds in a row and it is easy to drift.
- Work in continuous rounds unless a round tells you otherwise. Do not join.
- Keep your stitches tight. Loose fabric on a sphere this size lets the stuffing show through, and it shows most on the orange.
- Invisible decreases give a smoother finish on the head and body closing rounds. Work through the front loops only of the two stitches rather than both loops.
- Stuff in stages as you go rather than all at once at the end.
The Pattern
Head
Worked in continuous rounds using orange yarn.
- Round 1: MR, 6 sc [6]
- Round 2: Inc in every stitch [12]
- Round 3: 1 sc, 1 inc, repeat [18]
- Round 4: 2 sc, 1 inc, repeat [24]
- Round 5: 3 sc, 1 inc, repeat [30]
- Round 6: 4 sc, 1 inc, repeat [36]. Checkpoint: a flat circle that lies down on the table without lifting at the edges. If it is already domed, your tension is tight enough that you should consider going up a hook size.
- Rounds 7 to 11: 36 sc [36]. Checkpoint: by round 11 this should be a deep open bowl with straight sides, roughly as tall as it is wide across the opening.
- Insert the safety eyes between rounds 8 and 9, spaced evenly
- Begin stuffing firmly
- Round 12: 4 sc, 1 dec, repeat [30]
- Round 13: 3 sc, 1 dec, repeat [24]
- Round 14: 2 sc, 1 dec, repeat [18]. Checkpoint: the opening has clearly pulled in and the piece should already read as a ball rather than a cup. Top up the stuffing now, since this is the last comfortable moment.
- Round 15: 1 sc, 1 dec, repeat [12]
- Round 16: Dec around until closed [6]. Checkpoint: a firm even sphere with no flat side. Roll it on the table. It should not favour one position.
- Fasten off and weave in the ends
The widest point is 36 stitches at round 6. The five plain rounds that follow are what let the sphere round out properly before the decreases begin.
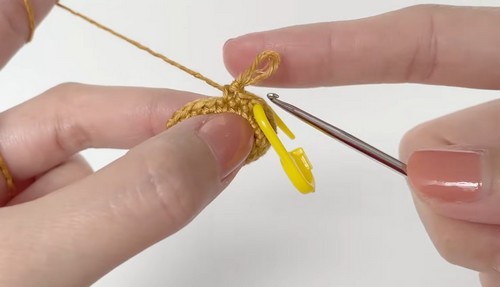
Muzzle
Worked in cream yarn.
- Round 1: MR, 6 sc [6]
- Round 2: Inc around [12]
- Round 3: 1 sc, 1 inc, repeat [18]
- Round 4: 18 sc [18]. Checkpoint: a shallow disc with a short rim, not a cup. It should sit against the curve of the head without gaping at the edges.
- Lightly stuff
- Sew to the lower front of the head
- Embroider a small triangular nose using black yarn
- Add a short line under the nose
Sit the muzzle slightly below the eye line rather than level with it. Keep the stuffing light so it stays close to the head instead of jutting out.
If you're new to crocheting toys, the video tutorial below shows you exactly what each round should look like, you've got this!
Ears
Make 2, in orange.
- Round 1: MR, 6 sc [6]
- Round 2: 1 sc, 1 inc, repeat [9]
- Round 3: 2 sc, 1 inc, repeat [12]. Checkpoint: a small cone, wider at the open end than at the magic ring.
- Rounds 4 to 6: 12 sc [12]. Checkpoint: a short tube with one rounded closed end. Pinch the open end flat and it should form a rough triangle, which is the shape you are sewing down.
- Flatten the base slightly
- Do not overstuff
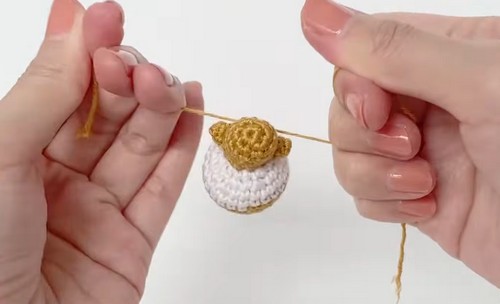
- Sew to the top of the head, angled slightly inward
Flattening the base is what lets the ear sit against the curve of the head instead of standing off it. The inward angle is the single biggest thing separating a shiba from a fox, so exaggerate it more than looks correct while pinning.
Body
- Round 1: MR, 6 sc [6]
- Round 2: Inc around [12]
- Round 3: 1 sc, 1 inc, repeat [18]
- Round 4: 2 sc, 1 inc, repeat [24]
- Round 5: 3 sc, 1 inc, repeat [30]. Checkpoint: a flat circle noticeably smaller than the head circle. It should be, since the body tops out at 30 against the head's 36.
- Rounds 6 to 10: 30 sc [30]. Checkpoint: an open cup with straight sides, shorter and squatter than the head was at the same stage.
- Begin stuffing
- Round 11: 3 sc, 1 dec, repeat [24]
- Round 12: 2 sc, 1 dec, repeat [18]
- Round 13: 1 sc, 1 dec, repeat [12]
- Round 14: Dec around until closed [count not stated; works out to 6]. Checkpoint: a firm oval that sits flat on its side without rolling.
- Fasten off
Stuff the body firmly but stop short of packing it. An overpacked body loses the slight oval shape and starts fighting the head for attention.
Legs
Make 4, in orange.
- Round 1: MR, 6 sc [6]
- Round 2: 1 sc, 1 inc, repeat [9]
- Rounds 3 to 6: 9 sc [9]. Checkpoint: a short stubby cylinder, closed and rounded at one end. All four should be the same length, so count rounds rather than comparing by eye.
- Stuff lightly
- Flatten the top
- Sew two to the front and two to the back of the body
Tail
- Round 1: MR, 6 sc [6]
- Round 2: 1 sc, 1 inc, repeat [9]
- Rounds 3 to 10: 9 sc [9]. Checkpoint: a long narrow tube, roughly twice the length of a leg.
- Stuff lightly
- Curve into the classic shiba curl
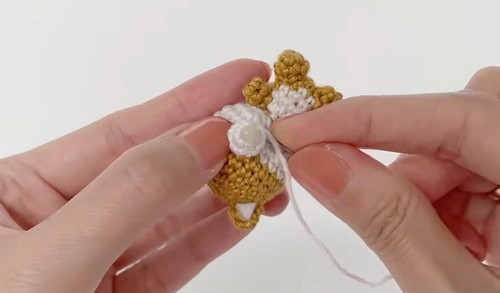
- Sew securely to the back of the body
Safety Eyes
- The eyes go in between rounds 8 and 9 of the head, spaced evenly on either side of the front. That timing is correct as written and worth following exactly. Rounds 7 to 11 are the widest, most open part of the head, so you can reach both hands inside to fit the washers. Once round 12 starts the decreases and the stuffing goes in, that window closes.
- Check placement before pushing the washers home. Sit the eyes in position, hold the head at arm's length, and look at it straight on. Eyes that seem level at close range often are not. A seated washer does not come off without cutting the post.
- Position the eyes with the muzzle in mind. They should sit above where the cream piece will go, not level with it, or the face reads as startled.
- For any dog going to a child under three, leave the safety eyes out and embroider them with black yarn instead. Two small satin stitches at the same position give the same expression, and safety eyes can work loose over time. If you go that route, skip the pipe cleaner in the tail as well.
Assembly
- Sew the head to the body first. Both pieces are closed spheres, so hold them together and find the flattest contact point before you start stitching.
- Pin before sewing. Push a pin through the join and check the dog from the front and from the side. A head that looks straight from one angle is often rotated when viewed from the other.
- Sew all the way around the join, catching a stitch from the head and then one from the body alternately. Go around twice. A shiba head is heavy relative to its body and a single pass will loosen.
- Attach the muzzle to the lower front of the head, centred below the eyes, if you have not already sewn it.
- Pin both ears before sewing either one. Angle them inward and slightly forward, then step back and look at the face from a metre away. Adjust until it reads as a dog. This is the step that decides whether the whole thing works.
- Position the legs symmetrically, two at the front and two at the back, spaced so the dog sits level. Sit it upright on a table and adjust before committing.
- Sew the tail to the back of the body in an upward curl, securing
- Adjust the stuffing through the face with your fingers once everything is attached, and weave in every end inside the body.

Stuffing Guide
- The head goes firm. It holds the eyes and it is the heaviest piece, so any softness shows immediately as a drooping neck join.
- The body is firm but slightly less packed than the head, enough to keep its oval shape while still giving a little when squeezed.
- The muzzle stays light. Overstuffed, it pushes away from the head and leaves a visible gap around the sewn edge, which is the most common thing that ruins this face.
- Ears take almost nothing. A pinch at most. The pattern says not to overstuff them for good reason, since a stuffed ear stands up round instead of flattening into a triangle.
- Legs stay light and the tail lighter still.
- Overstuffing shows first across rounds 7 to 11 of the head, where the stitches spread and you can see white filling through the orange. If that happens, take some out rather than pressing on.
Troubleshooting
- My dog looks like a fox. It is the ears almost every time. Move them forward and angle them further inward. Ears set too far back and too upright read as fox, and the fix takes five minutes of unpicking.
- The muzzle gapes at the edges. Too much stuffing in it. Pull some out and sew around the full circumference rather than tacking at four points.
- There is a visible gap where the head meets the body. Both pieces are closed spheres, so they only touch at one point. Flatten each slightly at the contact area with your fingers before sewing, and add a little extra stuffing under the join to fill the hollow.
- The head keeps tipping forward. Usually an understuffed neck area rather than a bad seam. Push extra filling into the base of the head before you close it, or work a few extra stitches at the back of the join to pull the head upright.
- The tail straightens out overnight. Expected. Light stuffing alone will not hold a curl.
- The dog will not sit level. Check that all four legs have the same number of rounds. Nine stitches across six rounds is easy to miscount, and one leg a round short will tip the whole toy.
- My stitches show gaps and the stuffing peeks through. Go down a hook size and remake the head. It is the only real fix, and it is worth it on the piece people look at.
- The eyes ended up crooked after the washers went on. Cut the posts flush with side cutters, remove the eyes, and place fresh ones a stitch over. Prising a seated washer off tears the fabric. Keep a spare pair on hand.
Yarn Substitution and Size Scaling
- Worsted with a 3.5 mm hook is the safe pairing. Cotton gives crisper stitch definition on the face, which suits the embroidered nose, but it is heavier and the head will pull forward more at the neck.
- Avoid anything fluffy. A halo hides the muzzle edge and the ear shape, which are the two things doing all the work on this design.
- Every stitch count stays the same at any size. Only the hook and yarn change. DK with a 3 mm hook gives a dog around 14 to 15 cm. Chunky with a 5 mm hook pushes it past 26 cm. Scale your safety eyes with the yarn, or the proportions go wrong immediately.
Colour and Customization Ideas
- The pattern uses cream for the muzzle only. Real shibas have cream on the cheeks, chest, and inner legs, so adding cream to the front two legs and a small chest patch gets you much closer to the real thing for very little extra work
- Black and tan instead of orange gives you a black shiba, keeping the cream muzzle exactly as written
- Cream throughout produces the white shiba variant, though you lose the muzzle contrast, so embroider a slightly larger nose to compensate
- A small crocheted collar in red sits well at the head and body join and hides an untidy seam
- Sesame shading can be faked by working rounds 7 to 11 of the head in a slightly darker shade
- Embroider the eyebrow dots above the eyes in cream. It is a tiny detail and it changes the expression completely
Toy Safety
- Safety eyes are the only hard component. Fit them properly, tug hard on each before assembly, and swap them for embroidery for any child under three.
- Skip the pipe cleaner option in the tail entirely for a young child. Wire ends work their way through crochet fabric over time regardless of how well you fold them.
- Sew the ears, legs, and tail down around their full contact edges rather than tacking at a couple of points. Small pieces that come off are the main hazard on a toy like this. Check every join again after a few weeks of real handling.
Frequently Asked Questions
- What size safety eyes should I actually buy? For a 36 stitch head in worsted, 8 mm or 9 mm looks right. Smaller reads as sleepy and larger tips it into cartoon territory, which some people want. If you can, finish the head before ordering and hold the options against the fabric.
- Can I make the muzzle in a different colour to match my own dog? Yes, and it works well. The muzzle is a separate piece sewn on at the end, so nothing else in the pattern changes. Just keep enough contrast with the body colour that the shape still reads from a distance.
- Why is the body only 30 stitches when the head is 36? That gap is the whole look. The head is meant to be bigger than the body, which gives the chibi proportions. If you make them the same width you get a realistic dog shape, which is a fine thing to want but it is a different toy.
- How do I get the ears symmetrical? Pin both before sewing either, then photograph the face on your phone. A photo shows an uneven placement your eye will happily forgive in person. Count the rounds from the top of the head to each ear base as well, rather than measuring with your fingers.
- Do I need the invisible decrease or will a normal one do? A normal decrease works fine on the body, legs, and tail. On the head closing rounds it leaves small visible bumps around the crown. Since that area is only really seen from above, plenty of people skip it, but the head does look noticeably smoother with it.