Adorable Snorlax Plush Crochet Pattern You’ll Want To Nap With
Immersive DIY projects often culminate in the creation of a Crochet Snorlax Plush, which stands out as a monumental tribute to the world’s most famous heavy sleeper. This handcrafted marvel features a wide, inviting torso and those unmistakable pointed ears, replicating the sleepy giant's endearing look through intricate stitch work. Owners often utilize this bulky masterpiece as a decorative statement piece or a supportive nursery prop, given its impressive scale and density.
Crochet Snorlax Plush
The sheer volume of the design provides the unique ability to act as a plush armchair companion, offering a tactile warmth that store-bought toys rarely achieve. Every loop and turn of the yarn contributes to a sturdy, substantial finish that captures the essence of tranquility and comfort for any Pokémon enthusiast.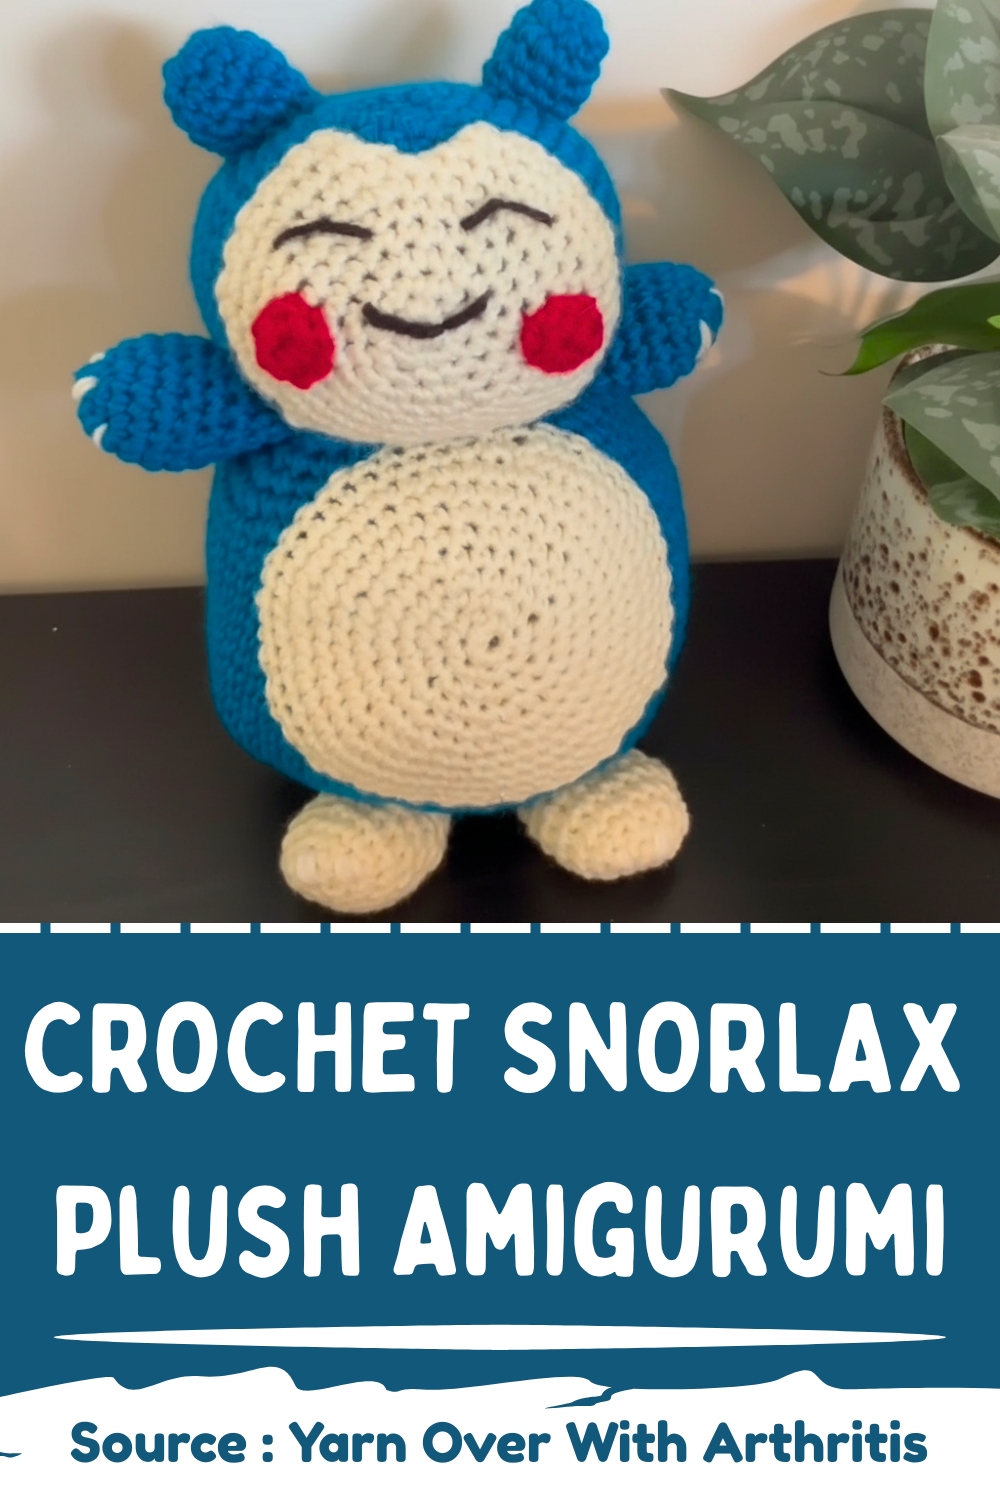
Skill Level
-
Intermediate beginner due to the multiple separate components and assembly requirements.
Finished Size
-
Approximately 8 to 10 inches tall depending on your personal tension and hook size.
Materials
-
Teal eight-ply yarn, Cream yarn, small amount of Black and Red yarn
-
Crochet hook
-
Stitch marker
-
Stuffing
-
Sewing needle
Abbreviations
-
SC: Single Crochet
-
Inc: Increase (two single crochets in one stitch)
-
Dec: Decrease (joining two stitches together)
Helpful Notes Before Starting
-
Use a stitch marker in the first stitch of every round to keep track of your progress in continuous spirals.
-
Choose a hook size slightly smaller than what the yarn label suggests to ensure your stitches are tight enough to hide the stuffing.
-
When working with teal and cream, keep your hands clean to avoid transferring dark fibers onto the lighter cream sections.
Construction Overview
-
The body and head are worked as two separate spheres of different sizes to create the characteristic stout silhouette.
-
The belly and face patch are flat or slightly domed circles that are appliquéd onto the main body pieces.
-
Smaller limbs and ears are added last to provide personality and balance to the figure.
Stitch and Shaping Clarity
-
Increases should be spaced evenly to create a smooth, rounded surface without visible "corners."
-
For the decreases in the later rounds, try using the invisible decrease method by working only in the front loops to keep the texture consistent.
-
The face patch requires a bit of manipulation during sewing to achieve the "V" shape mentioned in the instructions.
Body (Teal Yarn)
-
Make a slip knot, chain 4, and slip stitch into the first chain to form a magic circle.
-
Round 1: 6 SC in the circle (6)
-
Round 2: Inc in every stitch (12)
-
Round 3: (SC 1, Inc) repeat (18)
-
Round 4: (SC 2, Inc) repeat (24)
-
Round 5: (SC 3, Inc) repeat (30)

-
Round 6: (SC 4, Inc) repeat (36)
-
Round 7: (SC 5, Inc) repeat (42)
-
Round 8: (SC 6, Inc) repeat (48)
-
Round 9: (SC 7, Inc) repeat (54)
-
Rounds 10–24: SC in each stitch (54)
-
Round 25: (SC 7, Dec) repeat (48)
-
Round 26: (SC 6, Dec) repeat (42)
-
Round 27: (SC 5, Dec) repeat (36)
-
Round 28: (SC 4, Dec) repeat (30)
-
Round 29: (SC 3, Dec) repeat (24)
-
Round 30: (SC 2, Dec) repeat (18)
-
Round 31: Stuff firmly, then (SC 1, Dec) repeat (12)
-
Round 32: Dec in every stitch (6)
-
Fasten off and close the hole neatly.
Head (Teal Yarn)
-
Begin with a magic circle and 6 SC.
-
Round 2: Inc in each stitch (12)
-
Continue increasing up to (SC 6, Inc).

-
Rounds 9–15: SC in each stitch.
-
Round 16: (SC 6, Dec) repeat.
-
Continue decreasing until (SC 2, Dec).
-
Stuff before finishing.
-
Round 20–21: (SC 1, Dec) and then Dec around.
-
Fasten off and close the hole.
Cream Belly (Cream Yarn)
-
Make a magic circle and 6 SC.
-
Round 2: Inc in each stitch.
-
Round 3: (SC 1, Inc) repeat.
-
Round 4: (SC 2, Inc) repeat.
-
Round 5: (SC 3, Inc) repeat.
-
Round 6: (SC 4, Inc) repeat.
-
Round 7: (SC 5, Inc) repeat.
-
Round 8: (SC 6, Inc) repeat.
-
Round 9: (SC 7, Inc) repeat.
-
Rounds 10–11: SC in each stitch.
-
Fasten off with a long tail and sew onto the body.

Feet (Make 2 – Cream Yarn)
-
Make a magic circle and 6 SC.
-
Round 2: Inc in each stitch.
-
Round 3: (SC 1, Inc) repeat.
-
Rounds 4–5: SC in each stitch.
-
Round 6: (SC 1, Dec) repeat.
-
Lightly stuff and close the opening.
-
Sew the feet to the front bottom of the body.
-
Embroider three small claws on each foot with white yarn.
Ears (Make 2 – Teal Yarn)
- Magic circle with 6 SC.
-
Round 2: (SC 1, Inc) repeat.
-
Rounds 3–5: SC in each stitch.
-
Lightly stuff, close, and sew to the top of the head.
Arms (Make 2 – Teal Yarn)
-
Magic circle with 6 SC.
-
Round 2: Inc in each stitch.
-
Round 3: (SC 1, Inc) repeat.
-
Rounds 4–6: SC in each stitch.
-
Round 7: (SC 1, Dec) repeat.
-
Lightly stuff, close, and sew to the sides of the body.
-
Embroider claws with white yarn.
Face Patch (Cream Yarn)
-
Magic circle with 6 SC.
-
Round 11: Inc in each stitch.
-
Round 3: (SC 1, Inc) repeat.
-
Round 4: (SC 2, Inc) repeat.
-
Round 5: (SC 3, Inc) repeat.
-
Rounds 6–7: SC in each stitch.
-
Fasten off and sew onto the head, forming a gentle “V” at the top.

Assembly Guidance
-
Use glass-headed pins to secure all parts before sewing to ensure everything is symmetrical.
-
Center the cream belly on the front of the body first, as this acts as your visual anchor for the rest of the limbs.
-
When attaching the head, use a ladder stitch (hidden stitch) around the circumference to ensure it doesn't wobble.
-
Position the arms so they sit slightly forward on the body, which gives the character a more natural, inviting look.
Eye and Facial Feature Placement
-
The face patch should be centered on the head with the top "V" portion pointing toward the crown.
-
Place the black eye lines just above the center of the patch to create a calm or sleepy expression.
-
Ensure the mouth is embroidered centered horizontally between the eyes for a balanced face.
Stuffing Tips
-
Add stuffing in small golf-ball-sized amounts to avoid lumps and to fill the shape evenly.
-
Focus on filling the bottom of the body more heavily to help the toy sit upright on its own.
-
Do not overstuff the arms and feet, as they should remain slightly soft to lie flat against the body.
Finishing Notes
-
Weave all yarn tails deeply into the body of the toy to prevent them from slipping out over time.
-
Tug gently on the ears and arms after sewing to make sure the attachment is secure enough for handling.
-
Use a damp cloth to lightly steam the cream patches if they are curling at the edges before you sew them down.
Beginner Notes
-
If your magic circle feels too difficult, you can chain 2 and work your first 6 SC into the second chain from the hook.
-
Take your time with the face patch, as the "V" shape is what gives this specific character its iconic look.
-
If you see gaps between your stitches where stuffing shows through, try a smaller hook size for your next project.
Troubleshooting
-
If the head seems too heavy for the body, add a bit more stuffing right at the neck join to provide internal support.
-
If the feet aren't level, reposition them while pinned until the toy sits without tipping backward.
-
If the embroidered claws look messy, try using a thinner weight yarn or embroidery floss for more precision.
Customization Ideas
-
Change the teal yarn to a deep forest green or a bright blue for a different variety of the same creature.
-
Add a small crochet berry or snack for the character to hold between its paws.
-
Use safety eyes instead of embroidery if you prefer a more three-dimensional look for the face.