Superb Looking Peashooter Amigurumi Free Crochet Pattern
This Peashooter amigurumi crochet pattern is a fun and creative project inspired by a well known game character that instantly adds personality to your handmade collection. The pattern guides you step by step to create the signature round head, detailed mouth cannon, sturdy stem, and layered leaves that give the Peashooter its iconic look.
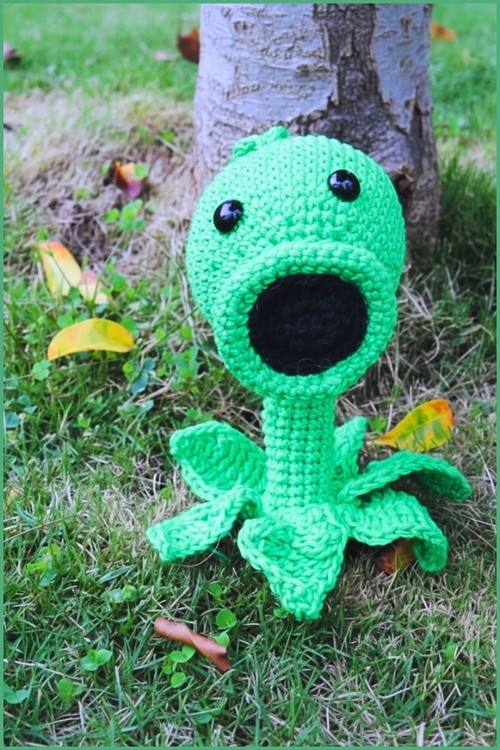
Crochet Peashooter Amigurumi

It is perfect for gamers, gift making, or decorative displays, and can easily be customized by adjusting yarn colors, size, or facial details. Whether you are making it as a collectible plush or a playful desk companion, this crochet pattern offers both structure and creative freedom.
Head and Mouth Base
- Start with a magic ring and crochet 8 single crochet
- Row 1: Increase in each stitch to make 16 single crochet
- Row 2: Crochet 16 single crochet with no changes
- Row 3: Work 1 increase and 1 single crochet around, add 1 extra increase at the end for 26 single crochet
- Row 4: Crochet 26 single crochet with no changes

- Row 5: Work 1 increase and 1 single crochet around to reach 50 single crochet
- Rows 6 to 15: Crochet 50 single crochet evenly
- Row 16: Work 4 single crochet and 1 decrease around to get 39 single crochet
- Row 17: Work 4 single crochet and 1 decrease around to get 32 single crochet
- Row 18: Work 4 single crochet and 1 decrease around to get 26 single crochet
- Row 19: Work 2 single crochet and 1 decrease around to get 18 single crochet and add stuffing
- Row 20: Crochet 18 single crochet with no changes
- Row 21: Work 1 increase and 2 single crochet around to get 24 single crochet
- Row 22: Crochet 24 single crochet with no changes
- Row 23: Work 1 increase and 2 single crochet around to get 31 single crochet
- Rows 24 and 25: Crochet 31 single crochet evenly

- Row 26: Work 4 single crochet and 1 increase around to get 36 single crochet
- Rows 27 and 28: Crochet 36 single crochet evenly
- Finish with a slip stitch and roll the edge outward to form the mouth shape
Inner Cannon Mouth Insert
- Start with a magic ring and crochet 8 single crochet
- Row 1: Increase in each stitch to make 16 single crochet
- Row 2: Crochet 16 single crochet with no changes
- Row 3: Work 1 increase and 1 single crochet around, fasten off and sew inside the mouth
- Attach 14 mm safety eyes to the head


Stem
- Start with a magic ring and crochet 10 single crochet
- Row 1: Increase in each stitch to make 20 single crochet
- Rows 2 to 4: Crochet 20 single crochet evenly
- Row 5: Work 2 single crochet and 1 decrease around to get 13 single crochet
- Rows 6 to 22: Crochet 13 single crochet evenly, stuff firmly and insert a supportive wire inside
Leaves
- Base leaves make six by starting with 13 chains
- Work along one side with double crochet, increases, treble crochet, and slip stitches to form the leaf shape
- Work the opposite side with slip stitches, single crochet, half double crochet, double crochet, and increases to complete the leaf
- Head leaf is made by chaining 4 and working 1 row of 4 single crochet, then sewing it to the top of the head
Assembly
- Sew the inner cannon securely into the rolled mouth opening
- Attach the stem to the bottom of the head
- Sew the six base leaves evenly around the bottom of the stem for balance