
No Sew Mini Coquette Ghost Amigurumi With Ruffle Skirt Crochet Free Pattern
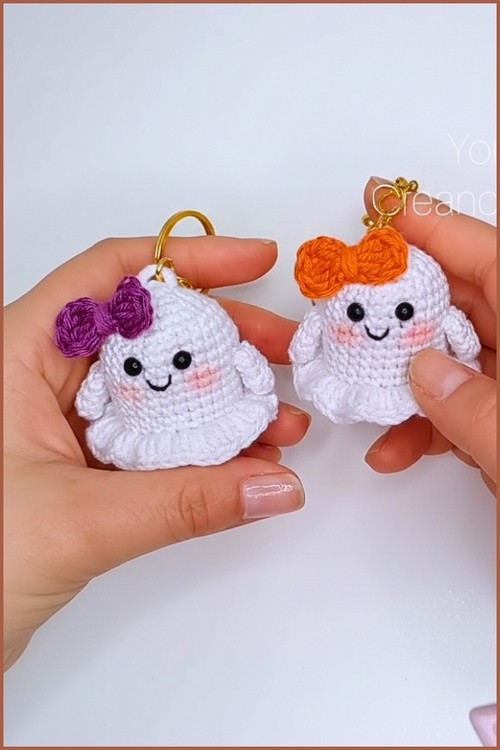
The Coquette Ghost Amigurumi Keychain is a tiny, charming crochet project designed to add a soft and playful touch to your accessories. Standing at approximately 5 cm tall, this ghost features a sweet ruffled skirt, delicate arms, and a signature coquette bow that gives it a cute and stylish personality.
Crochet Coquette Ghost

Skill Level
Beginner to intermediate.
You’ll need confidence with basic stitches like single crochet, increases, decreases, and working in the round. The shaping and assembly are what bring this project to life, so take your time there.
Finished Size
Size depends on yarn and hook choice, but using standard worsted weight yarn and a 3.5–4 mm hook, the finished keychain plush will be small palm-sized and perfect for bags or keys.
Materials
- White yarn for the body
- Yarn in your preferred color for the bow
- 5 mm safety eyes
- Crochet hook suitable for your yarn
- Stuffing (polyfill)
- Tapestry needle
- Keychain ring
Abbreviations
- MR = Magic Ring
- sc = Single Crochet
- inc = Increase (2 sc in one stitch)
- dec = Decrease (invisible decrease recommended)
- ch = Chain
- dc = Double Crochet
- tr = Treble Crochet
- FLO = Front Loop Only
- BLO = Back Loop Only
Helpful Notes Before Starting
- This design is worked in continuous rounds, meaning you will not join at the end of each round. Use a stitch marker to keep track of the beginning of each round.
- The body is shaped gradually through increases and decreases, creating a rounded plush form. The skirt ruffle is added later using front loops, which gives it that layered, decorative look without extra sewing.
- Stuffing is added gradually to maintain shape without creating lumps.
Construction Overview
This amigurumi keychain is built in four main parts:
- Body – worked from top to bottom in continuous rounds with shaping and eye placement
- Skirt ruffle – added to exposed front loops for a layered effect
- Arms – small simple tubes sewn onto the body
- Bow – crocheted separately and attached at the end
Finally, facial embroidery and blush bring the character to life.
Step by Step Pattern
BODY
- Round 1: Create a magic ring and crochet 6 single crochet stitches
- Round 2: Increase in each stitch for a total of 12 stitches
- Round 3: Work 1 single crochet and 1 increase around for 18 stitches
- Round 4: Crochet 1 single crochet and 1 increase, then repeat 2 single crochet and 1 increase around, finishing with 1 single crochet for 24 stitches
- Round 5: Work 3 single crochet and 1 increase around for 30 stitches
- Rounds 6 to 10: Crochet 1 single crochet in each stitch around
- Place safety eyes between rounds 7 and 8 with four stitches between them
- Rounds 11 to 14: Crochet 1 single crochet in each stitch around
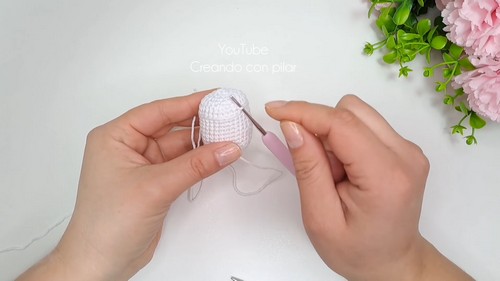
- Round 15: Crochet 30 single crochet stitches in back loops only
- Round 16: Crochet 30 single crochet stitches through both loops
- Round 17: Work 3 single crochet and 1 decrease around for 24 stitches
- Round 18: Work 2 single crochet and 1 decrease around for 18 stitches and stuff the body
- Round 19: Work 1 single crochet and 1 decrease around for 12 stitches
- Round 20: Work 1 single crochet and 1 decrease four times for 8 stitches
- Finish by closing the opening with a needle
LOWER SKIRT RUFFLE
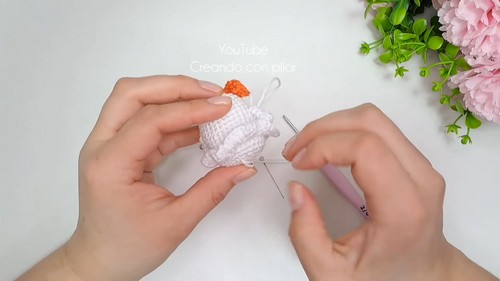
- Join yarn to the front loops left from round 15
- Crochet chain 2 and 1 double crochet in the same stitch, then work 2 double crochet stitches in each loop around
- Fasten off and weave in ends
- This ruffle works because front loops left behind act like a natural “edge,” giving structure so the skirt flares outward instead of collapsing into the body.
ARMS
- Round 1: Create a magic ring and crochet 6 single crochet stitches
- Rounds 2 to 4: Crochet 1 single crochet in each stitch
- Do not stuff and leave a tail for sewing
- Keeping the arms unstuffed makes them flexible and helps them sit naturally against the body instead of sticking outward stiffly.
COQUETTE BOW
- In a magic ring, crochet chain 3, 3 treble crochets, chain 3, and slip stitch
- Repeat the same sequence once more
- Close the ring and wrap yarn around the center to shape the bow
- The center wrapping is important because it defines the bow shape and keeps both loops evenly spread like a real ribbon bow.
ASSEMBLY AND DETAILS
Face Placement
- Embroider a small V-shaped or straight mouth centered slightly below the eyes.
- This simple mouth style keeps the expression soft and kawaii.
- Light pink blush below the eyes adds warmth and a gentle cute expression.
Arms Placement
- Sew the arms between rounds 9 and 10, about three stitches away from the eyes.
- This placement keeps the arms slightly forward-facing so they look naturally posed instead of too low or hidden in the body curve.
Bow Placement
- Attach the bow slightly to one side on top of the head.
- Off-center placement gives the plush a playful, stylized “coquette” personality instead of a perfectly symmetrical look.
Stuffing Tips
- Start stuffing after shaping begins (around round 16–18)
- Add small amounts gradually
- Push stuffing into edges and curves first, then fill center
- Avoid overstuffing the neck area to prevent distortion
Finishing Notes
- After closing the body, hide all yarn tails securely inside. Shape the plush gently with your hands to even out the stuffing.
- Check symmetry of eyes, arms, and bow before final tightening of stitches.
Beginner Notes
If this is your first shaped amigurumi:
- Mark every round carefully
- Don’t rush decreases; neat shaping depends on consistency
- Pause often to check stuffing and symmetry
- Use pins before sewing arms and bow
Troubleshooting
- My body looks uneven: Usually caused by inconsistent stitch counts—recount every few rounds.
- Eyes look misaligned: Before locking safety eyes, always step back and check from the front.
- Skirt flares too tightly: Make sure you are placing 2 double crochets in each front loop evenly.
Customization Ideas
- Change bow color for seasonal themes
- Add embroidered eyelashes for a softer face
- Use fluffy yarn for a plush cloud effect
- Turn it into a charm, bag clip, or mini plush display piece