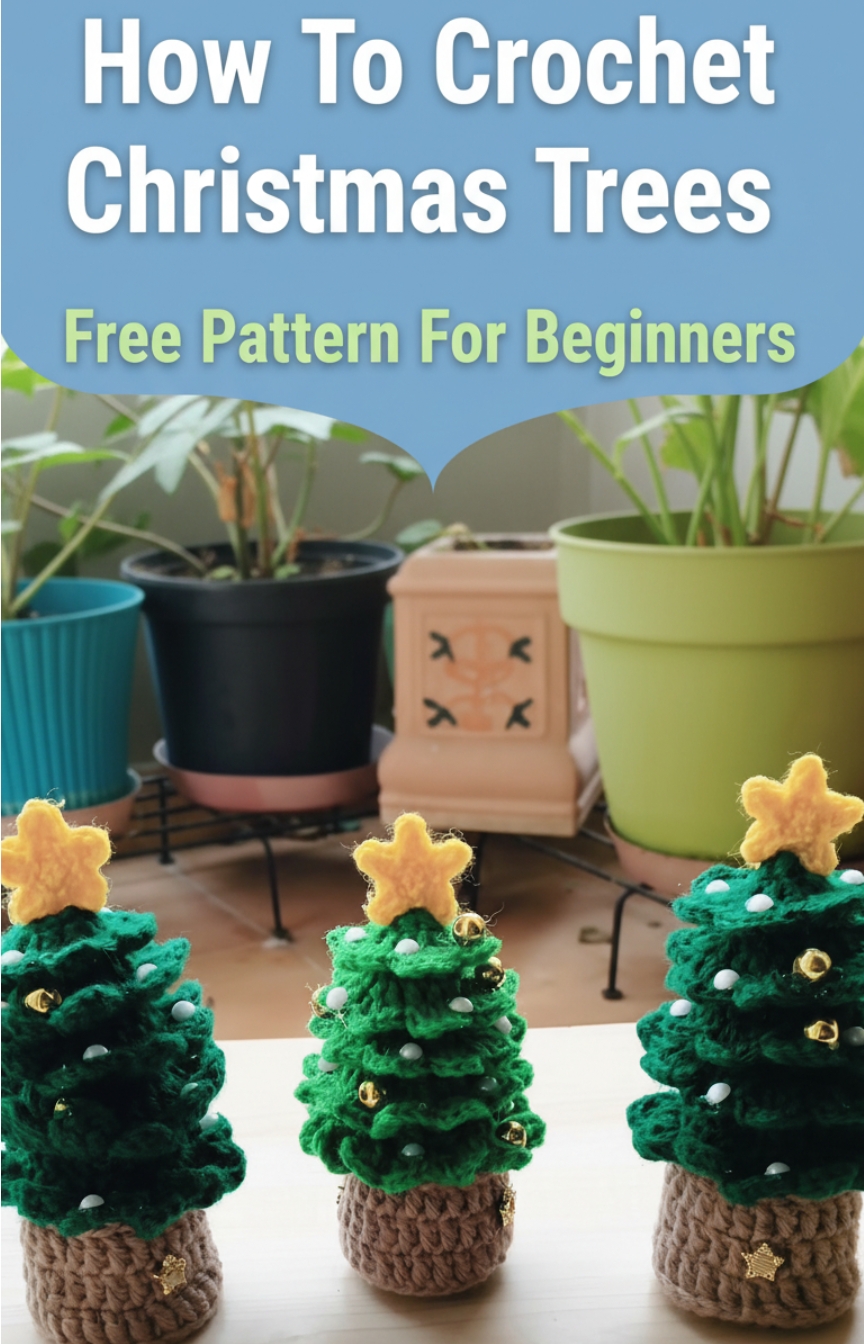
How To Crochet Christmas Trees Free Pattern For Beginners
This Crochet Christmas Trees pattern is a beginner-friendly project designed to help you create a charming handmade holiday decoration with simple stitches and clear construction. The pattern guides you through making a layered cone-style tree, a sturdy crochet pot, and a cute star topper, all assembled into a festive display piece.
Crochet Christmas Trees
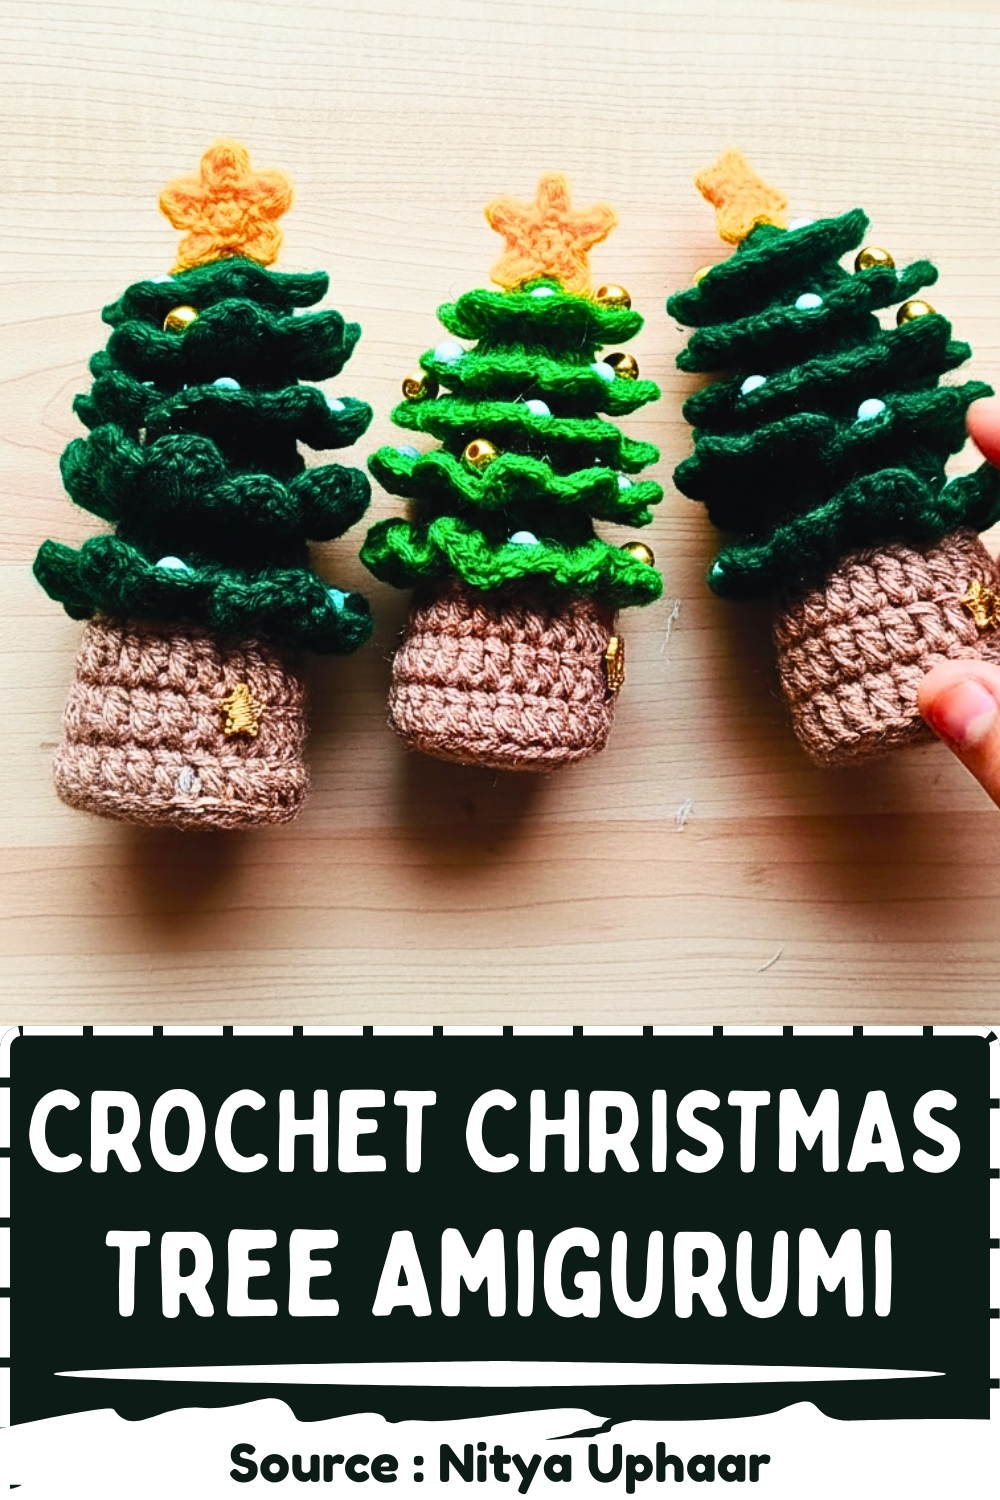
Perfect for home décor, gifting, or craft fairs, this crochet Christmas tree can be customized with different colors, beads, or ornaments to match any holiday theme. Its compact size and structured shape make it ideal for tabletops, shelves, or seasonal displays while remaining easy enough for confident beginners.
Materials
- Yarn 4-ply acrylic yarn in light green, light brown, and yellow
- Hook 2.5 mm crochet hook
- Other fiberfill, needle, scissors, glue, decorative beads or mini ornaments
Yellow Star
- Round 1 Start with a magic ring and work 5 single crochet into the ring, then join with a slip stitch
- Round 2 Chain 3, skip the first chain, slip stitch in the second chain, single crochet in the third chain, slip stitch into the next stitch on the base ring and repeat until 5 points are formed
- Assembly Make two identical stars and glue or sew them together back to back

Layer 1 Smallest
- Round 1 Magic ring, chain 2, work 6 double crochet into the ring and join
- Round 2 Chain 2, work 2 double crochet in every stitch for a total of 12 stitches
- Round 3 In one stitch work 2 double crochet, 2 chains, 2 double crochet, then in the next stitch work 1 single crochet and repeat around
Layer 2
- Round 1 Magic ring, chain 2, work 6 double crochet and join
- Round 2 Chain 2, work 2 double crochet in every stitch for 12 stitches
- Round 3 Work 3 double crochet and 1 increase repeatedly to reach 15 stitches
- Round 4 Work the leaf pattern by alternating leaf clusters and single crochet around

For Layer 3
- Round 1 Magic ring, chain 2, work 6 double crochet and join
- Round 2 Chain 2, work 2 double crochet in every stitch
- Round 3 Work 3 double crochet and 1 increase repeatedly
- Round 4 Work 4 double crochet and 1 increase repeatedly for 18 stitches
- Round 5 Work the leaf pattern around
Layer 4
- Round 1 Magic ring, chain 2, work 6 double crochet and join
- Round 2 Chain 2, work 2 double crochet in every stitch
- Round 3 Work 3 double crochet and 1 increase repeatedly
- Round 4 Work 4 double crochet and 1 increase repeatedly
- Round 5 Work 5 double crochet and 1 increase repeatedly for 21 stitches
- Round 6 Work the leaf pattern around

Layer 5 Largest
- Round 1 Magic ring, chain 2, work 6 double crochet and join
- Round 2 Chain 2, work 2 double crochet in every stitch
- Round 3 Work 3 double crochet and 1 increase repeatedly
- Round 4 Work 4 double crochet and 1 increase repeatedly
- Round 5 Work 5 double crochet and 1 increase repeatedly
- Round 6 Work 6 double crochet and 1 increase repeatedly for 24 stitches
- Round 7 Work the leaf pattern in front loops only, leaving back loops free
Pot
- Round 1 Magic ring, chain 2, work 12 double crochet
- Round 2 Work 2 double crochet in every stitch for 24 stitches
- Round 3 Work 1 double crochet in back loops only to create an edge
- Rounds 4 to 5 Work 1 double crochet in every stitch
- Round 6 Slip stitch in every stitch to finish the edge

Final Assembly
- Attach the star securely to the top of the smallest tree layer
- Stack and glue or sew all tree layers from smallest to largest
- Stuff the tree layers and the pot firmly with fiberfill
- Sew the pot to the back loops of the largest tree layer, matching all stitches evenly
- Decorate the tree by gluing beads or mini ornaments onto the leaf edges
