How To Crochet A Kawaii Duck Amigurumi Free Pattern Step By Step
This crochet duck amigurumi pattern helps you create an irresistibly cute bird plush with a soft rounded body and charming handmade details. The pattern is worked in continuous rounds, making it suitable for beginners while still enjoyable for experienced crocheters.
Crochet Kawaii Duck Amigurumi
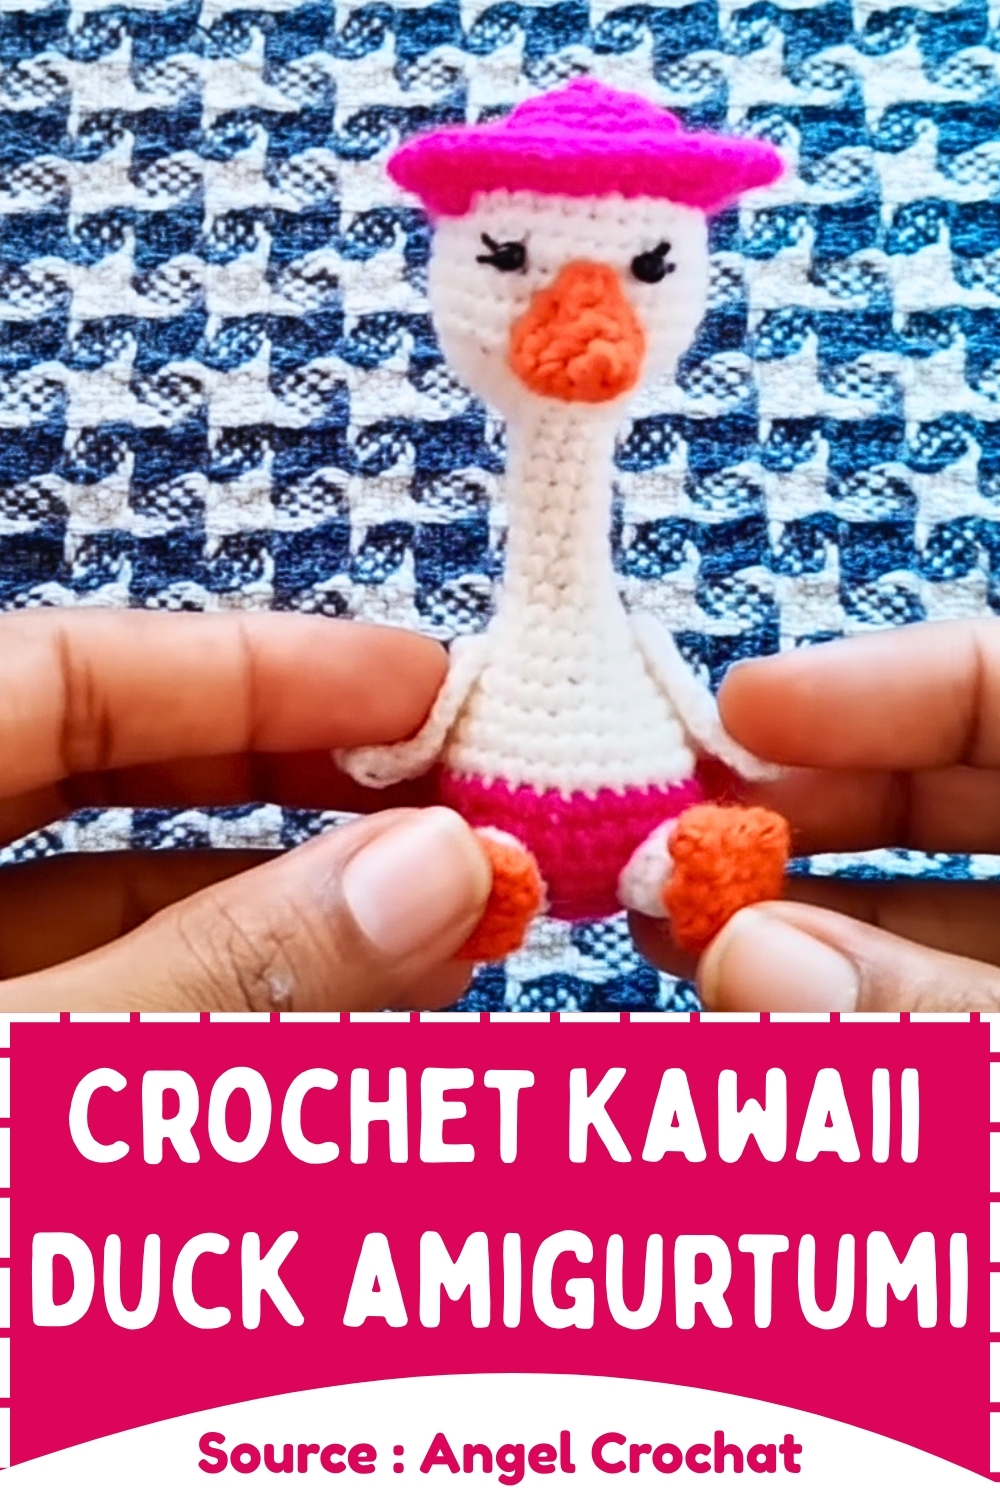


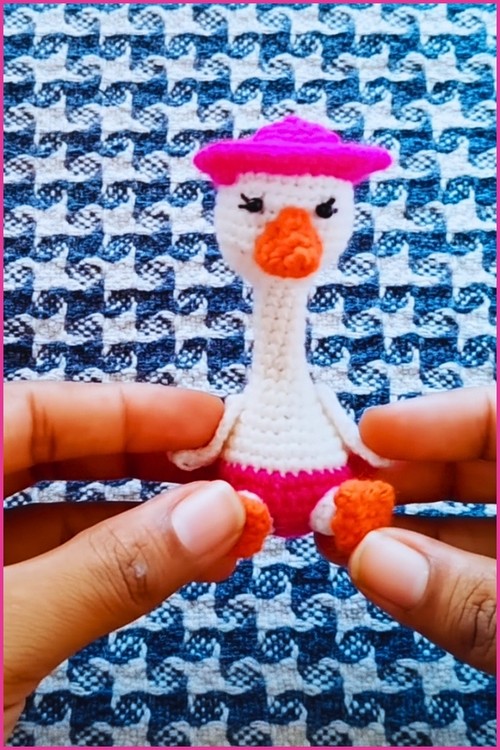
Few fiber crafts capture the heart quite like stitching a vibrant, oversized-head Crochet Kawaii Duck Amigurumi creation, which blends Japanese-style cuteness with everyday functionality. Boasting a plump silhouette and tiny stubby wings, this endearing accent works wonderfully as an eye-catching backpack accessory or a soothing sensory toy. Crafters will adore personalizing its tiny features, making each handmade piece uniquely magical.
Materials
-
Yarn in pink, white, and orange
-
Crochet hook suitable for your yarn
-
Fiberfill stuffing
-
Yarn needle
-
Safety eyes or beads
-
Scissors
Abbreviations
-
mr: Magic ring
-
sc: Single crochet
-
inc: Increase
-
dec: Decrease
-
ch: Chain
-
dc: Double crochet
-
sl st: Slip stitch
Construction Overview
-
The head and body are worked as a single continuous piece, which reduces sewing and prevents a floppy neck.
-
The color changes occur during the head and lower body sections to block out the facial area and the lower clothing detail.
-
Wings, beak, tail, and hat components are crocheted separately as individual modules and attached to the main body during the final assembly stage.
-
The skirt is added directly to the doll using surface crochet techniques, specifically anchoring into the stitches where the pink yarn joins the body.
Stitch and Shaping Clarity
-
The magic ring creates a tight, gap-free starting point that prevents fiberfill stuffing from escaping through the top of the pieces.
-
Uniform increases expand the fabric evenly to create a smooth, rounded shape without sharp corners or ridges.
-
Decreases taper the shape inward, and executing them invisibly helps maintain a clean fabric texture across the face and lower body.
-
Flattening pieces and slip stitching the edges together creates a clean, flat border that is easy to align and sew onto curved surfaces.
Step by Step Pattern Instructions
-
Head Round 1: Work 6 single crochet into a magic ring using pink yarn
-
Head Round 2: Increase in each stitch for a total of 12 single crochet
-
Head Round 3: Work one single crochet and one increase repeatedly around for 18 single crochet
-
Head Round 4: Work two single crochet and one increase repeatedly around for 24 single crochet
-
Head Round 5: Single crochet in each stitch for 24 single crochet
-
Head Round 6: Switch to white yarn and work three single crochet and one increase repeatedly around for 30 single crochet
-
Head Round 7: Single crochet in each stitch for 30 single crochet
-
Head Round 8: Work four single crochet and one increase repeatedly around for 36 single crochet
-
Head Rounds 9 to 11: Single crochet in each stitch for 36 single crochet
-
Head Round 12: Work four single crochet and one decrease repeatedly around for 30 single crochet
-
Head Round 13: Work three single crochet and one decrease repeatedly around for 24 single crochet
-
Head Round 14: Work two single crochet and one decrease repeatedly around for 18 single crochet
-
Head Round 15: Work one single crochet and one decrease repeatedly around for 12 single crochet
-
Head Round 16: Work four single crochet and one decrease twice for 10 single crochet
-
Head Rounds 17 to 22: Single crochet in each stitch for 10 single crochet and begin stuffing
-
Body Round 23: Work four single crochet and one increase twice for 12 single crochet
-
Body Round 24: Single crochet in each stitch for 12 single crochet
-
Body Round 25: Work one single crochet and one increase repeatedly around for 18 single crochet
-
Body Round 26: Work two single crochet and one increase repeatedly around for 24 single crochet
-
Body Round 27: Single crochet in each stitch for 24 single crochet
-
Body Round 28: Work three single crochet and one increase repeatedly around for 30 single crochet
-
Body Round 29: Work four single crochet and one increase repeatedly around for 36 single crochet
-
Body Rounds 30 to 31: Single crochet in each stitch for 36 single crochet
-
Body Rounds 32 to 33: Switch to pink yarn and single crochet in each stitch for 36 single crochet
-
Body Round 34: Work four single crochet and one decrease repeatedly around for 30 single crochet
-
Body Round 35: Work three single crochet and one decrease repeatedly around for 24 single crochet and finish stuffing
-
Body Round 36: Work two single crochet and one decrease repeatedly around for 18 single crochet
-
Body Round 37: Work one single crochet and one decrease repeatedly around for 12 single crochet
-
Body Round 38: Decrease six times to close the opening
-
Wings: Chain ten, skip the first chain, work one single crochet, then six double crochet, then three single crochet, and finish with slip stitches along the edge.
-
Hat White section: Work six single crochet into a magic ring, then work one single crochet and one increase repeatedly around for nine single crochet.
-
Hat Orange section: Work six single crochet into a magic ring, round two work one single crochet and one increase for nine single crochet, round three work nine single crochet, round four work two single crochet and one increase for twelve single crochet, flatten and slip stitch the edges together.
-
Tail: Work six single crochet into a magic ring, round two work one single crochet and one increase for nine single crochet, round three work nine single crochet.
-
Beak: Work six single crochet into a magic ring, round two work one single crochet and one increase for nine single crochet, round three work one single crochet and one increase repeatedly around for twelve single crochet.
-
Skirt: Attach pink yarn at the color change line and work two double crochet into each stitch around to create a ruffled edge.
Eye and Facial Feature Placement
-
Safety eyes should be inserted between the white rows of the face before completing the narrowing rounds of the lower head.
-
Position the eyes symmetrically on the white portion of the face, leaving a clear gap of several stitches between them for the beak.
-
Verify the alignment from multiple angles to ensure the eyes sit level before permanently locking the backings into place.
-
The beak should sit nestled directly between and slightly below the level of the eyes to create a balanced, endearing expression.
Stuffing and Shaping Tips
-
Fill the narrow neck column firmly to provide internal structural support and prevent the head from leaning or drooping.
-
Add fiberfill in small, teased portions rather than large clumps to avoid creating lumps underneath the crocheted stitches.
-
Use the back of a crochet hook or a stuffing tool to push fiberfill into the wider sections of the head and the lower base.
-
Mold the piece with your hands as you stuff to ensure the body achieves a smooth, rounded shape without overstretching the stitches.
Assembly and Finishing Notes
-
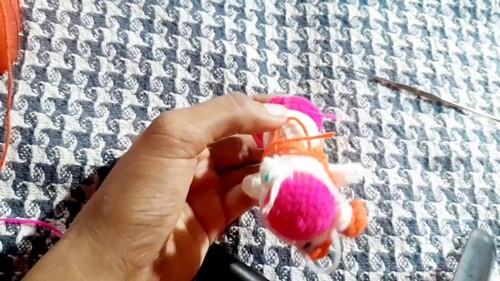
Assembly: Pin the wings, beak, tail, and hat in place. Sew all parts securely to the body. Attach safety eyes or beads to complete the face
-
Use sewing pins to secure every appendage before stitching to ensure nothing shifts out of alignment while you sew.
-
Sew the flat, slip-stitched edge of the orange hat section securely to the white base component to form the complete headwear.
-
Attach the wings symmetrically on both sides of the white section of the body, positioning them just below the neck line.
-
Sew the tail to the lower back of the body, utilizing it as a stabilizing point to help the finished toy sit upright.
-
Weave all remaining yarn tails through the interior of the body several times and clip them close to hide the ends completely.
Troubleshooting and Customization
-
If you notice large gaps between your stitches where stuffing is visible, try dropping down a hook size to tighten the tension.
-
If your color transitions look jagged, complete the final pull-through of the previous stitch with the new color to create a clean line.
-
For a customized appearance, try substituting the safety eyes with embroidered sleepy eyes using black embroidery floss.
-
You can easily transform the character into different seasonal variants by switching the pink and orange yarn choices for blue, mint, or lavender tones.