Haechan Crochet Pattern Free Amigurumi Doll For Kpop Fans
This Haechan chibi amigurumi crochet doll pattern is designed for fans who want to create a cute handmade version of their favorite Kpop idol. The pattern focuses on simple construction techniques that build the legs, body, and head seamlessly, making it beginner friendly while still allowing room for customization.
Crochet Haechan Amigurumi Doll

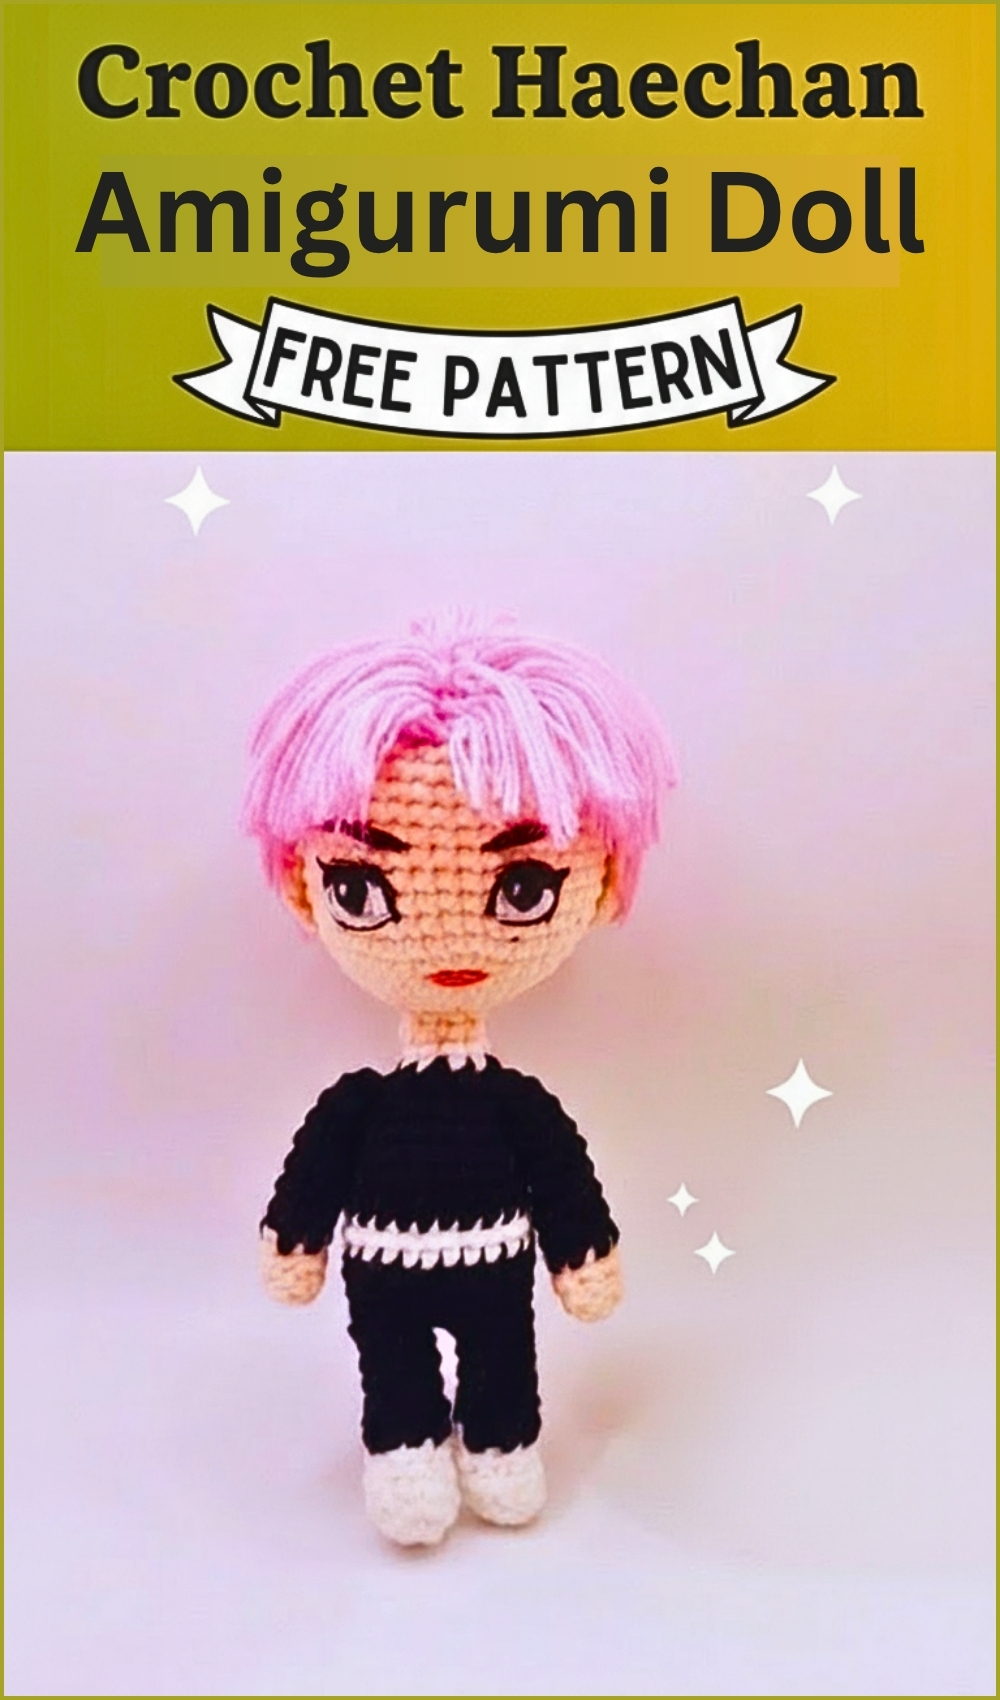


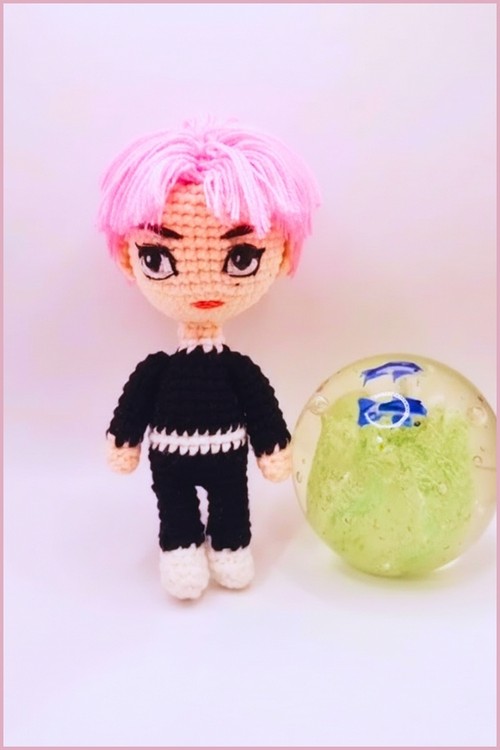
Few things compare to the joy of stitching your own K-pop memorabilia, which is exactly why finding a great Crochet Haechan Amigurumi Doll guide is a dream for creative fans. Boasting cute embroidered details and customizable outfits, this charming miniature captures the star's radiant energy perfectly. It functions beautifully as a vibrant bag charm or comforting desk mascot, offering an endlessly satisfying crafting experience.
Skill Level
-
This project is ideal for intermediate crocheters or confident beginners looking to learn seamless joining techniques.
Finished Size
-
The final size depends on your yarn choice and tension, but it typically yields a pocket-sized chibi doll perfect for display.
Materials
-
Skin tone yarn for the body, arms, and head
-
Dark yarn for the hair
-
Contrast yarn for the built-in clothing and separate outfit
-
Fiberfill stuffing
-
Safety eyes
-
Embroidery thread for facial details
-
Crochet hook matching your yarn weight
-
Stitch markers
-
Pins for assembly
-
Yarn needle
Abbreviations
-
MR: Magic ring
-
Sc: Single crochet
-
Inc: Increase
-
Dec: Decrease
-
Ch: Chain
Helpful Notes Before Starting
-
Continuous rounds mean you will not join with a slip stitch at the end of each round, so a stitch marker is essential to keep track of your progress.
-
Keep your tension firm and consistent throughout to ensure the stuffing does not peek through the stitches.
Construction Overview
-
The doll is worked primarily in continuous rounds
-
Use a stitch marker to track rounds
-
Stuff parts firmly as you go for best shape
-
Pin pieces before sewing to ensure symmetry
Stitch and Shaping Clarity
-
Increases spread the stitches outward to create flat surfaces or expanding curves, while decreases pull the fabric inward to close shapes.
-
Working rounds evenly without changes creates the height and depth needed for cylindrical limbs and rounded heads.
Legs and Body
-
Crochet two identical small legs using skin tone yarn
-
Complete the first leg and fasten off
-
Crochet the second leg and do not cut the yarn
-
Join the second leg to the first leg using a few chains
-
Begin crocheting in the round across both legs to form the torso
-
Continue working upward to shape the body
-
Change yarn colors as needed to create built-in clothing such as pants or a shirt
Head
-
Start with a magic ring and work single crochets into the ring
-
Increase evenly in each round until the head reaches the desired width
-
Crochet several rounds evenly without increases to add height
-
Insert safety eyes at the center area of the head before closing
-
Begin decreasing evenly to shape the top
-
Stuff the head firmly before completing the final decreases
Hair
-
Crochet a rounded hair cap using dark yarn sized to fit the head
-
Attach long chain stitches around the edge of the hair cap to form strands
-
Arrange the strands to match the chibi hairstyle
-
Sew the hair securely onto the head after positioning
Arms
-
Crochet two small cylindrical arms in skin tone yarn
-
Lightly stuff the arms if desired
-
Sew each arm evenly onto the sides of the body
Outfit and Details
-
Create a simple crocheted or fabric outfit such as a jacket or hoodie
-
Dress the doll after assembly
-
Embroider a small nose using matching yarn
-
Add blush details to the cheeks using embroidery thread
-
Check all seams and secure loose ends for a clean finish
Assembly Guidance
-
Line up the legs perfectly straight before joining the torso to ensure your doll stands or sits squarely without twisting.
-
Use sewing pins to secure the arms on opposite sides of the body, checking symmetry from both the front and the top view before stitching them down.
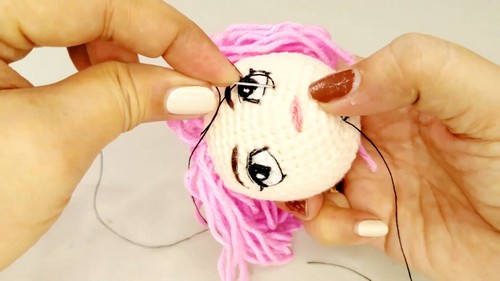
Eye and Facial Feature Placement
-
Position the safety eyes centered horizontally, leaving enough space between them to maintain that classic, wide-eyed chibi proportion.
-
Place the embroidered nose exactly centered between the eyes, keeping it small and subtle so it doesn't overwhelm the face.
Stuffing Tips
-
Roll the fiberfill into small clumps and push it into the bottom of the legs and torso first to prevent hollow spots.
-
Over-stuffing the head can stretch the stitches open, while under-stuffing causes wrinkles, so aim for a firm, smooth bounce.
Finishing Notes
-
Weave all yarn tails back and forth through the inside of the body several times to lock them securely in place before trimming.
-
Massage the stuffed pieces gently after assembly to redistribute the fiberfill and perfect the overall silhouette.
Beginner Notes
-
If your pieces are turning out inside out, ensure the right side of the stitches faces the exterior as you work.
-
Counting your stitches at the end of every round saves hours of backtracking later on.
Troubleshooting
-
If gaps appear during decreases, try using the invisible decrease method to keep the fabric dense and neat.
-
If the hair cap feels too small, block it slightly or add an extra round of increases before starting the strands.
Customization Ideas
-
Change up the yarn colors for the clothing to replicate your favorite characters or personalized outfits.
-
Vary the length and placement of the chain strands to create unique hairstyles, bangs, or pigtails.