Free Crochet Pikachu Keychain Amigurumi Pattern For Pokémon Fans
Fans of the Pokémon series will find that crafting a Crochet Pikachu Keychain Amigurumi offers a delightful way to carry a piece of pop culture wherever they go. This vibrant accessory showcases the recognizable bright yellow body and lightning-bolt tail that define the character, finished with embroidered details that bring its cheerful personality to life. Designed for durability, the item functions as a sturdy companion for car keys or a decorative charm for handbags, ensuring your essentials are easy to spot in any cluttered bag.
Crochet Pikachu Keychain Amigurumi
The dense, high-quality yarn construction provides a tactile, soft feel while maintaining its structural integrity, making it a perfect blend of artistic flair and practical utility for collectors of all ages.

Skill Level
-
Advanced Beginner
-
Assumes a solid understanding of working in the round and magic ring techniques
-
Requires precision with small pieces and color changes
Finished Size
-
Approximately two to three inches tall depending on your yarn choice and tension
Materials
-
Alize Cotton Gold yarn in Yellow, Black, and Red
-
Crochet hook in 1.75 mm or 2.0 mm
-
6 mm safety eyes
-
Fiberfill stuffing
-
Sewing needle, scissors, and sewing pins
Abbreviations
-
MR (magic ring)
-
sc (single crochet)
-
inc (increase)
-
dec (decrease)
-
sl st (slip stitch)
-
ch (chain)
Helpful Notes Before Starting
-
Use a stitch marker to keep track of the beginning of each round to maintain the correct stitch counts
-
Stuff pieces as you go for a firm and even shape, particularly the limbs and body
-
Maintain consistent tension to keep the stitches small and prevent the stuffing from showing through
Construction Overview
-
The toy is constructed by crocheting the individual parts such as the feet, arms, ears, body, head, cheeks, and tail
-
After completing all pieces, the parts are sewn together and the keychain loop is attached to the top of the head
Stitch and Shaping Clarity
-
The foot shaping utilizes decreases to create a flat bottom while maintaining a gentle curve
-
The head shape utilizes a sequence of increases in Round 7 to create the specific contour needed for the character's cheeks
Feet (Make 2 - Yellow)
-
Round 1: MR, 6 sc
-
Round 2: 6 inc (12)
-
Round 3: (1 sc, inc) x 6 (18)
-
Rounds 4–5: sc in all stitches (18)
-
Round 6: 3 sc, dec x 6, 3 sc (12)
-
Round 7: sc in all stitches (12)
-
sl st, fasten off, stuff lightly, leave long tail for sewing
Arms (Make 2 - Yellow)
-
Round 1: MR, 6 sc
-
Round 2: (1 sc, inc) x 3 (9)
-
Rounds 3–7: sc in all stitches (9)
-
Stuff lightly before Round 8
-
Round 8: (1 sc, dec) x 3 (6)
-
Close with 3 sc, leave long tail for sewing
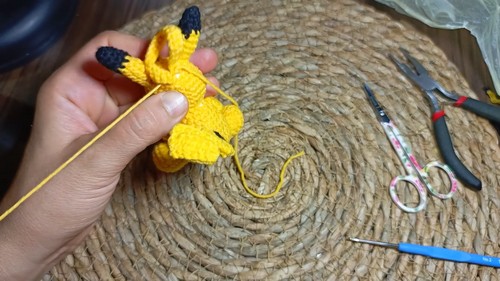
Ears (Make 2 - Start Black, switch to Yellow)
-
Round 1: MR, 6 sc (Black)
-
Round 2: sc in all (6)
-
Round 3: (1 sc, inc) x 3 (9)
-
Round 4: sc in all (9)
-
Round 5: Switch to Yellow, sc in all (9)
-
Rounds 6–8: sc in all (9)
-
Stuff lightly
-
Round 9: (1 sc, dec) x 3 (6)
-
sl st, leave long tail for sewing
Body (Yellow)
-
Round 1: MR, 8 sc
-
Round 2: 8 inc (16)
-
Round 3: (1 sc, inc) x 8 (24)
-
Round 4: (2 sc, inc) x 8 (32)
-
Rounds 5–9: sc in all (32)
-
Round 10: (2 sc, dec) x 8 (24)
-
Rounds 11–12: sc in all (24)
-
Round 13: (1 sc, dec) x 8 (16)
-
sl st, stuff firmly, leave long tail for sewing
Head (Yellow)
-
Round 1: MR, 6 sc
-
Round 2: 6 inc (12)
-
Round 3: (1 sc, inc) x 6 (18)
-
Round 4: (2 sc, inc) x 6 (24)
-
Rounds 5–6: sc in all (24)
-
Round 7: 6 sc, inc x 4, 2 sc, place marker, 2 sc, inc x 4, 6 sc (32)
-
Rounds 8–10: sc in all (32)
-
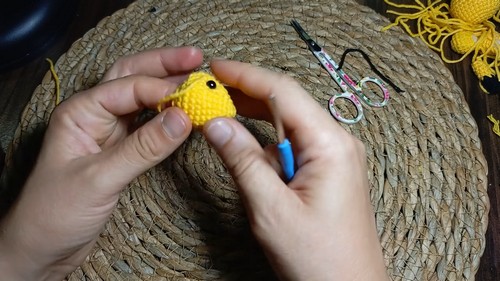
Insert safety eyes between rows 6 and 7, 3 sc apart
-
Round 11: (2 sc, dec) x 8 (24)
-
Round 12: (1 sc, dec) x 8 (16)
-
sl st, stuff firmly, fasten off

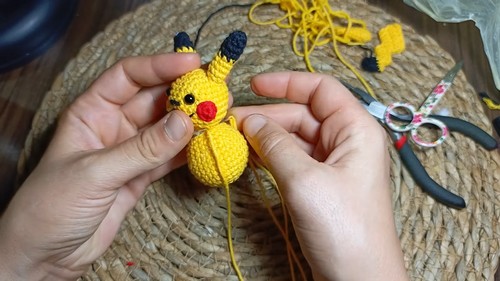
Cheeks (Make 2 - Red)
-
Round 1: MR, 6 sc
-
sl st, leave long tail for sewing
Tail (2 Pieces - Black and Yellow)
Piece 1 (Small Rectangle)
-
Ch 4, starting in 2nd ch, 3 sc (Black)
-
Ch 1, turn, 3 sc (Black)
-
Ch 1, turn, 2 sc, switch to Yellow on 3rd sc
-
Ch 1, turn, 3 sc (Yellow)
-
Cut black yarn, leave long yellow tail
Piece 2 (Main Body)
-
Continue from top of Piece 1
-
Ch 5, turn, 4 sc on chain, 1 sc into Piece 1
-
Ch 1, turn, 5 sc
-
Ch 5, turn, 4 sc on chain, 2 sc into Piece 1
-
Ch 1, turn, 6 sc for 3 rows
-
For one piece, cut yarn short; for the other, leave long tail for sewing
Assembly Guidance
-
Pin the parts securely before sewing to ensure symmetry and balance
-
Sew the tail pieces together along the edges and attach the tail to the back of the body
-
Sew the head to the body using the long yellow tail left from the body
-
Attach the ears, cheeks, arms, and feet securely using the long tails provided
Eye and Facial Feature Placement
-
Insert the safety eyes between Rounds 6 and 7 of the head, leaving exactly 3 sc apart
-
Sew the small red circles just below and to the outer sides of the eyes to form the cheeks
Stuffing Tips
-
Stuff the body and head firmly to achieve a smooth, rounded shape without lumps
-
Stuff the limbs and ears lightly to allow them to sit flush against the body when sewing
Finishing Notes
-
Secure all yarn tails with a strong knot and weave the ends into the interior of the piece
-
Check for any loose fibers and trim them to clean up the finished surface
Beginner Notes
-
Practice the magic ring a few times before starting if it feels unfamiliar
-
Count your stitches at the end of every round to ensure accuracy
Troubleshooting
-
If the head looks lumpy, ensure the stuffing is distributed evenly from the center outwards
-
If the piece curves incorrectly, verify that your increases and decreases are placed in the correct stitch
Customization Ideas
-
Add a small amount of blush with powder or thread around the cheeks for an extra cute look
-
Adjust the keychain chain length depending on where you plan to attach the finished project