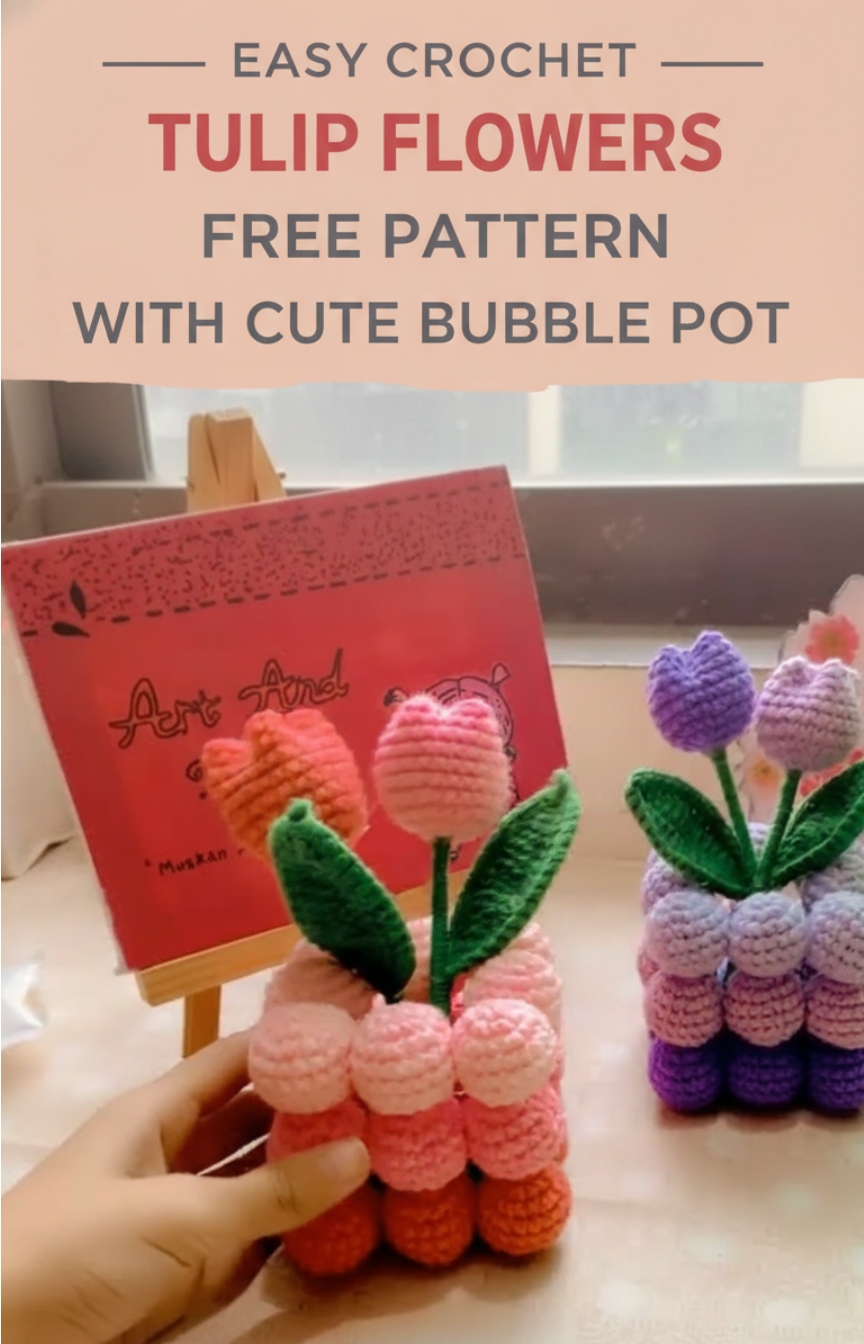
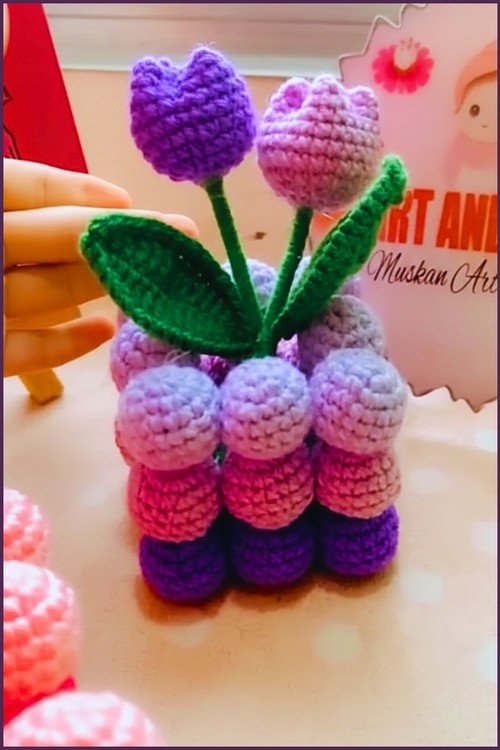
Easy Crochet Tulip Flowers Free Pattern With Cute Bubble Pot
Bring the beauty of spring indoors with this charming Crochet Tulip and Bubble Pot pattern. This project features delicate tulip flowers arranged in a soft, round bubble-style pot made of mini amigurumi balls. Each element from the wired leaf to the vibrant tulip head creates a realistic and modern decorative piece.
Crochet Tulip Flowers
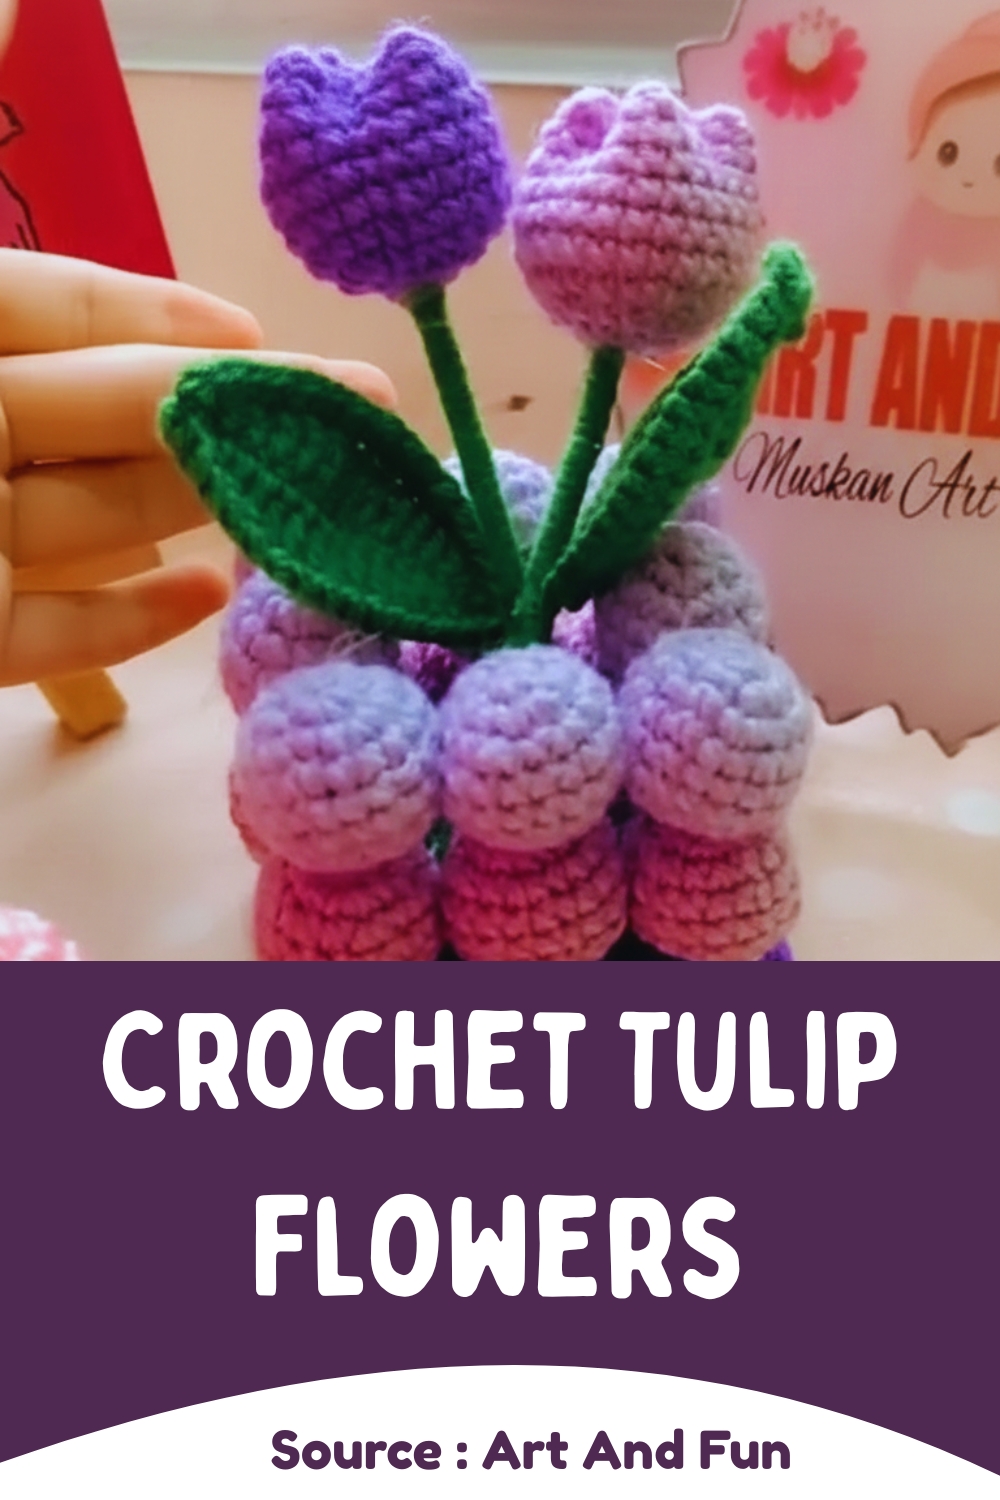
Perfect for home décor, gifts, or craft fairs, this beginner-friendly pattern allows endless color combinations, making every arrangement truly unique. Whether you love creating floral crochet projects or want to craft a stunning centerpiece, this tulip design is sure to brighten any space.
Materials
- Yarn (three shades for pot, one color for flower, green for stem/leaf)
- 2.5 mm crochet hook
- Stitch marker
- Scissors
- Yarn needle
- Stuffing (fiberfill)
- Hot glue
- Craft wire or thin electrical wire
- Barbecue stick or skewer
Crochet the Bubble Pot Pieces
- Magic Ring, chain 1, and make 6 single crochet. Slip stitch to join.
- Chain 1, increase in each stitch around (12 single crochet). Slip stitch to join.
- Chain 1, work 1 single crochet, increase repeat 6 times (18 single crochet). Slip stitch to join.
- Chain 1, make 1 single crochet in every stitch for three rounds (18 single crochet).
- Chain 1, 1 single crochet, decrease repeat 6 times (12 single crochet). Slip stitch to join.
- Firmly stuff with fiberfill.
- Chain 1, decrease repeat 6 times (6 single crochet). Slip stitch to join.
- Cut yarn and weave through front loops of the remaining stitches. Pull tight and secure.
- Make 25 bubbles in total (9 dark, 8 medium, 8 light).
- Use hot glue to connect them layer by layer with the largest layer at the bottom.
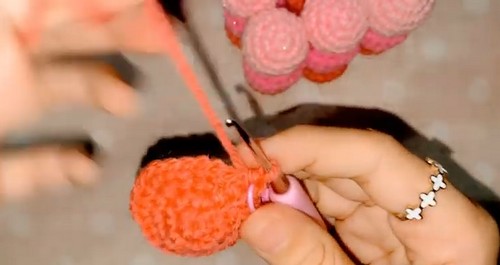
Crochet the Tulip Flower Head
- Magic Ring, chain 1, make 6 single crochet. Slip stitch to join.
- Chain 1, increase in each stitch around (12 single crochet).
- Chain 1, 1 single crochet, increase repeat 6 times (18 single crochet).
- Chain 1, 2 single crochet, increase repeat 6 times (24 single crochet).
- Chain 1, make 1 single crochet in every stitch for seven rounds (24 single crochet).
- Cut yarn, leaving a long tail, and firmly stuff.
- Flatten the opening, then stitch front and back together to form the tulip shape. Secure and weave in the end.
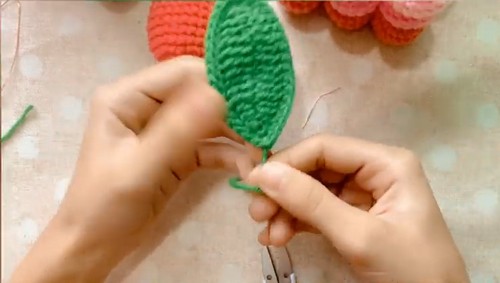
For Crochet the Wired Leaf
- Chain 16 and start from the second chain from the hook.
- Make 1 single crochet, 1 half double crochet, 2 double crochet, 7 treble crochet, 2 double crochet, and 1 half double crochet.
- In the last chain, make 1 single crochet, chain 2, 1 single crochet.
- On the other side, make 1 half double crochet, 2 double crochet, 7 treble crochet, 2 double crochet, 1 half double crochet, and 1 single crochet.
- Add craft wire along the edge. Slip stitch into the first stitch, chain 1, and work single crochet all around, enclosing the wire.
- In the chain-2 tip, make 1 single crochet, slip stitch or bead stitch, and 1 single crochet. Continue around and slip stitch to join.
- Cut yarn, secure, and twist the wire ends at the base.
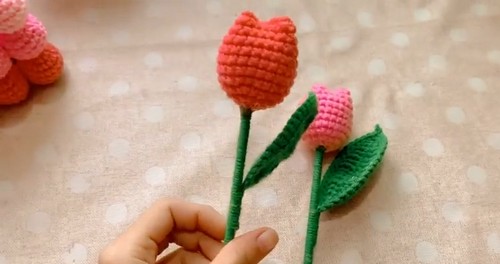
Stem and Final Assembly
- Wrap a barbecue stick with green yarn using hot glue for security.
- Stop wrapping where the leaf will go and attach the leaf base by wrapping yarn over the wire to hide it.
- Apply hot glue to the tip of the stick and insert it into the tulip flower base. Hold until set.
- Arrange the tulips in the bubble pot and enjoy your handmade floral décor.