
Cute Franken Cat Doll Crochet Free Amigurumi Pattern
When you are looking for a unique handmade gift that combines spooky charm with feline grace, this Crochet Franken Cat Doll is the ultimate project to sink your hooks into. This stitched-together kitty features iconic bolts and mismatched patches that give it a playful, laboratory-born look perfect for Halloween decor or year-round gothic flair. Beyond its striking appearance, this plush creation is incredibly durable, making it an excellent companion for kids or a quirky conversation piece for an office desk.
Crochet Franken Cat Doll
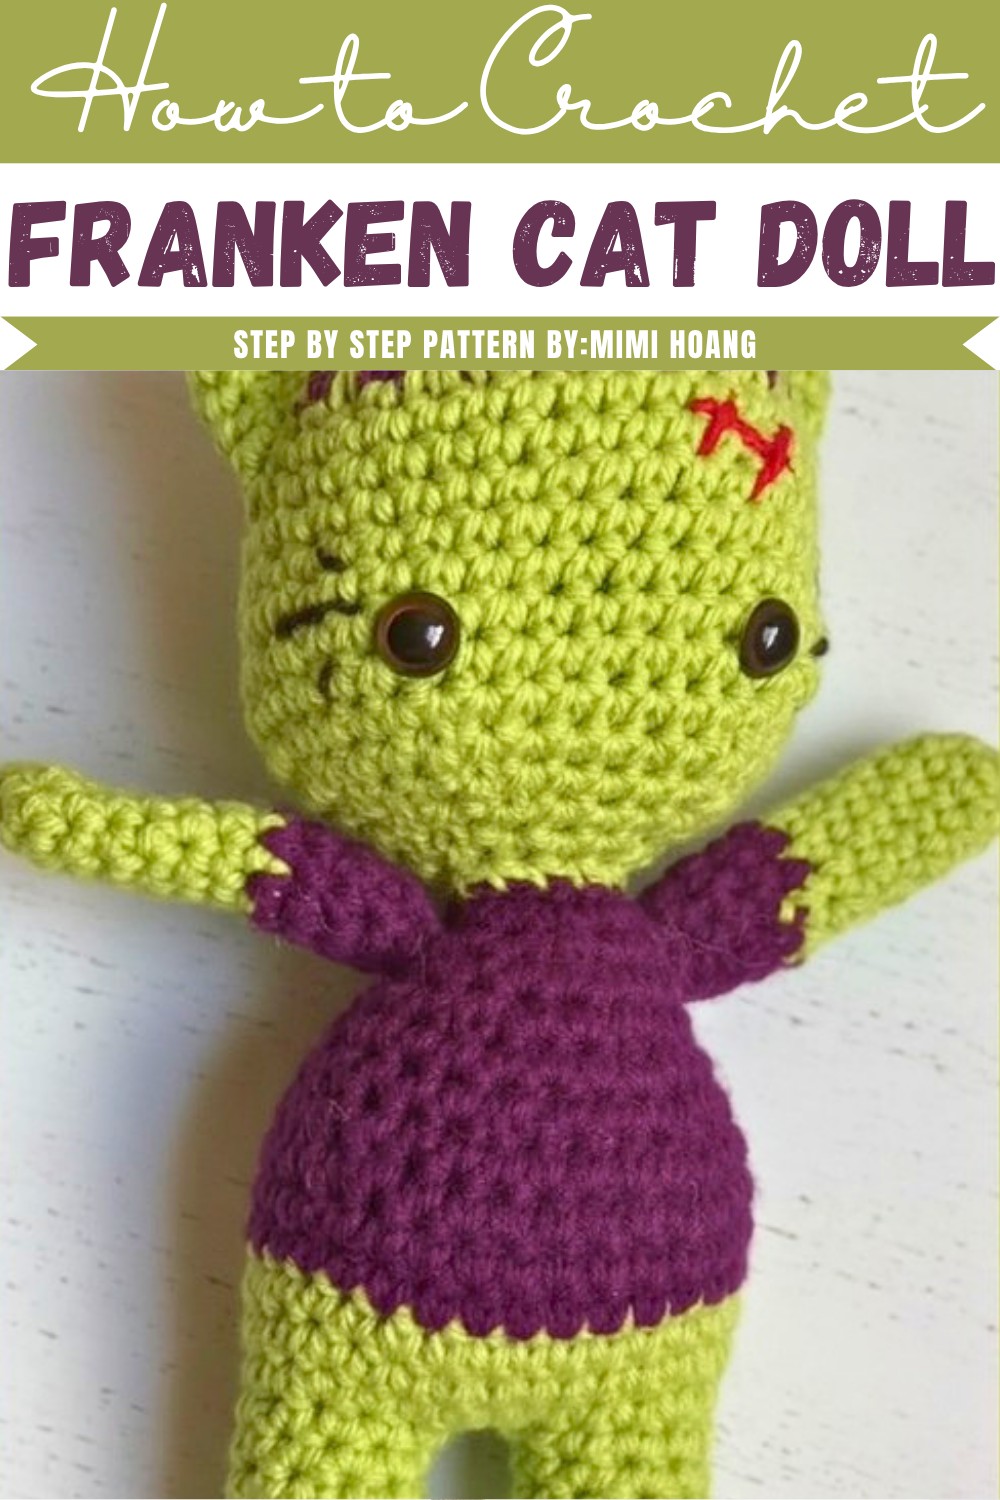
Its posable tail and sturdy construction allow it to sit perfectly on a shelf, ensuring your handmade monster stays as functional as it is frightfully cute.
Skill Level
-
Intermediate Beginner (requires knowledge of magic rings, back loop stitches, and manual sculpting)
Finished Size
-
Dimensions will vary based on yarn tension, but typically results in a palm-sized decorative plush when using the recommended 3.0mm hook
Materials
-
Orange and green acrylic yarn
-
3.0mm crochet hook
-
Fiberfill stuffing
-
Tapestry needle
Abbreviations
-
sc: single crochet
-
st: stitch
-
dec: decrease
-
inc: increase
-
BLO: back loops only
Helpful Notes Before Starting
-
Use a stitch marker to keep track of your rounds, as working in a continuous spiral can make it easy to lose your place during the large increase sections.
-
Choosing a slightly smaller hook than the yarn label suggests ensures a tight fabric that prevents stuffing from peeking through when you pull the ridges tight.

Construction Overview
-
The project begins with a large orange sphere that serves as the canvas for the shaping.
-
You will use a technique called "soft sculpting" where a long yarn tail is threaded through the body to physically compress the stuffing into sections.
-
The stem is worked separately with a flared base designed to sit flush against the top of the pumpkin.
Stitch and Shaping Clarity
-
The standard increase pattern builds a wide, flat base before the height is added, which helps the pumpkin sit upright without rolling.
-
In the stem, the "crooked" look is achieved by placing decreases right next to each other, which forces the fabric to lean in one direction.

Part 1 The Pumpkin Body Orange
-
Start with 6 single crochet (sc) in a magic ring.
-
Increase in every round until you reach 72 stitches. Follow the standard increase pattern (6, 12, 18, 24, 30, 36, 42, 48, 54, 60, 66, 72).
-
Crochet around for a few rounds with 72 stitches to give the pumpkin height.

-
Begin decreasing back down (66, 60, 54, 48, 42, 36, 30, 24, 18, 12). Stuff the pumpkin firmly as you go.
-
Decrease to 6 stitches, fasten off, and leave a very long tail for shaping.
Creating the Ridges
-
Use a tapestry needle to close the remaining hole.
-
Push the needle through the center of the pumpkin to the other side.
-
Wrap the yarn around the outside of the ball and push it through the center again. Pull with firm tension to create a groove.
-
Repeat this 6 times to divide the pumpkin into six equal sections.
-
Secure the thread with knots at the top (these will be hidden by the stem).
Part 2 The Pumpkin Stem Green
-
Foundation: 6 sc in a magic ring.
-
Increases: Increase to 12, then to 18 stitches.
-
Shaping the Curve: In the back loops only, decrease to 15 stitches. To make the stem look "crooked," place three decreases in a row rather than spacing them out.
-
Stem Length: Continue decreasing gradually (to 13, 11, then 10 stitches) and crochet several rounds to create the desired length.
-
The Base: Increase again at the bottom to create a flared base that will attach to the pumpkin.
-
Round 14: Sc 3, chain 2, slip stitch in the 2nd chain from hook.
-
Repeat this pattern (sc 3 or 4, then the chain-2 point) around the circle to create 6 points.

Assembly Guidance
-
Lightly stuff the stem to help it maintain its crooked shape without becoming too heavy.
-
Position the stem so that the six points of the base line up perfectly with the six indented grooves on the pumpkin body.
-
Sew through the flared base of the stem into the top of the pumpkin using a whip stitch for a seamless look.
Stuffing Tips
-
Stuff the pumpkin very firmly; if it is too soft, the yarn ridges will simply collapse the pumpkin rather than creating defined sections.
-
Ensure the stuffing is distributed evenly so the sphere remains symmetrical before you start the needle sculpting.
Beginner Notes
-
Needle sculpting can feel intimidating, but the key is consistent tension.
-
If the yarn tail feels like it is cutting into the stitch too much, try to wrap the yarn between the stitches rather than over the top of a single thread.
Troubleshooting
-
If your pumpkin looks more like a ball than a pumpkin, you may need to pull the shaping yarn tighter.
-
If the stem won't stand up, add a small bit of extra stuffing or a pipe cleaner inside for internal support.
Customization Ideas
-
Create a "Cinderella" style pumpkin by using a muted teal or cream-colored yarn.
-
Add curly vines by chaining a long string and working 3 sc into every chain stitch so it curls tightly.