Cute Crochet Corn Keychain / Amigurumi Pattern
A corn-shaped keychain has a naturally simple structure, but the small shaping details are what make it look recognizable and clean. This design builds upward from a rounded base, gradually widens to form the body, then tapers closed before adding a separate leafy top.
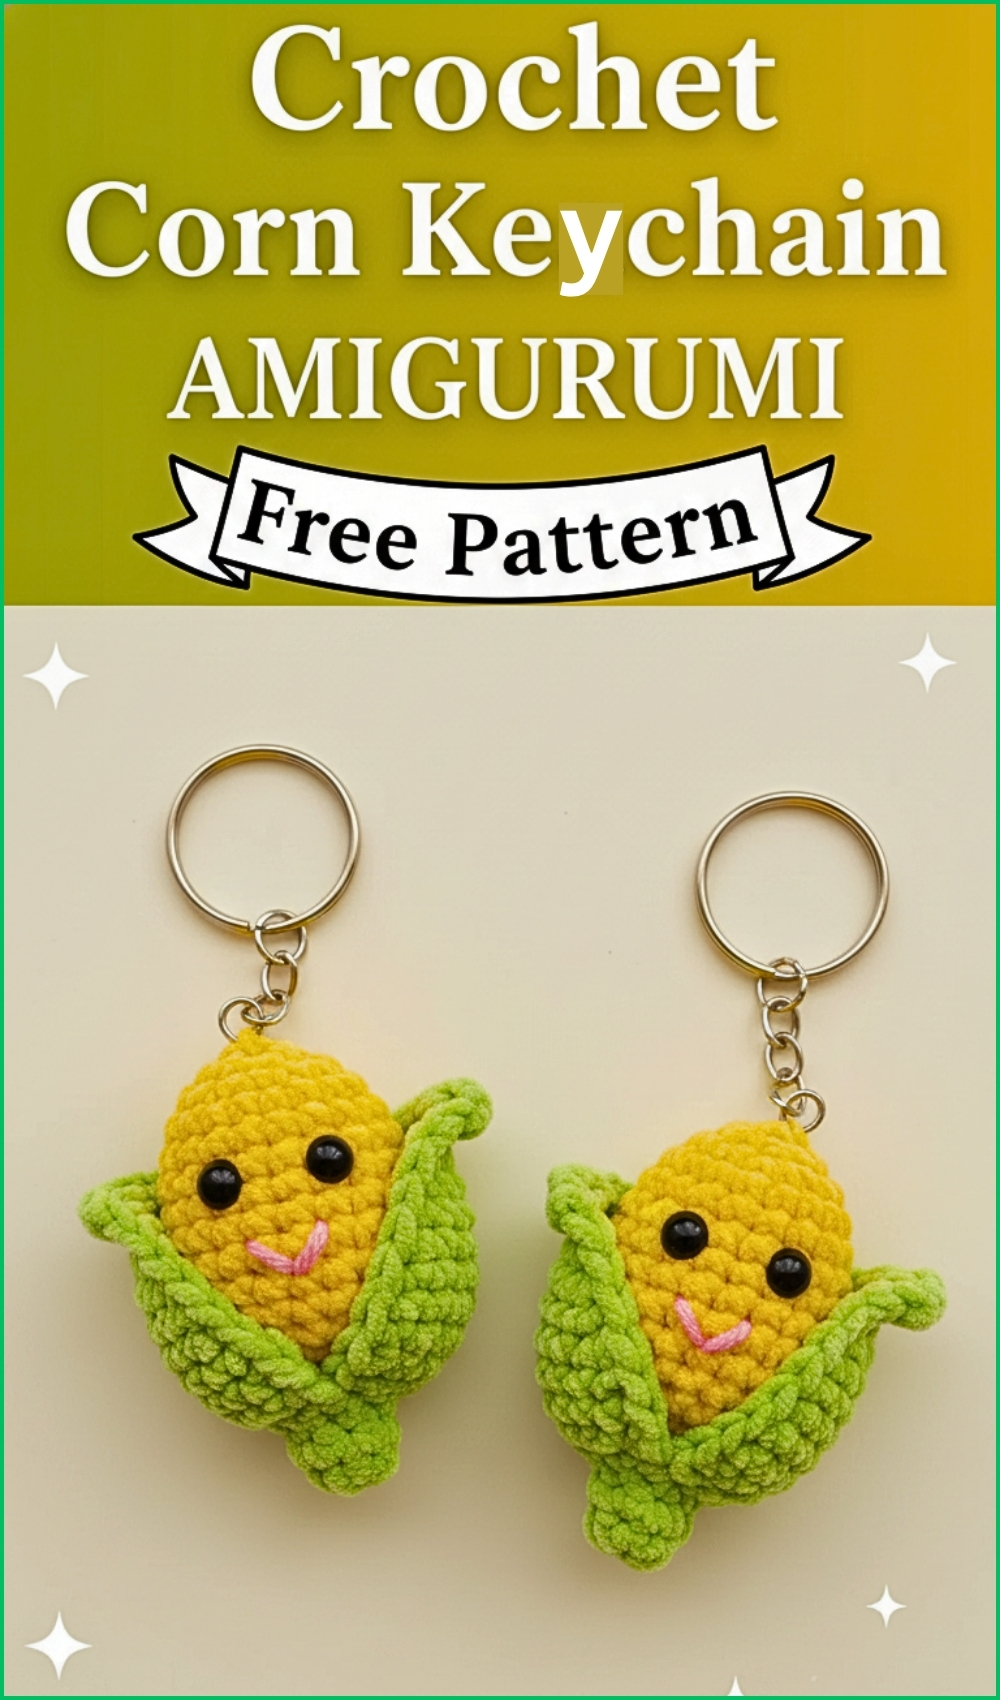
Crochet Corn Amigurumi Keychain

Understanding how the increases and decreases shape that gentle oval form will help you keep your stitches even and your final piece smooth.
Skill Level
Beginner to confident beginner
Finished Size
Depends on yarn and hook size, but typically small enough to fit comfortably in your palm as a keychain.
Materials
- DK cotton yarn (yellow for corn, green for stalk and leaves)
- Crochet hook (appropriate for your yarn)
- Scissors
- Darning needle
- Dacron stuffing
- Keychain ring
- Safety eyes or embroidery thread
- Hot glue (for assembly)
Abbreviations
- SC – Single Crochet
- INC – Increase (2 SC in same stitch)
- DEC – Decrease (2 stitches worked together)
- MR – Magic Ring

Helpful Notes Before Starting
- Work in continuous rounds unless otherwise stated.
- Use a stitch marker to track the beginning of each round.
- Keep stitches tight to avoid stuffing showing through.
- The body is shaped through evenly spaced increases and decreases—this is what creates the rounded corn look rather than a straight tube.
Construction Overview
This project is made in three main parts:
- Corn body – worked in the round from bottom to top, then closed
- Stalk and leaves – created separately using both rounds and rows
- Assembly – attaching the top, face, and keychain ring
The shaping is subtle but important. The increases in the early rounds widen the corn, while the decreases near the top gently taper it closed.
Stitch and Shaping Clarity
- Round 2 increases double your stitch count, creating the base width.
- Round 4 increases expand the body slightly more for a natural corn shape.
- Rounds 6–11 maintain the width, forming the main body.
- Rounds 12–13 decreases pull the top closed smoothly.
Try to keep your tension consistent—uneven tension can make the corn look lumpy instead of rounded.
Pattern Instructions
CORN BODY
- Round 1: Create a magic ring and work 8 single crochets (SC) into the ring.
- Round 2: Work an increase (2 SC) in each stitch for a total of 16 SC.
- Round 3: Work 1 SC in each stitch.
- Round 4: Repeat the pattern (1 SC, increase) around.
- Round 5: Work 1 SC in each stitch.
- Rounds 6-11: Continue with 6 rounds of SC.
- Round 12: Repeat the pattern (1 SC, decrease) around.
- Round 13: Work a decrease (2 SC into 1) for 10 times to close the opening.
- Fill the body with dacron.
- Finish with a slip stitch and cut the yarn.

STALK AND LEAVES
- Round 1: Use green yarn to create a magic ring and work 8 SC into the ring.
- Rounds 2-3: Work 1 SC in each stitch for two rounds.
- Round 4: Work an increase (2 SC) in each front loop.
- LEAF PATTERN:
- Rows 1-5: Work 7 SC, chain 1, and turn for five rows.
- Row 6: Decrease, 3 SC, decrease.
- Rows 7-8: Work 5 SC, chain 1, and turn for two rows.
- Row 9: Decrease, 1 SC, decrease.
- Row 10: Work a 3 SC together decrease, chain 1, and turn.
- Finish with a slip stitch and cut the yarn.
- Repeat: Attach the yarn again, skipping one stitch from the last leaf's end, and repeat the leaf pattern to create a second leaf.
Assembly
- Attach the keychain ring to the top of the corn body.
- Secure the stalk and leaf piece to the top of the corn body using hot glue.
- Attach the eyes and embroider the mouth.
Assembly Guidance
- Position the stalk directly at the center of the top for balance.
- When attaching leaves, angle them slightly outward so they frame the corn instead of lying flat.
- If sewing instead of gluing, use tight stitches to prevent wobbling.
Eye and Facial Feature Placement
- Place eyes between the middle rounds (around Rounds 6–8).
- Keep them evenly spaced—count stitches from the center to ensure symmetry.
- Embroider a small curved mouth just below the eyes for a friendly expression.
Stuffing Tips
- Add stuffing gradually as you go, especially before the final decrease rounds.
- Use small pieces to avoid lumps.
- Firm but not overstuffed is ideal—the shape should stay rounded without stretching stitches.

Finishing Notes
- After closing the top, weave in ends securely inside the body.
- Check that the keychain ring is firmly attached before use.
- Trim any loose fibers for a clean finish.
Beginner Notes
- If decreases leave gaps, try an invisible decrease technique.
- Keep track of rounds carefully—losing count can affect shaping.
- Don’t rush the leaf rows; turning rows can feel different from working in the round.
Troubleshooting
- Corn looks too pointy at the top: You may have decreased too tightly or skipped stitches—check Round 12 spacing.
- Body looks uneven or lumpy: This usually comes from inconsistent tension or uneven stuffing.
- Leaves curling too much: Try loosening your tension slightly or blocking them gently with steam.
Customization Ideas
- Use textured yarn for a more realistic corn kernel look
- Add blush or embroidery for extra personality
- Make a mini version using thinner yarn for earrings or charms
- Try different colors for playful or themed variations