Crochet Hello Kitty Free Pattern Amigurumi For Beginners
This Hello Kitty Amigurumi Crochet Pattern is a charming and beginner-friendly project perfect for fans of the classic Sanrio character. The pattern includes clear steps to crochet the head, body, and signature bow, creating a soft and cuddly plush. It’s a great handmade gift for children, collectors, or anyone who loves kawaii crafts.
Crochet Hello Kitty Amigurumi


Nothing matches the pure excitement of winding yarn to construct a Crochet Hello Kitty Amigurumi project from scratch. Highlighting distinct safety eyes and an iconic asymmetrical hair bow, this vibrant item operates flawlessly as an eye-catching pincushion or a sentimental baby shower gift. The ultimate charm rests in personalizing her wardrobe, providing a relaxing, innovative hobby that yields a durable and lovely heirloom.
Skill Level
-
This project is ideal for intermediate crocheters or confident beginners looking to expand their skills with oval chain starts and detailed facial embroidery.
Finished Size
-
The final dimensions will vary based on your choice of yarn and hook size, but using a standard worsted weight yarn with a 3.5mm hook typically yields a plush toy approximately 8 to 10 inches tall.
Materials
-
Yarn: White (A), Blue (B), Shirt Color (C), Red or Pink (D)
-
Crochet hook suitable for your yarn
-
Fiberfill stuffing
-
Yarn needle
-
Black and yellow yarn for facial details
Abbreviations
-
Ch: Chain
-
Sc: Single crochet
-
St/Sts: Stitch/Stitches
-
Inc: Increase (two single crochet stitches in the same stitch)
-
Inv.dec: Invisible decrease (combining two stitches together using the front loops only)
-
MR: Magic ring
-
BLO: Back loops only
-
Sl st: Slip stitch
Helpful Notes Before Starting
-
Use a stitch marker or a piece of scrap yarn to track your rounds, as working in continuous spirals makes it easy to lose your place.
-
The head begins with a foundation chain rather than a magic ring, which creates an oval shape instead of a perfect sphere.
-
Pay close attention to the stitch counts at the end of each round to ensure your shaping remains symmetrical.
Construction Overview
-
The head is crocheted from the top down starting with a foundation chain, which establishes the wide, iconic silhouette.
-
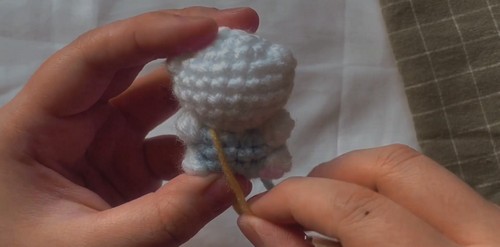
The legs are worked individually, then joined together in a single round to continue upward to form the continuous body.
-
Ears, arms, and the decorative bow are crocheted separately and sewn onto the main structure during final assembly.
Stitch and Shaping Clarity
-
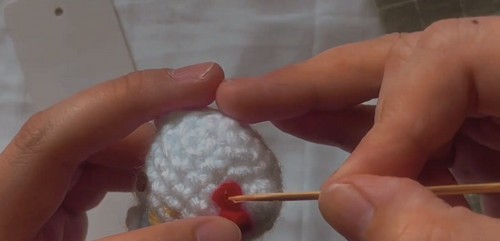
When working the foundation chain for the head, you will crochet down one side of the chain and then pivot to crochet back along the unworked bottom loops of the same chain.
-
Invisible decreases are highly recommended for the head and limbs to prevent stuffing from peeking through the stitches and to maintain a smooth surface.
-
The back loop only round on the feet creates a sharp, flat edge that helps the bottom of the legs transition cleanly into the ankles.
Head Instructions
-
Ch 13
-
R1: Sc 11 starting in the second st from the hook, sc 3 in the next st, mark the middle st, sc along the other side of the chain (28 sts)
-
R2: Sc until marker, sc 2 before marker, sc 3 in marked st (remark), sc 2 after, repeat on the other side (36 sts)
-
R3: Repeat R2 (44 sts)
-
R4–R6: Continue increasing to reach 60 sts
-
R7–R19: Sc around
-
R20: Begin decrease round, inv.dec before and after the marker (52 sts)
-
R21–R22: Repeat decreases until 36 sts
-
R23: Inv.dec groups of 3, mark the middle, repeat on the other side
Ears Instructions Make 2
-
R1: 4 sc in MR (4)
-
R2: Inc each st (8)
-
R3: 1 sc, 1 inc repeat 4 times (12)
-
R4: 2 sc, 1 inc repeat 4 times (16)
-
R5: 3 sc, 1 inc repeat 4 times (20)
-
R6: 4 sc, 1 inc repeat 4 times (24)
-
R7: 5 sc, 1 inc repeat 4 times (28)
-
Sl st, fasten off, leave tail for sewing. Stuff lightly and attach between R19–R23, spaced evenly at the top.
Legs Make 2 & Body Instructions
-
R1: 6 sc in MR using Color A (6)
-
R2: Inc each st (12)
-
R3: 1 sc, 1 inc repeat (18)
-
R4: 2 sc, 1 inc repeat (24)
-
R5: Sc in BLO
-
R6: 3 sc, 1 inc repeat (30)
-
R7–R9: Sc around
-
R10: Switch to Color B and sc in each st
-
R11: Join legs by crocheting across both legs (52 sts total), leaving small gaps to close later
-
R12–R13: Sc in each st
Arms Instructions Make 2
-
R1: 6 sc in MR with Color A (6)
-
R2: Inc each st (12)
-
R3: 1 sc, 1 inc repeat (18)
-
R4–R6: Sc around
-
R7: 1 sc, 1 dec repeat (12)
-
R8: Change to Color C, sc around
-
R9–R12: Sc around, stuff lightly
-
R13: Inv.dec 3 times, flatten and sc across to close, attach near armholes
Bow Instructions
-
Ch 15, sc across for 5 rows
-
Crochet evenly around the border, then fasten off
-
Ch 10, sc 9 for the center band, wrap around the rectangle and sew to shape
-
Attach the bow near the right ear
Face Embroidery Instructions
-
Nose: Yellow yarn, stitch between R10–R11, 2 sts wide at center
-
Eyes: Black yarn, stitch between R11–R13, 4 sts from nose, 10 sts apart
-
Whiskers: Black yarn
-
Middle Whiskers: Between R11–R12, 3 sts long, 3 sts away from eye
-
Top Whiskers: Two rows above, angled slightly upward
-
Bottom Whiskers: Two rows below, angled slightly downward
Assembly Guidance
-
Secure all pieces with straight pins before sewing to ensure that everything is centered and balanced.
-
Use the mattress stitch to join the open edges of the limbs and ears to the body for a clean, professional finish.
-
When joining the legs, use the yarn tail from the first leg to sew shut the small gap left in the center between the thighs.
Eye and Facial Feature Placement
-
Pin the eyes and nose in place simultaneously before doing any embroidery to check their spatial relationship.
-
Keep the nose low and wide between the eyes to achieve the classic, cute character proportions.
-
Ensure the whiskers angle symmetrically on both sides of the face by counting the stitches out from each eye.
Stuffing Tips
-
Stuff the head firmly, paying special attention to the sides of the oval to bring out the wide silhouette without overstretching the stitches.
-
Leave the upper half of the arms mostly unstuffed so they lay flat against the sides of the body instead of sticking straight out.
-
Use small clumps of fiberfill at a time to avoid lumps and to ensure an even, smooth distribution of weight.
Finishing Notes
-
Weave all yarn ends deep inside the body cavity using a yarn needle to prevent them from coming undone.
-
Give the finished toy a gentle roll and massage between your hands to distribute the stuffing evenly and perfect the shape.
-
Double check the security of the bow and ears since these protruding parts handle the most friction during use.
Beginner Notes
-
If your foundation chain twists while working the first round of the head, try using a slightly larger hook just for the chain to keep your loops loose.
-
Marking the exact middle stitch as instructed in the head pattern is vital for keeping your increases aligned correctly on subsequent rounds.
-
Take your time with the embroidery, as the spacing of the facial features dictates the entire personality of the doll.
Troubleshooting
-
If your head looks like a circle instead of an oval, you may have missed the pivot step or skipped the side increases on the foundation chain.
-
If gaps appear in your stitches when you transition to the body, pull your working yarn tighter on the first two stitches of the leg join.
-
If the ears look asymmetrical, count the rounds down from the top center peak on both sides to verify they sit on the exact same plane.
Customization Ideas
-
Swap the blue and shirt colors for traditional red or pastel pink to create different classic outfits for your plush toy.
-
Use a fuzzy or chenille yarn with a matching hook size to make an ultra soft, oversized version of this character.
-
Add a small loop of chain stitches to the back of the head if you want to turn the finished piece into a bag charm or ornament.