Crochet Greyhound Coat Free Pattern For Beginners And Experts
This detailed crochet pattern will help you create a lifelike Greyhound Dog Amigurumi, perfect for pet lovers and collectors. The design captures the elegant body and slender shape of a real greyhound, making it a standout display piece or a heartfelt handmade gift.
Crochet Greyhound

With clear step-by-step rounds and structured shaping, this project is ideal for both intermediate and advanced crocheters who enjoy realistic amigurumi creations. You can customize the size and colors to match your favorite greyhound breed, turning this pattern into a one-of-a-kind crochet treasure.
Materials
- Yarn: 2 mm thread
- Hook: 2.5 mm
- Size: 14 cm (length) x 16 cm (height)
- Worked in a spiral (continuous rounds) unless stated otherwise
- Do not join with a slip stitch unless indicated
Abbreviations
- SC – Single Crochet
- Inc – Increase (2 SC in one stitch)
- Dec – Decrease (SC two stitches together)
- Ch – Chain
- MR – Magic Ring
- st – Stitch
Body and Head
- R1: MR, 8 SC. (8)
- R2: 8 Inc. (16)
- R3: [1 SC, Inc] repeat 8 times. (24)
- R4: [2 SC, Inc] repeat 8 times. (32)
- R5: Inc, 30 SC, Inc. (34)
- R6: 34 SC. (34)
- R7: 3 SC, [3 SC, Inc] repeat 3 times, 4 SC, [Inc, 3 SC] repeat 3 times, 3 SC. (40)
- R8: 40 SC. (40)
- R9: 40 SC. (40)
- R10: 3 SC, Dec, 7 SC, Inc, 14 SC, Inc, 7 SC, Dec, 3 SC. (40)
- R11: 11 SC, Skip 18 st for neck, 11 SC. (22)
- R12: Dec, 1 SC, Dec, 5 SC, Dec, 5 SC, Dec, 1 SC, Dec. (17)
- R13: Dec, 13 SC, Dec. (15)
- R14: 6 SC, Dec, 7 SC. (14)
- R15+: Continue decreasing and shaping. Refer to the video for head shaping.
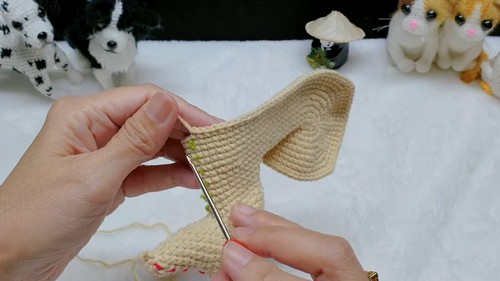
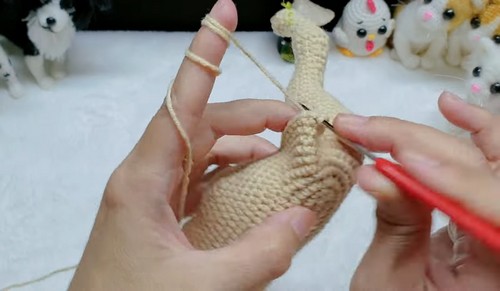
Neck and Front Body
- R1: 18 SC around neck opening. (18)
- R2: Work 2 SC into connection stitches to close the gap. (20)
- R3: 8 SC, Inc, 9 SC, Dec. (20)
- R4: 9 SC, 3 SC in one st, 8 SC, Dec. (21)
- R5: 11 SC, 16 Ch for front leg, turn, Inc in 2nd Ch from hook, 14 SC down the chain, 1 SC in same st as connection, 10 SC.
- R6: 1 SC, 14 SC on chain, Inc, 17 SC, 10 SC. (44)
- R7: 24 SC, 7 Inc, 23 SC. (51)
- R8–R23: Continue following on-screen shaping.
- R24: 19 SC, 19 SC around both sides. (38)
- R25: 20 SC, 20 SC around both sides. (40)
- R26: 2 SC, 2 Ch, Skip 9 st (back leg hole), 18 SC, Skip 17 st, 2 SC, Skip 17 st, 18 SC, 2 Ch, Skip 9 st (second leg hole), 2 SC. (44)
- R27: 2 SC, 2 SC on chain, 9 SC, [1 SC, Dec, 1 SC] repeat 5 times, 9 SC, 2 SC on chain, 2 SC. (39)

Back Legs
- R1: 17 SC around opening, 4 SC in corner/side stitches. (21)
- R2: 8 SC, Dec, 9 SC, Inc, 1 SC. (21)
- R3–R19: Continue shaping as shown in video.
- R20: 6 SC, Dec 3 (3 SC together), 5 SC.
- R21+: Continue until closed.
Front Legs
- R1: 9 SC, 1 SC in corner, 2 SC on chain, 1 SC in corner. (13)
- R2+: Continue shaping as shown in video.
Tail
- R1: 2 Ch, 1 SC in 2nd Ch from hook. (1)
- R2: 1 Ch, turn, Inc. (2)
- R3: 1 Ch, turn, 1 SC, Inc. (3)
- R4: 1 Ch, turn, 1 SC, Inc, 1 SC. (4)
- R5: 1 Ch, turn, 3 SC, Inc. (5)
- R6: 1 Ch, turn, 2 SC, Inc, 2 SC. (6)
- R7–R9: 1 Ch, turn, 6 SC. (6)
- R10+: Continue shaping tail as shown in video.
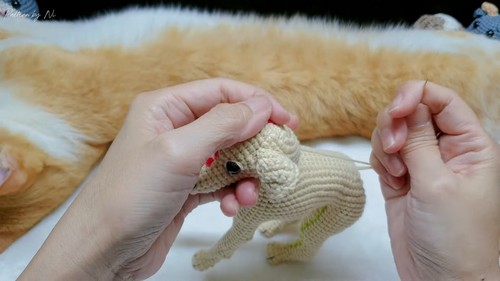
Final Assembly Notes
- Stuff the body and legs as you go before closing.
- Do not stuff the tail.
- Attach eyes between rounds 11 and 12 of the head.
- Attach ears around R5–R6 of the neck.
