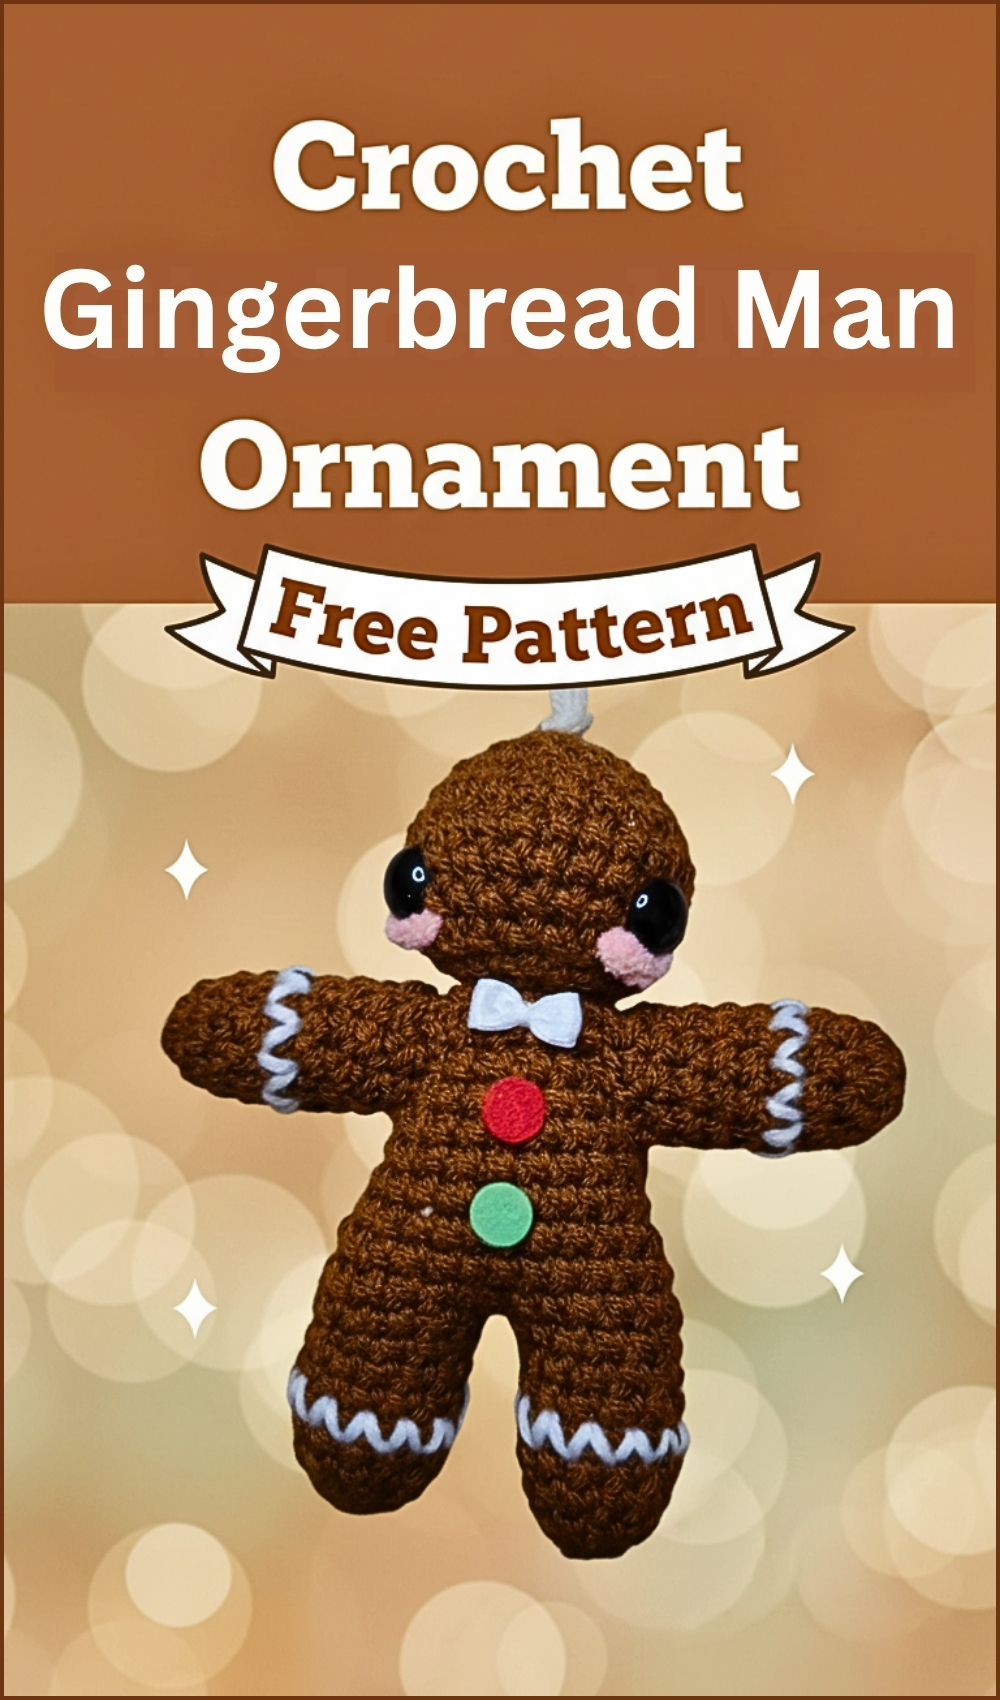
Crochet Christmas Ornaments Gingerbread Man Pattern
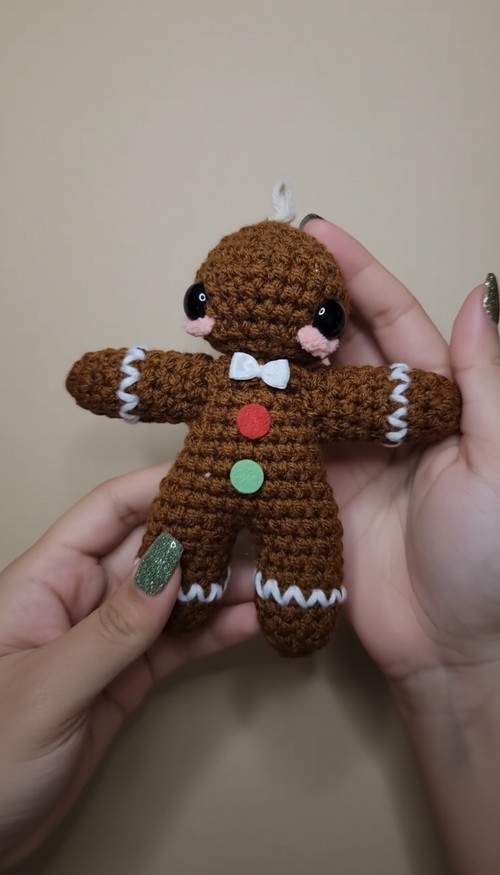
Golden brown stitches shaped into a charming cookie-inspired figure bring this Crochet Gingerbread Amigurumi pattern to life, combining playful design with decorative appeal. The rounded body, neatly formed limbs, and icing-style details create a soft handmade piece that works beautifully as a festive ornament, gift, or cozy display item.
Crochet Gingerbread Man Ornament
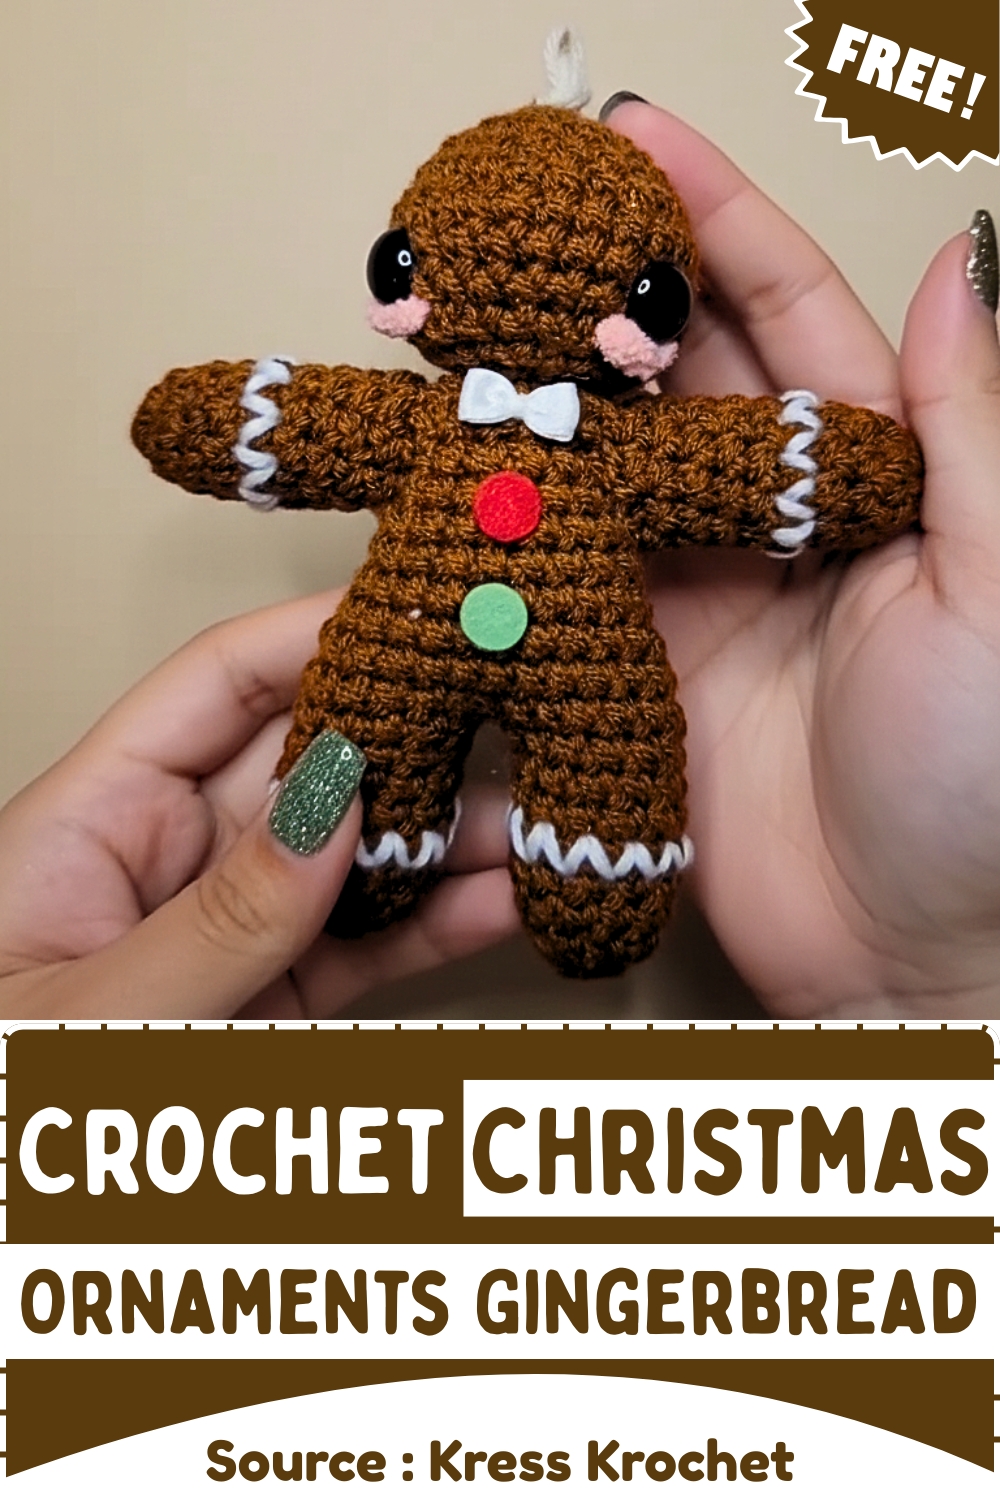
Beyond its cheerful appearance, this design gives crocheters the chance to practice clean shaping, balanced assembly, and simple embellishment techniques while ending up with a character that feels warm, familiar, and full of personality.
Skill Level
Beginner to Intermediate
This pattern uses simple stitches and shaping, but includes joining legs, balanced decreases, and decorative finishing that benefit from a bit of experience.
Finished Size
- Size will vary depending on yarn and tension, but expect a palm-sized plush suitable for hanging or display.
Materials
- Medium-weight yarn in brown and white, and any size pink yarn.
- 4mm crochet hook, stitch marker, scissors, and tapestry needle.
- 14mm safety eyes and backs.
- Twine for hanging.
- Two felt circles (one red, one green).
- One white ribbon bow.
- Felt glue and sewing pins.
- Stuffing/Poly-fill.
Abbreviations
- sc – single crochet
- inc – increase
- dec – decrease
- mc – magic circle
Helpful Notes Before Starting
- Work in continuous rounds unless stated otherwise.
- Use a stitch marker to track the beginning of each round.
- Keep your stitches tight enough to prevent stuffing from showing through.
- When instructed to crochet fewer stitches (like “sc 5”), you are intentionally shaping the piece by narrowing it.
Construction Overview
This amigurumi is built in separate sections:
- Arms and legs are made first as small tubes
- Legs are joined to form the base of the body
- Body is shaped upward with gradual decreases
- Head is worked separately and sewn on
- Decorative details (icing, bow, buttons) are added last
The shaping relies heavily on decreases to taper the limbs and body, creating that soft, cookie-like silhouette.
ARMS (MAKE 2)
- R1: 5 single crochets (sc) in a magic circle (mc) (5).
- R2: Increase (inc) in each stitch (10).
- R3–9: Single crochet around (10).
- R10: Single crochet 5 times (5).
- Slip stitch to finish off, leaving a long tail for sewing.
- Stuff the arm with poly-fill.
Stitch and Shaping Insight
- The final round reduces the stitch count sharply, which helps taper the arm slightly so it sits neatly against the body without looking bulky.
LEGS (MAKE 2)
- R1: 6 single crochets (sc) in a magic circle (mc) (6).
- R2: Increase (inc) in each stitch (12).
- R3–7: Single crochet around (12).
- R8: Single crochet 6 times (6).
- Do not finish off or cut the yarn for the first leg.
- For the second leg, slip stitch to finish off and cut the yarn.
Why This Matters
Leaving the first leg open allows you to seamlessly join both legs and start building the body without extra sewing.
BODY
- R1: Single crochet 9 times on the first leg, chain 1, attach to the second leg, single crochet around (12), single crochet on the back of the chain (1), and go back to the first leg and single crochet 3 times (26).
- R2: Single crochet around (26).
- R3: Single crochet twice, decrease, single crochet 11 times, decrease, and single crochet 9 times (24).
- R4: Single crochet twice, decrease, single crochet 10 times, decrease, and single crochet 8 times (22).
- R5: Single crochet around (22).
- R6: Single crochet, decrease twice, single crochet 7 times, decrease twice, and single crochet 6 times (18).
- STUFF THE LEGS.
- R7: Single crochet around (18).
- R8: (Decrease, single crochet 5 times) repeated twice (14).
- R9–10: Single crochet around (14).
- R11: (Decrease, single crochet 5 times) repeated twice (12).
- Slip stitch to finish off, leaving a long tail for sewing.
- Stuff the body with poly-fill.
Shaping Guidance
- The decreases are placed symmetrically to gently taper the torso.
- Stuff the legs firmly before continuing upward so they hold their shape.
- Keep stuffing even to avoid a lumpy or tilted body.
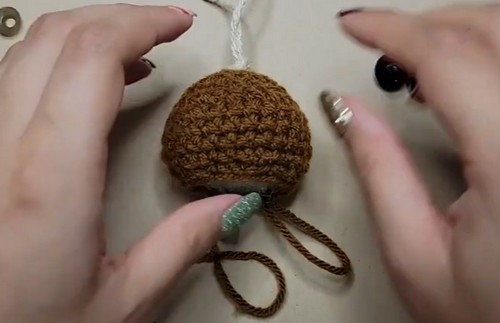
HEAD
- R1: 6 single crochets (sc) in a magic circle (mc) (6).
- R2: Increase (inc) in each stitch (12).
- R3: (Single crochet, increase) repeated 6 times (18).
- R4: Single crochet around (18).
- R5: (Single crochet twice, increase) repeated 6 times (24).
- R6–8: Single crochet around (24).
- Place the 14mm safety eyes between rounds 7 and 8, with 7 visible stitches between them.
- Sew the blushes below each eye using pink yarn.
- R9: (Single crochet twice, decrease) repeated 6 times (18).
- R10: (Single crochet, decrease) repeated 6 times (12).
- Pull a loop of twine through the top of the head and tie a knot.
- Stuff the head with poly-fill.
- Finish off and hide the tail.
Eye Placement Tip
Spacing the eyes with 7 stitches between them creates a balanced, gentle expression. If placed too close, the face looks crowded; too far, and it loses character.
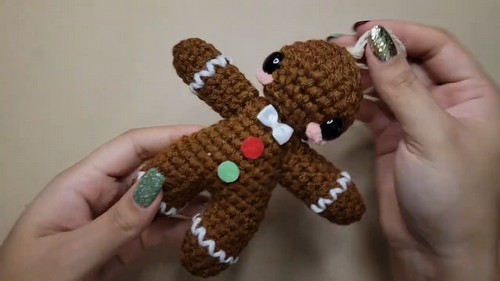
ASSEMBLY
- Pin and sew the arms to the sides of the body.
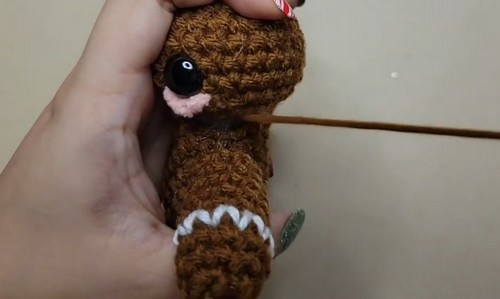
- Using white yarn, sew zigzag stitches around Round 5 of the arms and legs for the icing effect.
- Pin and sew the head on top of the body.
- Use felt glue to attach the white ribbon bow and the red and green felt buttons.
Assembly Guidance
- Pin everything first before sewing to check symmetry
- Arms should sit slightly forward, not directly on the sides
- Head placement should align centrally over the body opening
- Sew slowly and evenly to avoid gaps
Stuffing Tips
- Stuff in small pieces rather than large chunks
- Focus extra stuffing in the lower body for stability
- Keep the head firmly stuffed so it doesn’t collapse when hanging
Beginner Notes
- Take your time when joining the legs—this is often the trickiest step
- Count stitches after each round to stay on track
- Use pins generously during assembly for better placement
Troubleshooting
- Body looks uneven: Check that decreases are evenly spaced and stitch counts are correct
- Head tilting forward or back: Adjust stuffing and reposition before fully sewing
- Arms sticking out awkwardly: Sew slightly angled downward for a more natural look
Customization Ideas
- Change icing color for different themes
- Add embroidered details instead of felt
- Use textured yarn for a more “cookie-like” finish
- Adjust facial features for different expressions