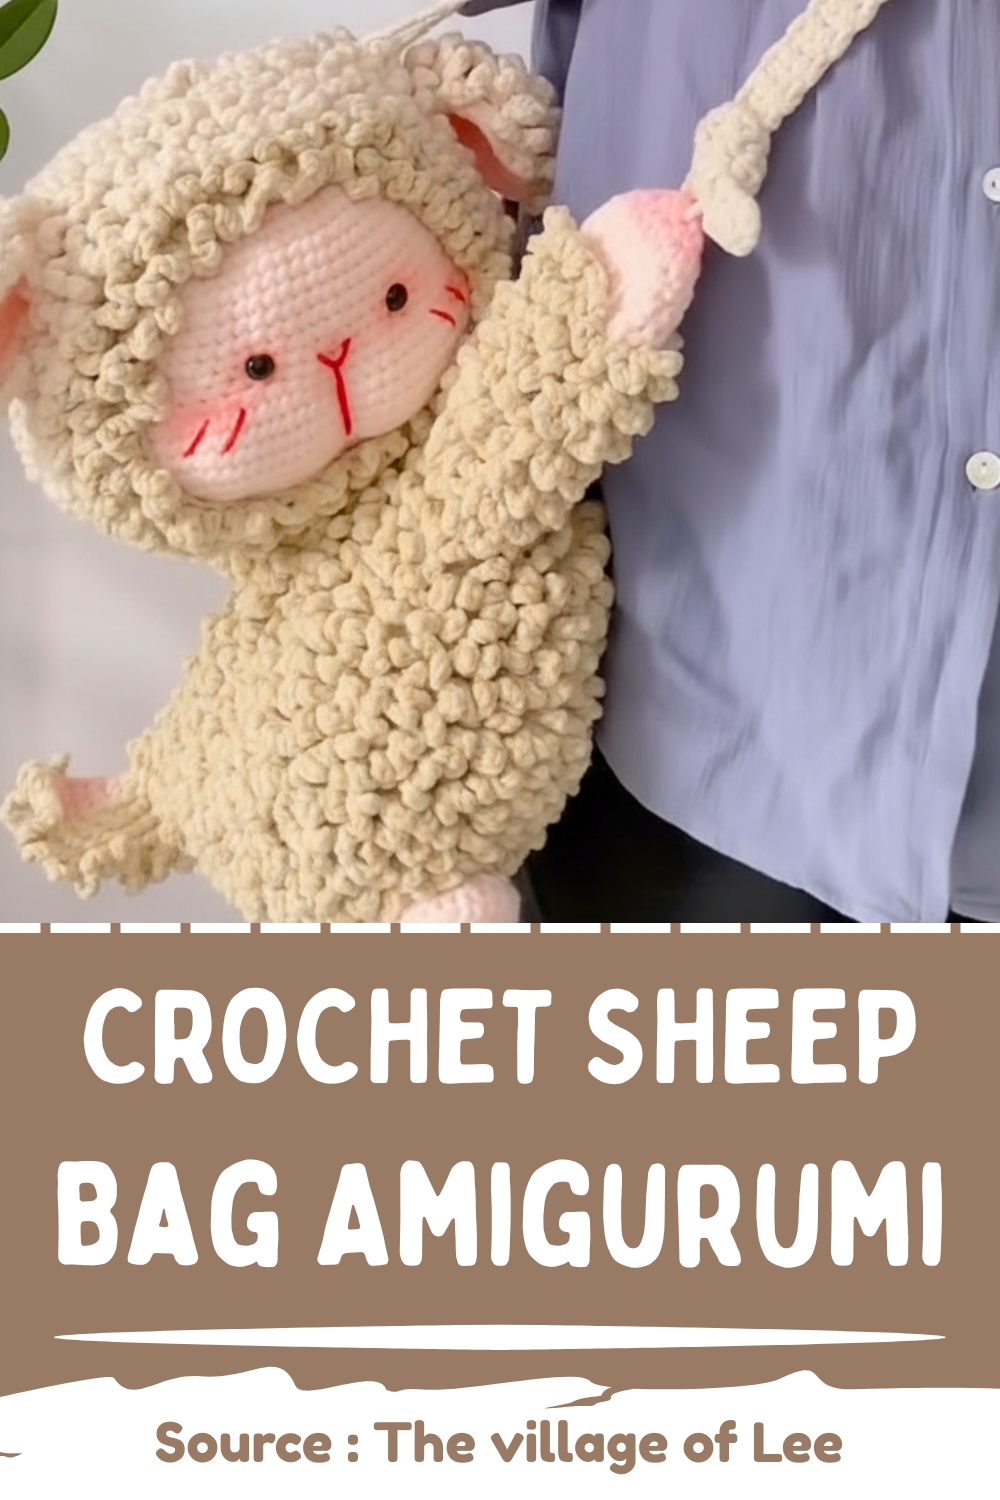
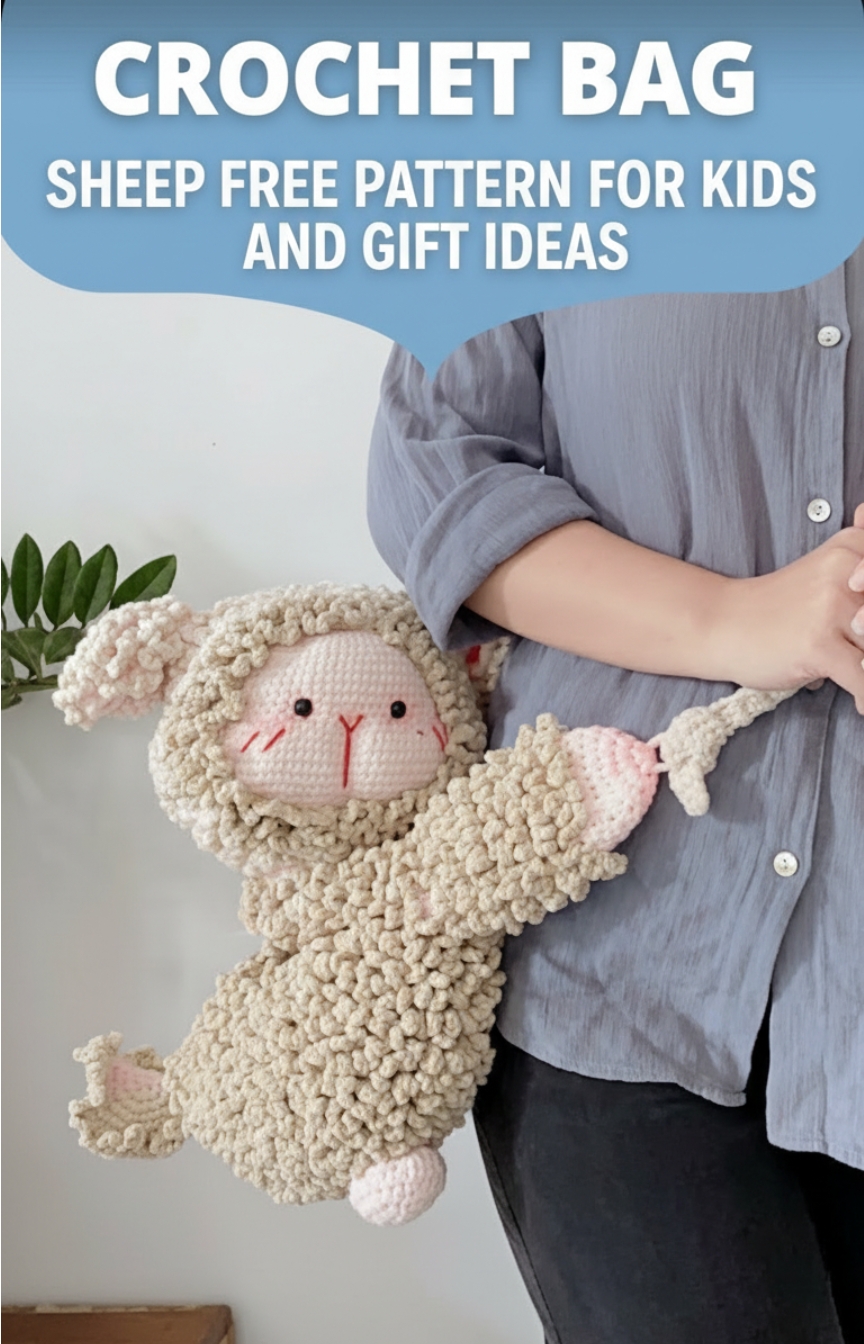
Crochet Bag Sheep Free Pattern For Kids And Gift Ideas
This crochet sheep backpack pattern is a charming and functional handmade project that combines cute amigurumi details with practical bag construction. Designed to be soft, sturdy, and eye catching, this crochet sheep bag works beautifully as a small backpack for kids, a playful everyday bag, or a thoughtful handmade gift.
Crochet Sheep Bag


Skill level
-
Intermediate beginner
-
Requires knowledge of working with double strands
-
Focuses on basic shaping and sturdy assembly
Finished size
-
Approximately 20 to 25 cm in height depending on tension
-
Customizable strap lengths for both children and adults
Materials
-
Milk cotton yarn 50g per ball
-
Color 07 for the face and skin
-
Color 19 for the wool body texture
-
Small amount of red or pink yarn for mouth nose and cheeks
-
Crochet hook 3mm for single strand or 4mm for double strands
-
10mm safety eyes
-
Polyester fiberfill stuffing about 200g
-
Yarn needle
-
Button for bag closure
Abbreviations
-
MR: Magic Ring
-
DC: Double Crochet
-
BLO: Back Loop Only
-
ST: Stitch
-
INC: Increase
Helpful notes before starting
-
Using two strands of yarn held together ensures the bag is dense enough to hold items without stretching out too much.
-
Milk cotton is ideal for this project because it is soft against the skin but provides enough structure for a functional accessory.
-
Make sure your magic ring is pulled very tight at the start to prevent the stuffing or small items from falling through the center of the bag.
Construction overview
-
The bag is built from the bottom up starting with a flat circular base that transitions into the walls.
-
The head is a separate amigurumi piece that acts as the focal point and decorative flap.
-
The straps are threaded through the body rather than just surface-sewn, which distributes weight more evenly and prevents the yarn from sagging.
Stitch and shaping clarity
-
Double crochet is used for the bag body to provide height and speed, making the main pouch a quick build.
-
Working in the back loop only (BLO) serves two purposes: it creates a decorative texture and helps the bag "turn" upward from the base to the sides.
-
For the head, keep your stitches tight so that the fiberfill remains hidden and the face maintains a smooth, professional appearance.
Step by step pattern instructions
-
Bag Body
-
Crochet the bag body using two strands of yarn held together for thickness
-
Start with a magic ring and crochet 12 double crochet stitches into the ring
-
In the next round crochet 3 double crochet in the first stitch to begin increasing
-
Continue the round working in the back loop only for remaining stitches
-
Keep working in rounds while increasing evenly to expand the base
-
From rounds 10 to 12 crochet 1 double crochet in each stitch working in the back loop only
-
Continue until the bag reaches your preferred height and finish off neatly
-
Head
-
Crochet the sheep head separately using the face color
-
Shape the head with increases and decreases to create a rounded form
-
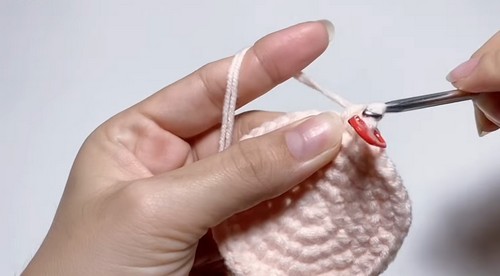
Insert safety eyes evenly on the face
-
Stuff the head firmly with fiberfill
-
Embroider the mouth nose and cheeks using red or pink yarn
-
Straps
-
Crochet backpack straps separately
-
Fold each strap and prepare it for threading through the bag body
-
Pull the straps through the bag to form backpack loops
-
Adjust each loop to approximately 8 cm before securing
-
Crochet a long chain strap about 150 stitches or around 1 meter in length
-
Use this chain as a crossbody strap or extra reinforcement
Assembly guidance
-
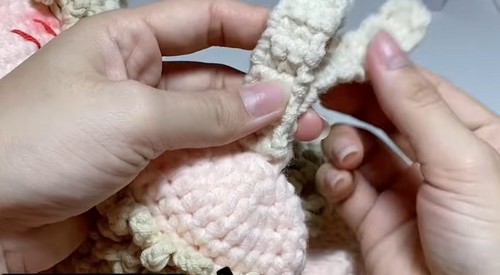
Positioning is the most critical step; use straight pins to hold the head in place and view it from several angles before sewing.
-
The head should sit high enough to allow the bag to open easily but low enough to look like it is "leaning" on the bag.
-
When sewing the head, go through both loops of your stitches on the head and a full stitch on the bag for the strongest bond.
Eye and facial feature placement
-
Place the 10mm safety eyes roughly in the middle of the head, leaving enough space between them for the embroidered nose.
-
The nose and mouth are typically embroidered in a "Y" or "V" shape to give the sheep a gentle, friendly expression.
-
Apply the pink blush or yarn accents just below and slightly to the outside of the eyes to emphasize the roundness of the cheeks.
Stuffing tips
-
Fill the head gradually, teasing the fiberfill apart to avoid lumps and ensure the shape is perfectly spherical.
-
Pay extra attention to the area around the safety eye stems, ensuring there is enough stuffing behind them so they don't tilt inward.
Assembly
-
Position the sheep head at the top front of the bag body
-
Use pins to center the head before sewing
-
Sew the head securely to the bag using a yarn needle
-
Thread and secure the straps in place
-
Sew a button at the bottom center of the bag front
-
Use a crochet chain loop at the top to hook over the button for closure
-
Add blush or embroidery to the ears and cheeks for a cute finish
Finishing notes
-
Check all knots and yarn tails to ensure they are woven deep into the stuffing or the inside of the bag.
-
Test the button closure several times to make sure the loop is tight enough to stay closed but loose enough for a child to manipulate.
Beginner notes
-
If you find working with two strands difficult, try using a slightly larger hook than the 4mm to help catch both loops easily.
-
Don't worry if your bag base looks a bit wavy at first; the weight of the items inside will help it settle into a better shape.
Troubleshooting
-
If the bag feels too flimsy, you can line the interior with a simple fabric circle to prevent the crochet from stretching over time.
-
If the head feels top-heavy, follow the tip below to reinforce the connection points between the head and the bag body.
Finishing Tips
-
Use the long chain strap to balance the weight of the sheep head
-
Reinforce the head attachment with extra stitches if the head tilts backward
-
Adjust strap length to fit children or adults as needed
Customization ideas
-
Change the body color to a soft grey or beige for a more realistic "natural wool" look.
-
Add a small crochet flower or a ribbon bow near the sheep's ear to give the character more personality.
-
Use a wooden toggle button instead of a standard plastic one to enhance the rustic, handmade feel of the accessory.