
Crochet Amigurumi Hedgehog Free Pattern
Autumn mantels look cosier with a cute crochet hedgehog tucked among the leaves and pumpkins, its spine worked separately in eyelash or fur yarn and sewn on. Seven pieces in DK or worsted yarn make a 4 to 5 inch hedgehog soft toy in about two to three hours.
Pulling each loop of the spine section on this crochet amigurumi hedgehog doll is meditative once you find the rhythm. The texture grows fast and the contrast against the smooth belly keeps it visually satisfying row by row. Makers who enjoy process over speed will not want to put this one down.
Crochet Amigurumi Hedgehog Doll

Looped or cut fringe yarn covers the entire back of this hedgehog, creating a dense, textured spine section that sits in sharp contrast to the smooth cream face and belly. The body is wide and low, with four round legs underneath and small flat ears at the sides of the head. Dark safety eyes with amber surrounds and a separate dark nose sit on the plain face panel. Parts include the body, head, four legs, ears and the textured back worked as its own section. Working the spine texture is the most time-consuming part. The face and legs build up quickly in comparison.
Materials and Tools
- Beige or skin-tone yarn for the body and face
- Textured eyelash or fur yarn for the spine piece
- Crochet hook suitable for your yarn (usually 2 mm to 3 mm)
- Safety eyes
- Fiberfill stuffing
- Stitch marker
- Tapestry needle
- Scissors
Abbreviations
- SC: single crochet
- Inc: increase, work 2 SC into the same stitch
- Dec: decrease, SC two stitches together
Pieces List
- Head and body: 1, worked as one continuous piece
- Spine piece: 1, worked in eyelash or fur yarn and sewn to the back
- Ears: 2, small semicircle shapes
- Arms: 2
- Legs: 2
Seven pieces. Make the arms, legs, and ears while the head and body are drying or settling, so everything is ready for assembly.
Approximate Size and Time
Estimates at standard DK or worsted weight at a 2.5 to 3 mm hook.
- Finished height when seated: approximately 4 to 5 inches
- Working time: approximately 2 to 3 hours
- Difficulty: beginner
Before You Start
- The most important habit for this pattern is a stitch marker in the first stitch of every round. The head-and-body piece runs from a 6-stitch magic ring to 30 stitches and back down to 6 — that is three distinct phases of shaping, and the stitch marker is what keeps you oriented throughout.
- When you reach the eyelash yarn spine piece, your hook tension may feel different because eyelash yarn catches on the hook more than smooth yarn does. Work slightly more slowly than usual and feel each stitch rather than trying to see it.
The Pattern
Head and Body
- Round 1: MR, 6 SC [6]
- Round 2: 1 SC, inc, repeat 3 times [9]
- Round 3: 2 SC, inc, repeat 3 times [12]
- Round 4: 1 SC, inc, repeat 6 times [18]
- Round 5: 2 SC, inc, repeat 6 times [24]
- Round 6: 3 SC, inc, repeat 6 times [30] Checkpoint: a wide flat disc — the nose end of the hedgehog. Should lie completely flat. Mark the centre-front stitch now — this is where the nose will be embroidered later.
- Round 7: SC in each stitch around [30]
- Insert safety eyes between rounds 7 and 8, approximately 5 to 6 stitches apart on the front face. Secure the washers from inside before continuing. For toys going to children under three, embroider the eyes with black yarn at this stage instead.
- Round 8: SC in each stitch around [30]
- Round 9: SC in each stitch around [30]
- Round 10: SC in each stitch around [30]
- Round 11: SC in each stitch around [30]
- Round 12: SC in each stitch around [30] Checkpoint: after six straight rounds the body is a clear dome — the hedgehog's rounded belly and body shape. This is the widest and tallest point before closing begins.
- Round 13: 3 SC, dec, repeat 6 times [24]
- Round 14: 2 SC, dec, repeat 6 times [18]
- Begin stuffing the head firmly at this point Checkpoint: stuff before round 15 narrows the opening further. The body should feel firmly rounded — like a small apple — before you continue.
- Round 15: 1 SC, dec, repeat 6 times [12]
- Round 16: Dec around [6]
- Fasten off and weave in the yarn ends, closing the remaining hole

Spine Piece (Eyelash or Fur Yarn)
- Round 1: MR, 6 SC [6]
- Round 2: Inc in every stitch around [12]
- Round 3: 1 SC, inc, repeat 6 times [18]
- Round 4: 2 SC, inc, repeat 6 times [24]
- Round 5: 3 SC, inc, repeat 6 times [30] Checkpoint: a flat disc in eyelash yarn — it will look more like a fur pom-pom than a flat circle, which is correct. The textures makes it hard to count, so count by stitch count rather than by eye.
- Round 6: SC in each stitch around [30]
- Round 7: SC in each stitch around [30]
- Round 8: SC in each stitch around [30]
- Round 9: SC in each stitch around [30] Checkpoint: a short, slightly domed piece that is roughly two-thirds the diameter of the body sphere. When placed on the back of the body it should cover the upper half and partway down each side.
- Fasten off leaving a long tail for sewing
If shaping and stuffing feel intimidating, the video tutorial below shows you exactly how it comes together, one round at a time!
Ears (Make 2)
- MR, 5 SC
- Pull the ring tight to form a small semicircle Checkpoint: a very small half-moon shape. Both ears should match — compare them flat before sewing.
- Fasten off leaving a long tail for sewing
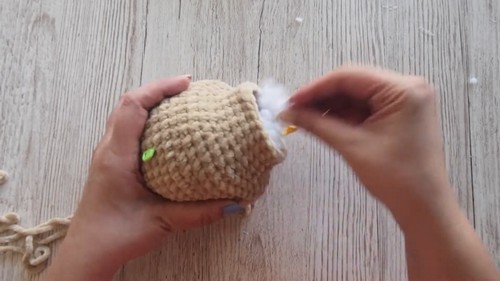
- Sew to the top sides of the head
Arms (Make 2)
- MR, 6 SC [6]
- Work 3 to 4 rounds of SC around (choose a number and keep it consistent for both arms)
- Do not stuff
- Fasten off leaving a long tail for sewing
Legs (Make 2)
- Round 1: MR, 6 SC [6]
- Round 2: 1 SC, inc, repeat 3 times [9]
- Round 3: SC in each stitch around [9]
- Round 4: SC in each stitch around [9] Checkpoint: a short, slightly wider tube than the arms. Both legs should match in length before fastening off.
- Fasten off leaving a long tail for sewing
Face Embroidery
- Embroider the nose at the centre of the starting magic ring — a few satin stitches covering the ring entirely
- Embroider a small curved smile just below the nose

Assembly
This is where placement decisions determine the personality of the finished hedgehog. Do not rush it.
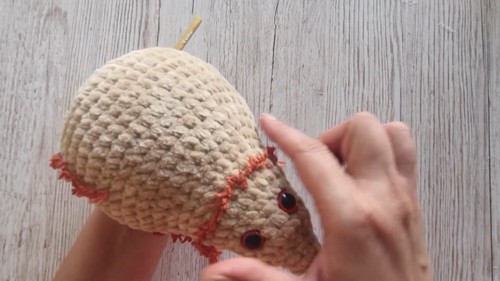
- Pin the spine piece to the back of the body before sewing a single stitch. It should start just behind the eyes — not on top of them — and run down the back to the base. Check from the front, both sides, and from directly above before sewing.
- Sew ears to the top sides of the head, just behind where the spine piece begins.
- Attach arms slightly below the midpoint of the body on each side.
- Attach legs toward the front base of the body so the hedgehog can sit without tipping forward or backward. Pin both legs simultaneously and test the sitting position on a flat surface before sewing.
- Embroider the nose and smile after all three-dimensional pieces are attached, so the face reads correctly against the full assembled figure.
Stuffing Guide
- Begin stuffing at round 14, before round 15 closes the opening below comfortable hand-width.
- The body needs to feel firmly round — dense enough to keep the sitting position stable when the legs are sewn on.
- The spine piece stays unstuffed — it is a flat fabric piece and the eyelash texture gives it all the volume it needs.
- Arms stay unstuffed for flexibility and natural draping.
- Legs can have a very light amount of stuffing or none — they need to hold their tube shape but stay soft enough for position adjustment during assembly.
- Overstuffing shows first at the closing rounds (15 and 16), where the stitches will stretch outward. If the stitches are visibly separating, remove a small amount before continuing.
Troubleshooting
- The spine piece is making the hedgehog look like it is wearing a hat. It is positioned too high — centred on top of the head rather than starting just behind the eyes. Unpick the attachment stitches, slide the spine piece back until its front edge sits at roughly the eye line, and re-pin before sewing.
- The safety eyes shifted during stuffing and now look uneven. The washer locks the eye in place — it cannot shift after the backing is secured. If the eyes look uneven after stuffing, it is because they were placed unevenly before the washers were locked. Check eye position and symmetry before pushing the washer home — once it is on, the only fix is to cut the eye post from inside, which damages the fabric.
- The eyelash yarn is catching on the hook and making the spine piece difficult to work. Go down one hook size for the spine piece and work significantly more slowly than usual. Feel each stitch loop rather than trying to see it in the eyelash pile. Taking twice as long per stitch is normal with this yarn type.
- The head and body look elongated rather than round. The straight rounds (7 to 12) build height without adding width. If you worked more than 6 of these rounds, the piece becomes taller and reads as oval rather than spherical. Count your straight rounds as you work them — it is easy to lose track and work 8 or 9 instead of 6.
- The hedgehog tips forward when sitting. The legs need to be positioned slightly further back on the body base. Unpick and reattach them, using the flat surface test (place the figure on a table before sewing) to find the correct position.
- The ears look too small. The ear is 5 SC in a magic ring, which is intentionally tiny for a small animal. If you want larger ears, work 6 SC in the ring and a round of increases to reach 12. The proportion changes slightly but the construction works at both sizes.
- The spine piece is not staying flat against the back — it is curling at the edges. The sewing tension is pulling at one point rather than being distributed around the perimeter. Sew around the full edge of the spine piece rather than tacking at a few points, and keep the sewing tension loose enough that the edge lies flat.

Yarn Substitution and Size Scaling
- Any eyelash, fur, or long-pile yarn works for the spine piece as long as it is thin enough for the hook size. Thicker pile creates more dramatic spines.
- A contrasting smooth yarn in a brown or grey shade can substitute for eyelash yarn if texture yarn is unavailable — the silhouette reads similarly with a colour contrast even without the texture.
- Scaling up: go up a hook size and a yarn weight for a larger hedgehog without changing round counts.
- At fingering weight with a 2 mm hook the finished piece is approximately half the size — a good keychain-scale hedgehog.
Toy Safety
- Safety eyes must go in between rounds 7 and 8 while the piece is fully accessible from inside.
- For children under three, embroider the eyes in black yarn. No safety hardware.
- Eyelash yarn strands can loosen from the base yarn over time. Before giving the toy to a child, check that the spine piece is sewn completely around its perimeter so no individual fibre strands can be pulled out.
- Weave in all ends with at least two direction changes.
Frequently Asked Questions
- Can I skip the eyelash yarn and just use a matching smooth yarn for the spine piece? Yes. The construction is identical — same rounds, same stitch counts. Without the texture, the colour contrast between the body and the spine piece does all the visual work. A darker brown or grey smooth yarn on a beige body still reads clearly as a hedgehog.
- Do I have to make the arms? The arms are optional in the sense that the hedgehog reads as a hedgehog without them. The source includes them as part of the pattern. If you skip them, the assembly section is shorter and the figure looks a bit rounder and simpler, which is also a valid finished toy.
- The magic ring on the ear is pulling open. How do I close it fully? Thread the starting tail through the front loop of each of the 5 round 1 stitches and pull firmly, then knot before weaving in. The second pull through those loops usually closes any gap left by the initial ring pull.
- How do I know when the spine piece is correctly positioned? Set the assembled body on a flat surface, hold the spine piece against the back, and look from the front. The spine should be completely hidden from the front-facing view — if you can see any of the eyelash texture from the front, the piece has drifted too far forward. Adjust until the eye line is the boundary.
- The nose embroidery over the magic ring looks uneven. Magic rings are small and slightly irregular, and the nose embroidery sits on that irregularity. Use satin stitches laid very close together and cover the ring completely — a slightly larger nose than you intended is better than one where the ring peeks through. Once the face is fully assembled and viewed from a distance, a slightly thick nose is barely visible.