
Baby Koala Crochet Pattern Amigurumi Free
Baby shower gifts get extra sparkle from the crochet baby koala amigurumi, which carries 15 mm glitter safety eyes and a 26 mm safety koala nose. A 3.75 mm hook shapes the grey head and face, while a 6.0 mm hook works the fluffy edged ears on a koala of 12 to 15 cm.
Those dome eyes are the first thing children notice about this crochet baby koala amigurumi, and they will ask for one by name after seeing it. It suits anyone making for a child under five who has a thing for animals with big eyes specifically. The splayed paws seal the request.
Crochet Baby Koala Amigurumi
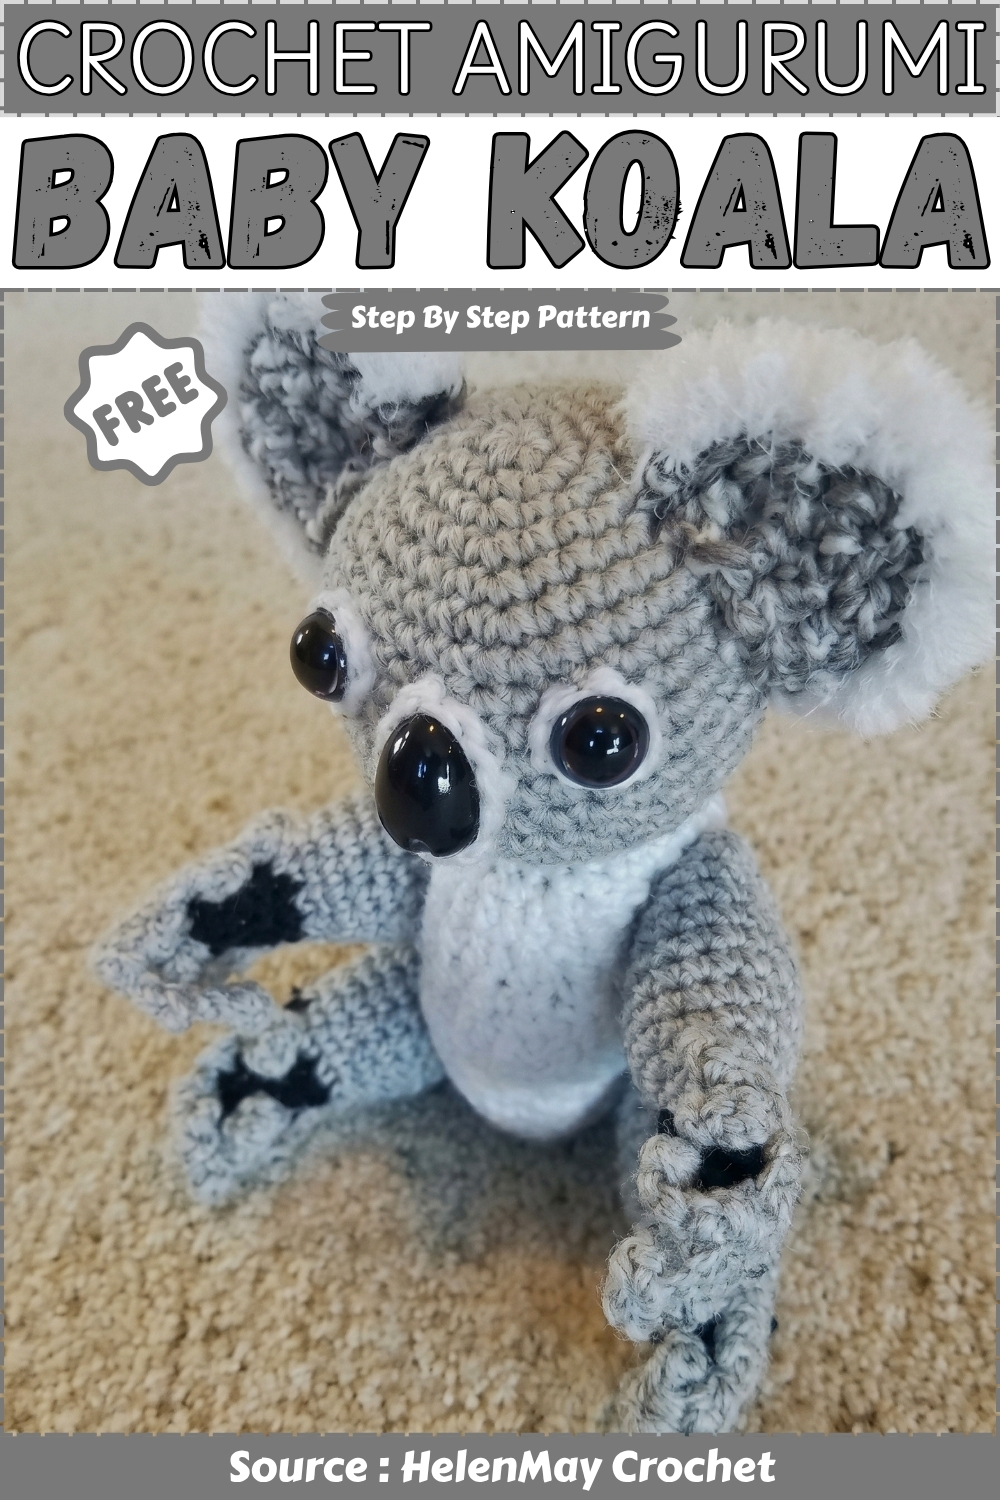
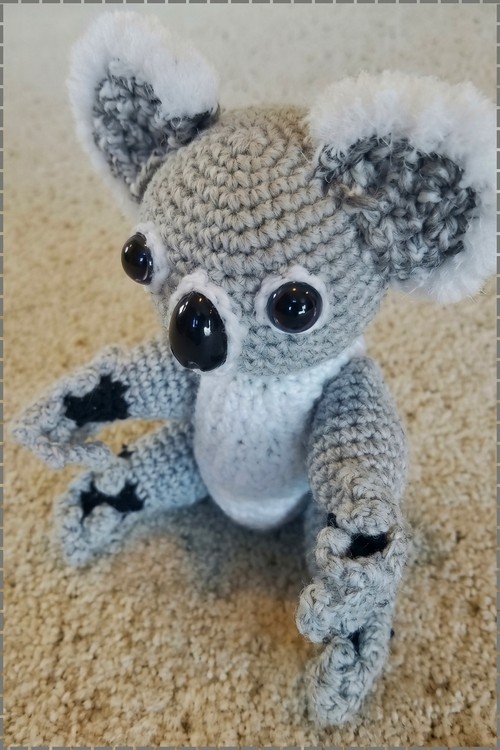
Oversized safety eyes dominate the face of this koala, set against a wide white eye surround that makes them read almost comic in scale. The ears are large and fluffy, worked with a looped or brushed texture that contrasts with the tighter body stitches. Splayed limbs with dark paw pads give it a climbing pose rather than a seated one. Parts include the head, body, four limbs and ears, all assembled after working each piece separately. The ear texture and the paw detail are the two sections that take the most attention. The rest builds up in standard rounds.
Quick Facts
- Finished size: approximately 12 to 15 cm from base to ear tips, depending on tension
- Difficulty: easy to intermediate, with face assembly requiring care
- Estimated time: 3 to 5 hours including face detail work
- Piece count: 7 pieces plus optional crocheted nose
- Key technique: two-hook construction, face assembly before closing rounds
Colour and Customization Ideas
Consider these before choosing your yarn, as some affect the whole colour scheme.
- Classic grey with white eye whites and a black crocheted nose reads immediately as a koala; this is the base version the pattern is written around
- A warm taupe or ginger-grey body with a cream muzzle leans more toward a joey colouring
- Swapping the glitter safety eyes for solid black gives a rounder, more classic amigurumi read; either works but the glitter version photographs differently
- Using a short-pile chenille or mohair blend for the ear join yarn instead of a standard fluffy yarn gives the ear edge more visual texture
- Adding a small embroidered eucalyptus leaf in green yarn somewhere on the piece, sewn flat to the head or held in the finished paw if you add a body, is the detail that makes gifted versions memorable
Pieces List
Seven pieces plus one optional piece.
- Head: make 1, worked in grey yarn on 3.75 mm hook
- Eye whites: make 2, small circles in white yarn
- Nose muzzle: make 1, oval shape in white yarn
- Crocheted nose: make 1, optional, in black yarn
- Ears: make 2 pairs (4 individual flat pieces total), worked on 6.0 mm hook, joined in pairs
Materials and Tools
- 3.75 mm crochet hook for the head and face details
- 6.0 mm crochet hook for the ears
- Grey yarn for the head
- White yarn for the eye whites and muzzle
- Black yarn for the optional crocheted nose
- Fluffy yarn for joining the ear edges (not listed separately in materials but required for the ear join)
- 15 mm glitter safety eyes
- 26 mm safety koala nose
- Poly fill stuffing
- Tapestry needle
- Scissors
- Yarn marker
Note on the fluffy ear yarn: the pattern specifies single crochet around the curved ear edges using fluffy yarn to join them. This yarn is not listed in the materials section. Source a small amount of fluffy or mohair-style yarn in grey or white before you begin.
Safety Eye Timing
- Insert the safety eyes through the crocheted eye whites first, then through the head fabric, before beginning round 15
- The eye whites must be pre-positioned and pinned to the head with the safety eye posts through all layers before pressing the washers
- The 26 mm koala safety nose inserts through the muzzle and head at the same stage, before round 15
- Both the glitter eyes and the oversized nose are serious choking risks; for toys going to children under three, embroider all facial features in yarn instead and skip all plastic hardware entirely
The Pattern
Head
- Round 1: create a magic circle and work 6 sc into the ring [6]
- Round 2: work 2 sc in each stitch around [12]
- Round 3: 1 sc, increase, repeat around [18]
- Round 4: 2 sc, increase, repeat around [24]. Checkpoint: a flat disc about 7 cm across; should lie completely flat with no cupping at the edges.
- Round 5: 3 sc, increase, repeat around [30]
- Round 6: 4 sc, increase, repeat around [36]. Checkpoint: the disc is widening steadily; at 36 stitches it should be roughly 11 cm across and still flat.
- Round 7: sc in each stitch around [36]
- Round 8: sc in each stitch around [36]
- Round 9: sc in each stitch around [36]
- Round 10: sc in each stitch around [36]
- Round 11: sc in each stitch around [36]. Checkpoint: the straight rounds should be forming sides now; the piece should cup upward like a bowl rather than lying flat. If it still lies flat, tension may be too loose.
- Round 12: 5 sc, increase, repeat around [42]
- Round 13: sc in each stitch around [42]
- Round 14: sc in each stitch around [42]. Checkpoint: the head is at its widest point; position and pin the muzzle and eye whites now before beginning the decrease round, as this is the most accessible the head will be.
- Decrease round: 5 sc, sc2tog, repeat around [36]

Eye Whites (make 2)
- Magic circle with 6 sc [6]
- Do not close completely so the safety eye post can pass through
- Slip stitch to the first stitch and leave a long yarn tail for sewing
Nose Muzzle
- Chain 7
- Sc in the second chain from the hook and continue across [6]
- Place 3 sc in the last chain
- Turn and work along the opposite side of the chain
- Sc across and place 3 sc in the final stitch [15]
- Fasten off, leaving a long tail for sewing
Crocheted Nose (optional, black yarn)
- Chain 5
- Sc in the second chain from the hook and continue across [4]
- Work 3 sc in the last stitch
- Rotate and work along the bottom of the chain
- Sc across and place 3 sc in the final stitch
- Work one round of sc in each stitch around [11]
- Fasten off, leaving a tail for sewing

Face Assembly
- Position the muzzle on the front lower portion of the head and pin it in place
- Position the eye whites above the muzzle, evenly spaced, and pin them
- Insert the safety eyes through the eye whites and through the head fabric, then press the washers from inside the head
- Place the koala nose in the centre of the muzzle area and press the washer from inside
- Sew the muzzle securely to the head around its full edge
- Embroider a small curved smile below the nose using pink yarn
Beginner crocheter? The video tutorial below guides you through every round of this plushie, and the written pattern is below for later!
Closing the Head
- Round 15: sc in each stitch around [36]
- Round 16: 4 sc, sc2tog, repeat around [30]
- Round 17: 3 sc, sc2tog, repeat around
- Round 18: 2 sc, sc2tog, repeat around
- Round 19: 1 sc, sc2tog, repeat around. Checkpoint: the opening should now be small, roughly 2 to 3 cm across; stuff the head firmly now before the gap closes further.
- Stuff the head firmly
- Continue working sc2tog until the opening is fully closed
- Fasten off and close

Ears (make 2 finished ears, 4 flat pieces total)
- Using 6.0 mm hook, create a magic circle and work 6 sc [6]
- Do not join; begin working in rows
- Row 2: chain 1, turn, work 1 sc in the first stitch then 2 sc in each remaining stitch
- Row 3: chain 1, turn, 1 sc, 2 sc in the next stitch, repeat across. Checkpoint: each flat ear piece should be a clear fan or half-circle shape, wider at the top and curving down to the magic circle base.
- Place two ear pieces together, wrong sides facing
- Using fluffy yarn, sc around the curved edges to join both layers. Checkpoint: the joined ear should have a fluffy edged border visible around the curve and a flat base where it will attach to the head.
- Sew the finished ears to the sides of the head approximately two rounds away from the magic circle
Stuffing
- The head is the only stuffed piece in this pattern. Fill it firmly and evenly, working stuffing in from all sides rather than piling it at the centre.
- Add stuffing during round 19 while the gap is still accessible; it is much harder to get a good fill through a gap smaller than a finger.
- Over-stuffing shows at rounds 16 to 18 where the decrease stitches begin to pull outward instead of drawing the dome closed. Remove a small amount if that happens before the final rounds.
- The ears are flat joined pieces and stay unstuffed.

Assembly
The head is a standalone piece in this pattern; no body is included. Assemble facial features before closing, and attach ears after the head is fully closed and stuffed.
- Complete face assembly as described above, before round 15, while the head is still open enough to press washers from inside.
- Finish the closing rounds, stuff firmly, and close the head.
- Pin both ears against the sides of the head approximately two rounds from the magic circle, which places them high on the crown.
- View the face from the front with both ears pinned before sewing either one; koala ears sit high and wide, further apart than feels natural on a human-proportioned toy.
- Sew each ear down along its flat base edge rather than just a centre point, so the ear sits flush against the head rather than jutting outward.
The one thing makers consistently underestimate is how high the ears need to sit. Pin them one round higher than looks right and look again.
Tips
- Work the eye whites with a slightly looser tension than the head so the safety eye post passes through cleanly without splitting the yarn.
- Pin the muzzle and eye whites simultaneously rather than one at a time so you can adjust both until the face is balanced before sewing anything down.
- The 6.0 mm hook for the ears creates a noticeably looser fabric than the head; this is correct and gives the fluffy ear texture its character. Do not tighten your tension to match the head.
Toy Safety
This pattern uses both 15 mm glitter safety eyes and a 26 mm koala safety nose. The nose in particular is large and has a smooth rounded surface that can become a choking risk if it works free. For display pieces, press the washers firmly and check the hardware periodically. For toys going to children, embroider all features and skip every piece of plastic hardware.
FAQ
- Why does this pattern use two different hook sizes? The 3.75 mm gives a tight dense fabric on the head that hides stuffing and holds its shape. The 6.0 mm on the ears creates a looser, slightly airy fabric that looks fluffy around the edges when the ear pieces are joined. Using the same hook for both would make the ears look flat and stiff.
- The pattern places face assembly between two blocks of head rounds. Can I do it all at the end? No, not cleanly. By round 16 the opening is already narrowing and pressing the safety eye washer from inside becomes difficult. The split is intentional; the window between the decrease round and round 15 is when access is best.
- The ear row counts do not give stitch totals. How do I know if mine are right? Work to shape. Each finished flat piece should be a clear half-circle or fan, clearly wider at the curved top than at the base. Lay both pieces side by side and confirm they match before joining.
- Can I add a body to this pattern? The pattern as written is a head only piece. A simple amigurumi body using the same increase-then-straight-then-decrease structure could be added using the same yarn and a 3.75 mm hook, attached at the flat base of the head. The head stitch count at closing gives you the attach point.