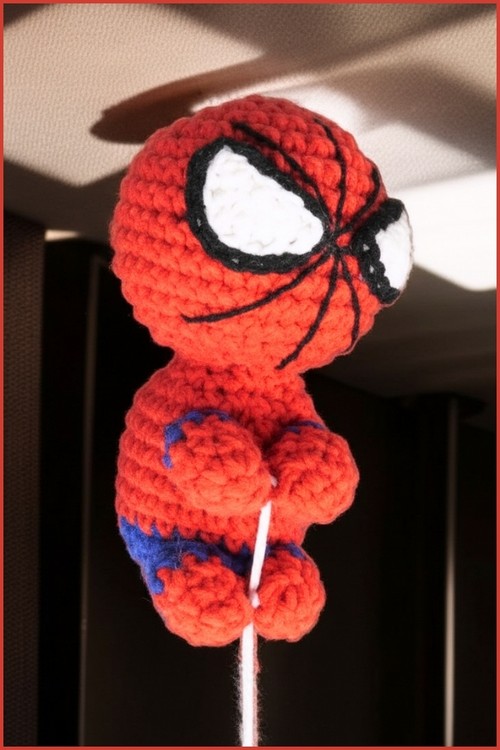
Adorable Spider Man Amigurumi Free Crochet Pattern
Bold red and blue stitches come together in this Crochet Spider Hero Amigurumi pattern to create a playful character that instantly stands out on a shelf, keychain, or gift set. The design focuses on a rounded head, compact body, and striking eye details, making it perfect for practicing color changes and simple shaping while still producing a recognizable and fun result.
Crochet Spider Man Amigurumi
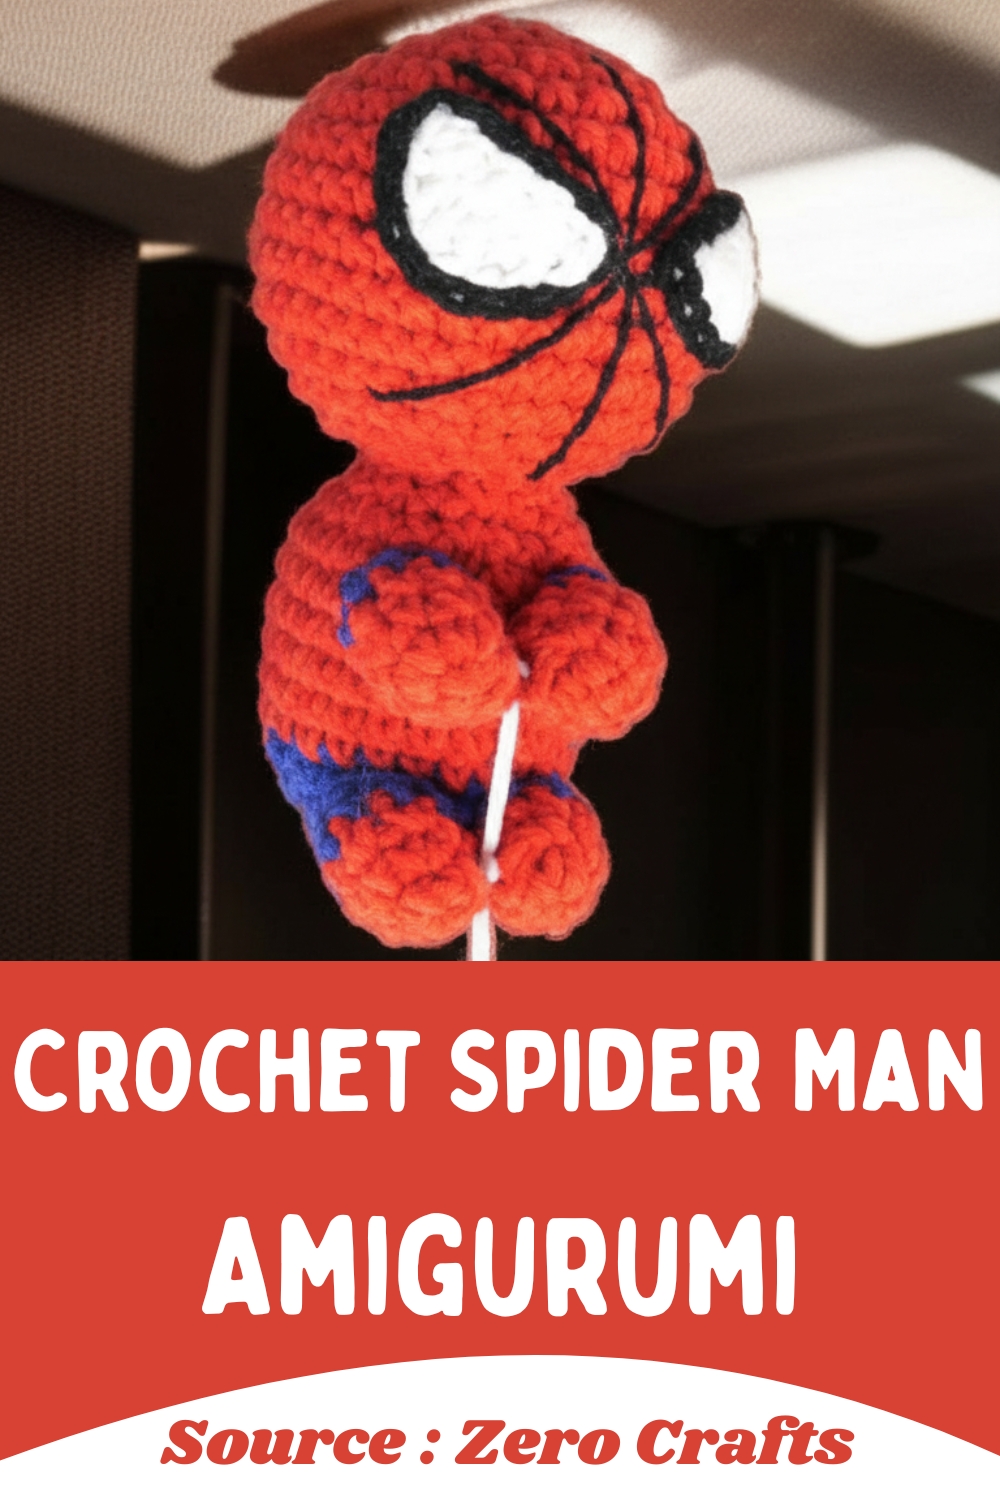
Whether used as a decorative piece, a handmade toy, or a themed accessory, this project offers a satisfying mix of structure and creative finishing that brings personality into every stitch.
Skill Level
Beginner to intermediate
You’ll be working with basic stitches and shaping, but neat color changes, embroidery, and assembly will make the biggest difference in the final result.
Finished Size
Depends on your yarn and hook choice, but expect a palm sized figure when using standard yarn.
Materials
- Red, blue, black, and white yarn
- A crochet hook
- A needle
- Stuffing
- Scissors
Abbreviations
- SC – Single Crochet
- Inc – Increase (2 SC in one stitch)
- Dec – Decrease
- Hdc – Half Double Crochet
- Tr – Treble Crochet
- BLO – Back Loop Only
Helpful Notes Before Starting
- Use a stitch marker to keep track of rounds.
- Work in continuous rounds unless stated otherwise.
- Keep tension consistent, especially when changing colors.
- Stuff gradually rather than all at once for smoother shaping.

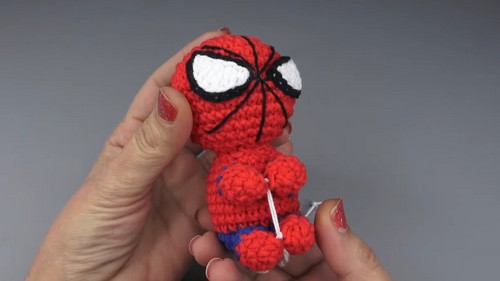
Construction Overview
This piece is built in separate parts:
- Head (worked top down and closed)
- Body (worked from bottom up with color change)
- Arms and legs (small cylindrical pieces)
- Eyes (flat decorative pieces)
All parts are sewn together at the end, followed by embroidery that defines the character.
Stitch and Shaping Clarity
- Increases (Inc) expand the shape evenly to form smooth curves, especially in the head and body.
- Decreases (Dec) taper the shape inward, helping close the head and shape the lower body.
- Even rounds (SC in each stitch) build height without changing width.
- The head uses a classic sphere construction: increase → maintain → decrease.
- The body is slightly cylindrical with a color transition to define clothing.

Pattern Instructions
HEAD (RED YARN)
- Magic Ring: Create a magic ring
- Row 1: 6 SC into the magic ring (6)
- Row 2: Inc in each stitch (12)
- Row 3: (1 SC, 1 inc) x6 (18)
- Row 4: (2 SC, 1 inc) x6 (24)
- Row 5: (3 SC, 1 inc) x6 (30)
- Row 6: (4 SC, 1 inc) x6 (36)
- Rows 7-11: 36 SC (5 rows)
- Row 12: (4 SC, 1 dec) x6 (30)
- Row 13: (3 SC, 1 dec) x6 (24)
- Row 14: (2 SC, 1 dec) x6 (18)
- Row 15: (1 SC, 1 dec) x6 (12), stuff firmly
- Row 16: (1 dec) x6 (6)
Guidance:
- The increases create a smooth round dome.
- The 5 even rows form the full head height.
- Start stuffing before the opening gets too small to keep the shape even and firm.
BODY (BLUE AND RED YARN)
- Magic Ring: Create a magic ring
- Row 1: 6 SC into the ring (6)
- Row 2: (Inc) x6 (12)
- Row 3: (1 SC, 1 inc) x6 (18)
- Row 4: (2 SC, 1 inc) x6 (24)
- Row 5: 24 SC
- Change to red yarn
- Rows 6-11: 24 SC (6 rows)
- Row 12: (2 SC, 1 dec) x6 (18)
- Row 13: (1 SC, 1 dec) x6 (12), stuff body
Guidance:
- The lower blue section forms the base.
- The color change creates a clean visual separation—keep your yarn tension consistent here.
- Stuff before finishing to avoid gaps or uneven firmness.
ARMS (2 PIECES, BLUE AND RED YARN)
- Magic Ring: Create a magic ring
- Row 1: 4 SC into the ring (4)
- Row 2: (Inc) x4 (8)
- Rows 3-4: 8 SC (2 rows)
- Change to red yarn
- Row 5: 8 SC
- Arms are worked with 1 row blue and 4 rows red
Guidance:
- These are narrow tubes, so avoid overstuffing.
- Light stuffing or no stuffing works best for flexibility.
LEGS (2 PIECES, BLUE AND RED YARN)
- Magic Ring: Create a magic ring
- Crochet 2 rows blue and 3 rows red
Guidance:
- Keep the legs short and consistent so the figure sits evenly.
EYES (2 PIECES, WHITE AND BLACK YARN)
- With white yarn, chain 5
- Round 1: 1 Hdc, 2 Tr, 1 Hdc, 1 SC into the chain
- Change to black yarn
- Outline with slip stitches around the white shape in BLO
- Fasten off
Guidance:
- The mix of stitches creates the curved eye shape.
- The black outline defines the edges and gives a bold, expressive look.
Assembly Guidance
- Sew the head securely onto the body, aligning it straight.
- Attach arms at the sides of the upper body.
- Position legs evenly at the bottom so the figure can sit balanced.
Eye and Facial Feature Placement
- Place eyes symmetrically on the front of the head.
- Position them slightly above the center line for a more natural expression.
- Adjust placement before sewing permanently.
Embroidery Details
- Use black yarn to embroider webbing across the head and body.
- Keep lines evenly spaced and radiating outward for a clean look.
- Add a red spider on the back and a blue spider on the front to complete the design.
Stuffing Tips
- Stuff the head firmly to maintain a round shape.
- Keep body stuffing slightly softer so it sits naturally.
- Avoid lumps by adding small amounts gradually.

Finishing Notes
- Check all seams and attachments for security.
- Trim and hide yarn tails neatly inside the piece.
- Adjust limbs if needed before final tightening.
Beginner Notes
- Take your time with color changes—they define the character.
- Count stitches at the end of each round to avoid shaping issues.
- Use pins to test placement before sewing pieces.
Troubleshooting
- Head looks uneven: Check increase spacing and stuffing distribution.
- Gaps between stitches: Try a smaller hook or tighter tension.
- Eyes look mismatched: Lay both pieces flat and compare before attaching.
Customization Ideas
- Adjust colors for different character variations.
- Add a keychain loop to turn it into an accessory.
- Experiment with embroidered expressions for different moods.