Adorable Crochet Goldfish Cracker Pillow Pattern Free You’ll Want To Hug
If you love playful crochet projects, this Goldfish Cracker Pillow pattern is a must-try. Designed to resemble everyone’s favorite snack, this oversized, cuddly pillow brings both charm and comfort to any room.
Crochet Goldfish Cracker Pillow

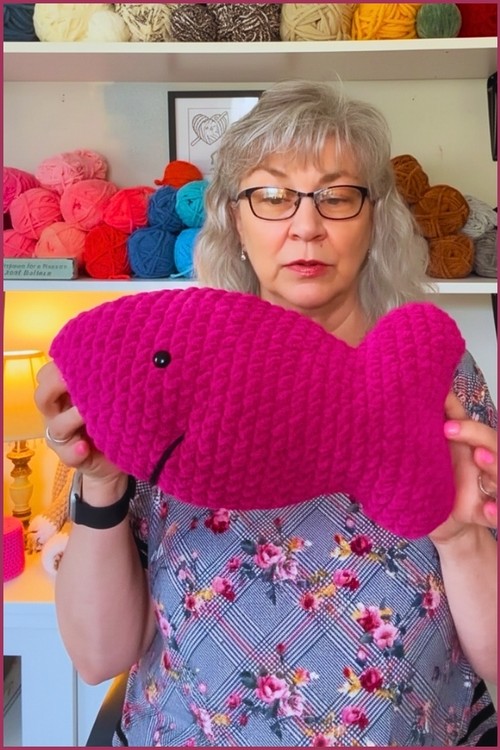


Injecting a dose of lighthearted charm into your home decor becomes an absolute joy when utilizing a Crochet Goldfish Cracker Pillow blueprint. Boasting a rich cheddar hue and the unmistakably cute, puffy fish silhouette, this oversized snack replica doubles as a cozy back rest and a hilarious conversation piece. Yarn enthusiasts will adore the clever shaping techniques that make crafting this functional, whimsical accent incredibly rewarding.
Skill Level
-
Intermediate due to unusual stitch counts and specific shaping sequences.
Finished Size
-
Approximately 10 to 12 inches in length, depending on individual tension and hook choice.
Materials
-
Yarn – Bernat Blanket Yarn (deep fuchsia or any color)
-
Hook – 7 mm (use 8 mm for larger or 6.5 mm for smaller size)
-
Tools – Scissors, yarn needle, stitch marker
-
Optional – 13 mm safety eyes
Abbreviations
-
SC – Single Crochet
-
Inc – Increase (2 SC in the same stitch)
-
Dec – Decrease (SC2tog: insert hook, pull up loop, insert hook into next stitch, pull up loop, yarn over, pull through all 3 loops)
-
SS – Slip Stitch
Helpful Notes Before Starting
-
Use a running stitch marker or a piece of contrasting scrap yarn because traditional clip-on markers can easily get lost in thick blanket yarn.
-
Maintain a consistent, firm tension to ensure the stuffing does not peek through the stitches, especially during the decrease rounds.
-
Pull your slip stitches slightly looser than your single crochets in the tail section to prevent the fabric from bunching up too tightly.
Construction Overview
-
The entire piece is worked in one continuous piece from the front of the head down to the tip of the tail.
-
The unusual increase patterns in the midsection create a deliberately flattened, cracker-like profile rather than a perfect sphere.
-
The tail section introduces slip stitches directly into the rounds to automatically pinch the fabric and create natural fin definitions without sewing separate parts.
Stitch and Shaping Clarity
-
The sequences in rounds 4, 6, 8, and 12 do not distribute increases evenly around the circle, which is a deliberate technique to create specific contours.
-
Make sure to follow the exact repeat sequences noted in the pattern to ensure the flat sides align correctly on opposite sides of the body.
-
When working the slip stitch sections in the tail, treat the top loops of the slip stitches from the previous round just like regular stitches when you work into them.
Step by Step Pattern Instructions
-
Head and Body
-
Begin with a Magic Ring.
-
Round 1: 6 SC in the ring. (6)
-
Round 2: SC Inc in every stitch. (12)
-
Round 3: (SC, Inc) repeat around. (18)
-
Round 4: 6 SC, Inc, SC, Inc. Repeat sequence. (22)
-
Round 5: SC around. (22)
-
Round 6: 6 SC, (Inc, SC) twice, Inc. Repeat sequence. (28)
-
Round 7: SC around. (28)
-
Round 8: 8 SC, (Inc, SC) twice, Inc twice. Repeat sequence. (36)
-
Rounds 9–11: SC around. (36)
-
Round 12: 13 SC, (Inc, SC) twice. Repeat sequence, SC last 2. (40)
-
Rounds 13–17: SC around. (40)
-
Round 18: 13 SC, (Dec, SC) twice. Repeat sequence, SC last 2. (36)
-
Round 19: SC around. (36)
-
Round 20: 8 SC, (Dec, SC) twice, Dec twice. Repeat sequence. (28)
-
Round 21: SC around. (28)
-
Round 22: 6 SC, (Dec, SC) twice, Dec. Repeat sequence. (22)
-
Round 23: SC around. (22)
-
Tail
-
Round 24: SC, Inc, 5 SC, (SC, Inc) three times, 5 SC, (SC, Inc) twice. (32)
-
Round 25: Inc twice, 8 SC, (Inc, SC) twice, Inc twice, 8 SC, (Inc, SC) twice, SC last. (40)
-
Round 26: 14 SC, Inc, 2 SC, Inc. Repeat sequence. (44)
-
Rounds 27–28: SC around. (44)
-
Round 29: 6 SC, 5 SS, 5 SC, Dec, SC, Dec, 5 SC, 5 SS, 5 SC, Dec twice. (37)
-
Round 30: Dec twice, 2 SC, 5 SS, 2 SC, Dec four times, 3 SC, 5 SS, 3 SC, Dec twice. (28)
-
Round 31: 3 SC, 7 SS, 7 SC, 7 SS, 4 SC. (28)
Eye and Facial Feature Placement
-
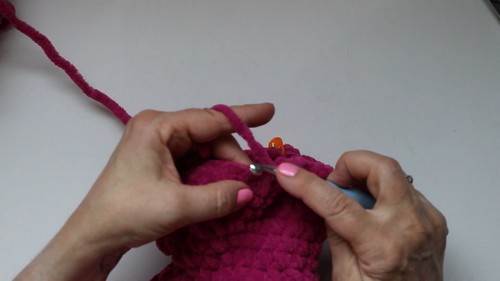
If you are using the optional 13 mm safety eyes, insert them between rounds 6 and 7, leaving about 6 to 7 stitches of space between them.
-
Align the eyes so they sit on the broader, flatter surface of the face rather than the compressed side edges.
-
Secure the safety backings firmly before completing round 12, as the opening will begin to narrow later on.
Stuffing Tips
-
Stuff the head and body firmly, shaping it flat on the sides for a cracker-like look.
-
Use large clumps of fiberfill to avoid a lumpy texture, pushing the stuffing outward toward the flat sides to emphasize the unique shape.
-
Stop stuffing the main body at round 23 so you can easily work the tail rounds without catching stray fiberfill in your stitches.
Assembly Guidance
-
The design is almost entirely seamless, meaning your main assembly task is closing the final edge of the tail flat.
-
Use a stitch marker to pinch the center of the tail opening before sewing to ensure your final seam runs perfectly horizontal relative to the eyes.
Finishing the Tail
-
Cut a long yarn tail and pull through to fasten off.
-
Stuff the tail gently, shaping the fins.
-
Align the opening and sew closed with a yarn needle.
-
Weave in all yarn ends securely.
Embroidering the Face
-
Thread a long piece of black yarn onto a darning needle.
-
Insert needle a few rows back from the eye area and pull through to where the mouth will begin.
-
Wrap the yarn under the body to form a curved smile.
-
Repeat once to thicken the mouth line.
-
Tie the ends securely and weave into the body to hide.
Beginner Notes
-
If you are new to working with blanket yarn, use your fingers to feel for the tops of the stitches rather than relying purely on sight, as the fluff can obscure the loops.
-
If your stitch counts do not match at the end of a round, check the sections where increases or decreases are stacked directly next to each other.
Troubleshooting
-
If the sides of your body look too round instead of flat, remove some stuffing and manually compress the sides with your hands while reworking the fiberfill.
-
If your tail curves upward or downward dramatically, check that your slip stitch sections in rounds 29 through 31 are perfectly aligned with each other.
Customization Ideas
-
Mix up the presentation by using a variegated or multi-colored blanket yarn to create automatic stripes along the flat sides of the body.
-
You can easily scale this project down into a smaller keychain size by switching to a standard worsted weight acrylic yarn and a 3.5 mm hook.