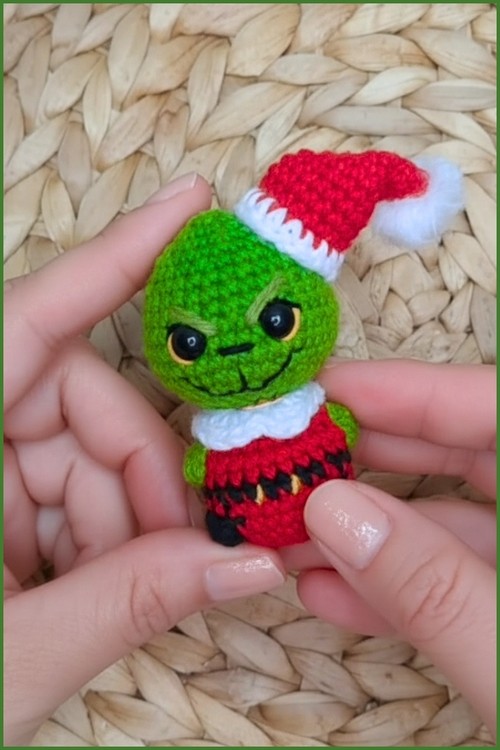
Mini Crochet Baby Grinch Doll Pattern For Christmas
Holiday themed crochet projects often feel more engaging when they carry personality, and the Crochet Grinch Doll Amigurumi pattern delivers that through its distinct shape, bold red and green contrast, and expressive facial details.
Crochet Baby Grinch Doll

This design works well as a decorative piece for festive setups, a playful handmade gift, or even a standout item for craft displays. The structured body, textured elements like bobble stitches, and carefully embroidered features all come together to create a figure that feels lively, recognizable, and full of character from every angle.
Skill Level
Intermediate
You should be comfortable with:
- Working in continuous rounds
- Basic increases and decreases
- Color changes mid-round
- Bobble stitches
- Simple embroidery
Finished Size
Size will vary depending on yarn and hook, but expect a small hand-sized doll when using typical amigurumi yarn and a tight gauge.
Materials
- Red yarn
- Black yarn
- Green yarn
- White yarn
- Yellow yarn (for embroidery)
- Crochet hook suitable for your yarn
- Safety eyes
- Black embroidery thread
- Fiberfill stuffing
- Yarn needle
Abbreviations
- MR: Magic ring
- sc: Single crochet
- inc: Increase (2 sc in one stitch)
- dec: Decrease
- BLO: Back loop only
- hdc: Half double crochet
- sl st: Slip stitch
Helpful Notes Before Starting
- Work in continuous rounds unless stated otherwise.
- Use a stitch marker to track the beginning of each round.
- Keep stitches tight to avoid gaps, especially when stuffing.
- Bobble stitches are used to create raised features like boots and hands.
Construction Overview
This piece is worked as one main structure:
- Body begins in red and forms the base
- Boots and hands are created using bobble stitches within rounds
- Belt is added through a color change
- Head is built directly on top of the body using green yarn
- Facial features and accessories are added at the end
This approach keeps assembly minimal while focusing attention on shaping and placement.
BODY (RED YARN)
- R1: Make a magic ring and work 6 single crochet
- R2: Increase in each stitch around for 12 single crochet
- R3: Work 1 single crochet, then increase, repeat around for 18 single crochet
- R4: Work 2 single crochet, then increase, repeat around for 24 single crochet
- At this stage, the base is flat and evenly expanded. This creates a stable bottom so the doll can sit properly.
- R5: Work 8 single crochet in red, make a 5 double crochet bobble in black for the first boot, switch back to red and work 6 single crochet, repeat the bobble for the second boot, finish with 8 single crochet
- The bobble stitches here push outward, forming the boots. Keep tension consistent so both boots sit evenly.
- R6: Work 24 single crochet, catching the stitches above the boots
- This round locks the bobbles into place and smooths the body shape above them.
- R7: Switch to black yarn and work 24 single crochet for the belt
- Keep this round even to create a clean, straight belt line.
- R8: Switch back to red yarn and work 24 single crochet
- R9: Work 6 single crochet in red, make a 5 double crochet bobble in green for the first hand, switch back to red and work 10 single crochet, repeat the bobble for the second hand, finish with 6 single crochet
- These bobbles form the hands. Try to align them symmetrically with the boots below.
- R10: Work 24 single crochet
- R11: Work 2 single crochet, then decrease, repeat around for 18 single crochet
- R12: Work 1 single crochet, then decrease, repeat around for 12 single crochet
- This gradual decrease shapes the upper body and neck area. Begin stuffing firmly here and continue as you go.
HEAD (GREEN YARN)
- R13: Work in back loops only, work 1 single crochet then increase, repeat around for 18 single crochet
- Working in back loops creates a subtle ridge that visually separates the head from the body.
- R14: Work 2 single crochet then increase, repeat around for 24 single crochet
- R15: Work 3 single crochet then increase, repeat around for 30 single crochet
- R16: Work 2 single crochet then increase, repeat around for 40 single crochet
- These increase rounds build the rounded shape of the head. Stuff gradually to avoid lumps.
- R17: Work 40 single crochet
- R18: Work 40 single crochet
- R19: Work 2 single crochet then decrease, repeat around for 30 single crochet
- R20: Work 30 single crochet
- R21: Work 30 single crochet
- R22: Work 30 single crochet
- Place safety eyes between rounds 17 and 18 with six stitches between them
- Take time here to position the eyes evenly. Slight adjustments can change the expression significantly.
- R23: Work 3 single crochet then decrease, repeat around for 24 single crochet
- R24: Work 24 single crochet
- R25: Work 2 single crochet then decrease, repeat around for 18 single crochet
- R26: Work 1 single crochet then decrease, repeat around for 12 single crochet
- Continue stuffing firmly before closing.
R27: Work 1 single crochet then decrease four times for 8 single crochet, fasten off
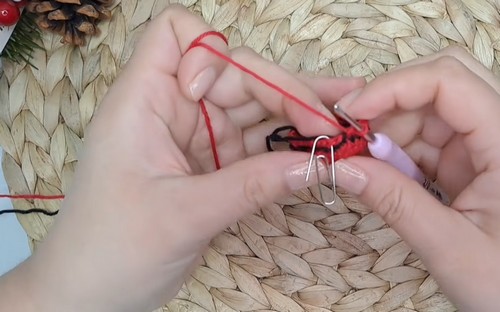
FACIAL DETAILS
- Embroider a yellow line around the outer edge of each eye
- Use black thread to embroider the upper eyelid, nose, and Grinch-style mouth
- Embroider eyebrows using green yarn with approximately three stitches per eyebrow

These details define the character. Keep stitches slightly curved to create expression rather than straight lines.
SANTA HAT (RED AND WHITE YARN)
- R1: Make a magic ring and work 4 single crochet in red
- R2: Increase in each stitch around for 8 single crochet
- R3: Work 8 single crochet
- R4: Work 8 single crochet
- R5: Work 1 single crochet then increase, repeat around for 12 single crochet
- R6: Work 12 single crochet
- R7: Work 12 single crochet
- R8: Work 2 single crochet then increase, repeat around for 16 single crochet
- R9: Work 16 single crochet
- R10: Work 16 single crochet
- R11: Work 16 single crochet
- R12: Switch to white yarn and work half double crochet around, starting with back loop only on the first stitch
- The hat should taper gently. Adjust how it sits by slightly bending the tip before attaching.
POM POM
- Wrap white yarn around your finger ten times
- Tie tightly at the center
- Cut the loops and brush to create a fluffy pom pom
Attach securely to the tip of the hat.
JACKET TRIM (WHITE YARN)
- Chain 16
- Starting in the second chain from the hook, work 6 single crochet
- Work 3 half double crochet in the next stitch
- Work 1 slip stitch
- Work 3 half double crochet in the next stitch
- Work 6 single crochet
- Sew the trim to the front of the body to resemble a Santa jacket opening
- Position it centered over the belt line for a clean look.
Assembly Guidance
- Ensure boots and hands are aligned before final stuffing
- Attach the hat slightly tilted for character
- Sew the jacket trim straight down the front
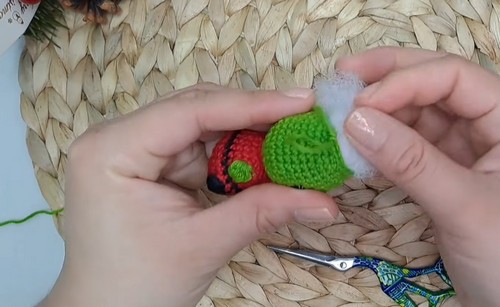
Stuffing Tips
- Stuff in stages, not all at once
- Keep the base firm so the doll can sit
- Avoid overstuffing the head to prevent stretching

Beginner Notes
- Take your time with bobble stitches, they define the shape
- Count stitches frequently, especially after increases and decreases
- Use pins to test placement before sewing pieces
Troubleshooting
- Uneven boots or hands: check stitch counts around bobbles
- Head leaning: adjust stuffing distribution
- Gaps in stitches: switch to a smaller hook
Customization Ideas
- Adjust facial expression with different embroidery angles
- Add a scarf or extra trim for variation
- Change hat length or bend for different styling