
Cute Crochet Bunny Amigurumi Free Tutorial Using Chenille Yarn
Create your own soft and cuddly bunny amigurumi with this easy crochet pattern. Made using plush chenille yarn and a 3.5 mm hook, this project is perfect for beginners and experienced crocheters alike.
Crochet Bunny
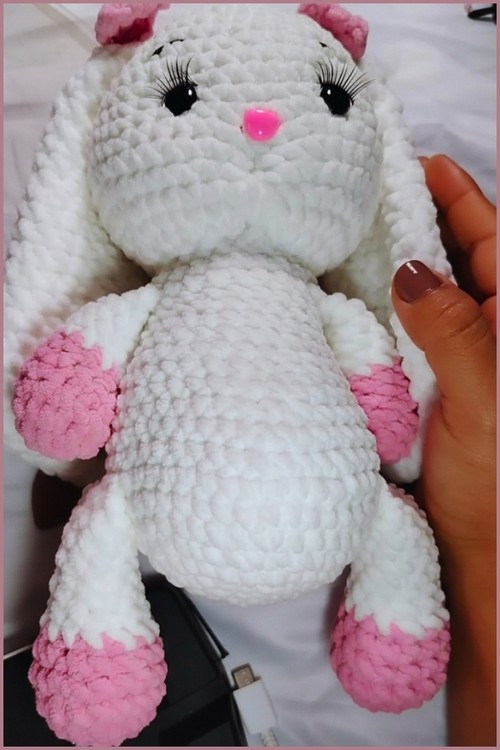
Soft, floppy ears and a twitching stitched nose are just a few reasons why a Crochet Bunny project is the ultimate choice for your next handmade endeavor. Beyond just being an adorable nursery decoration, these plush companions offer a timeless charm that appeals to both children seeking a cuddle buddy and adults looking for a whimsical touch of decor.

Skill Level
-
This project is rated as Advanced Beginner. While the stitches are basic, the construction involves joining limbs as you go and managing color transitions, which requires a bit of focused attention on stitch counts.
Finished Size
-
Using the recommended chenille yarn and 3.5 mm hook, your finished plush will stand approximately 10 to 12 inches tall, depending on your individual tension.
Materials
-
Chenille yarn (main color and accent color)
-
3.5 mm crochet hook
-
5 mm hook for ears (optional)
-
Fiberfill stuffing
-
12 mm safety eyes
-
Yarn needle, scissors, and stitch markers
Abbreviations
-
MR: Magic Ring
-
SC: Single Crochet
-
INC: Increase (two SC in one stitch)
-
DEC: Decrease (invisible decrease recommended)
-
Sts: Stitches
Helpful Notes Before Starting
-
Chenille yarn can be slippery and makes it difficult to see individual stitches; always use a stitch marker to track the beginning of your rounds.
-
When working with bulky yarn, avoid pulling too tight on your magic ring to prevent the yarn from snapping; you can also start with a "chain 2" and work your first round into the second chain from the hook.
-
The invisible decrease technique is vital here to prevent stuffing from peeking through the gaps in the fabric.
Construction Overview
-
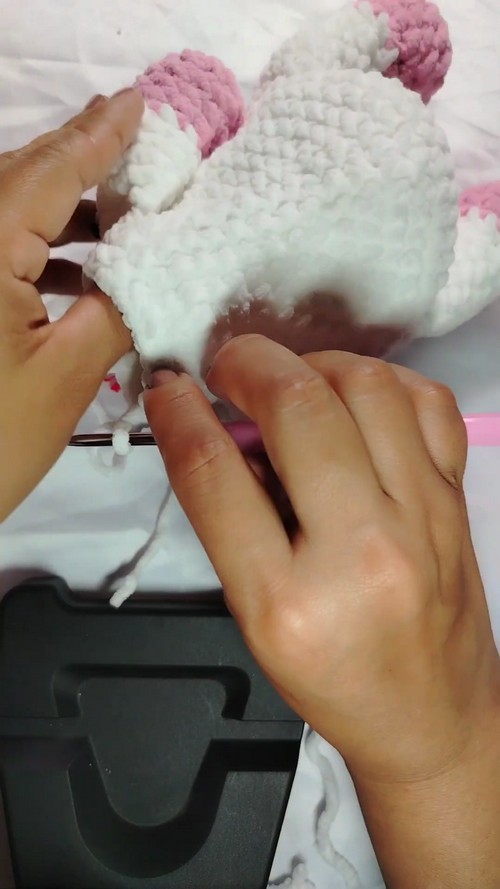
This amigurumi is built from the bottom up. You will begin by making the legs and arms separately, then set them aside. As you work the body, you will physically crochet these limbs into the fabric of the torso to create a seamless, secure attachment without extra sewing. The head, ears, and tail are made separately and joined at the end.
Stitch and Shaping Clarity
-
R6 of the head and body uses a "shifted" increase pattern (starting with 2 SC before the first increase). This prevents the increases from stacking directly on top of each other, resulting in a smooth circle rather than a hexagonal shape.
-
The decreases in R13 and R15 of the body are concentrated in the center to create a slight curve, giving the character a more natural, seated posture or a "belly" effect.
Head Instructions
-
R1: Magic ring with 6 SC
-
R2: 6 INC (12 sts)
-
R3: (1 SC, 1 INC) × 6 → 18 sts
-
R4: (2 SC, 1 INC) × 6 → 24 sts
-
R5: (3 SC, 1 INC) × 6 → 30 sts
-
R6: 2 SC, 1 INC, (4 SC, 1 INC) × 5, 2 SC → 36 sts
-
R7: (11 SC, 1 INC) × 3 → 39 sts
-
R8–11: 1 SC in each → 39 sts
-
R12: (12 SC, 1 INC) × 3 → 42 sts
-
R13: (6 SC, 1 INC) × 6 → 48 sts
-
R14–16: 1 SC in each → 48 sts
-
Place eyes between R12–13, 8 sts apart; embroider nose between rows 2–3
-
R17: (6 SC, 1 DEC) × 6 → 42 sts
-
R18: 2 SC, 1 DEC, (4 SC, 1 DEC) × 5, 2 SC → 36 sts
-
R19: (1 SC, 1 DEC) × 12 → 18 sts
-
Stuff and close, leaving long tail for sewing

Body Instructions
-
R1: MR 6 SC
-
R2: 6 INC → 12
-
R3: (1 SC, 1 INC) × 6 → 18
-
R4: (2 SC, 1 INC) × 6 → 24
-
R5: (3 SC, 1 INC) × 6 → 30
-
R6: 2 SC, 1 INC, (4 SC, 1 INC) × 5, 2 SC → 36
-
R7: (5 SC, 1 INC) × 6 → 42
-
R8–9: 1 SC in each → 42
-
R10: Join legs (see Legs) → 42 sts total
-
R11–12: 1 SC in each → 42
-
R13: 18 SC, 3 DEC, 18 SC → 39
-
R14: 1 SC in each → 39
-
R15: 17 SC, 3 DEC, 16 SC → 36
-
R16: 1 SC in each → 36
-
R17: (4 SC, 1 DEC) × 6 → 30
-
R18: 1 SC in each → 30
-
R19: (3 SC, 1 DEC) × 6 → 24
-
R20: 1 SC in each → 24
-
R21: Join arms (see Arms) → 24 sts total
-
R22: 1 SC in each → 24
-
R23: (2 SC, 1 DEC) × 6 → 18
-
Stuff and close, leaving long tail
Legs (Make 2)
-
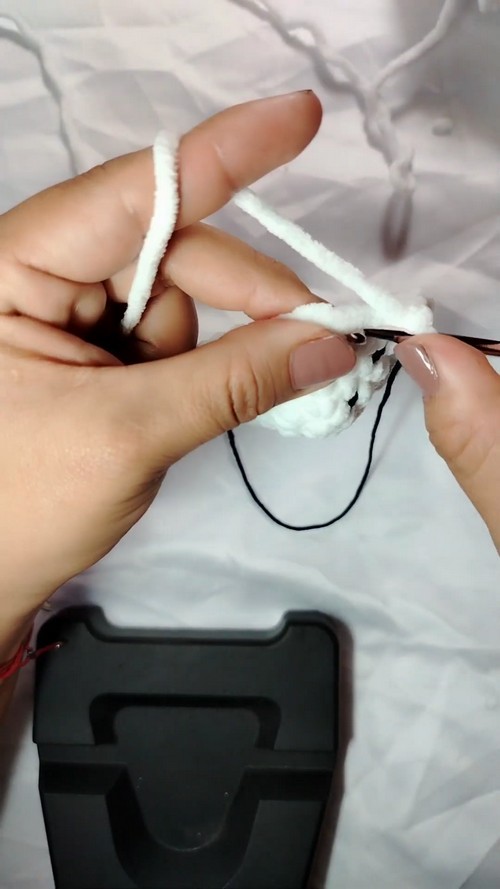
Use pink → white for transition
-
R1: MR 6 SC
-
R2: 6 INC → 12
-
R3: (1 SC, 1 INC) × 6 → 18
-
R4: 1 SC in each → 18
-
R5: (7 SC, 1 DEC) × 2 → 16
-
R6: (6 SC, 1 DEC) × 2 → 14
-
R7: (5 SC, 1 DEC) × 2 → 12
-
R8: (4 SC, 1 DEC) × 2 → 10
-
R9–14: 1 SC in each → 10
-
Leave open for joining to body
Arms (Make 2)
-
Use pink → white for transition
-
R1: MR 6 SC
-
R2: 6 INC → 12
-
R3: (3 SC, 1 INC) × 3 → 15
-
R4: 1 SC in each → 15
-
R5: 4 SC, 3 DEC, 5 SC → 12
-
R6: 4 SC, 2 DEC, 4 SC → 10
-
R7–11: 1 SC in each → 10
-
Lightly stuff, flatten, close with 5 SC across
Ears (Make 2)
-
Main body color
-
R1: MR 6 SC
-
R2: 6 INC → 12
-
R3: (1 SC, 1 INC) × 6 → 18
-
R4: 1 SC in each → 18
-
R5: (2 SC, 1 INC) × 6 → 24
-
R6: (3 SC, 1 INC) × 6 → 30
-
R7–8: 1 SC in each → 30
-
R9: (3 SC, 1 DEC) × 6 → 24
-
R10–11: 1 SC in each → 24
-
R12: (2 SC, 1 DEC) × 6 → 18
-
R13–15: 1 SC in each → 18
-
R16: (1 SC, 1 DEC) × 6 → 12
-
R17–24: 1 SC in each → 12
-
Flatten, close with 5 SC, leave long tail
Tail
-
R1: MR 7 SC
-
R2: 7 INC → 14
-
R3: 1 SC in each → 14
-
R4: 7 DEC → 7
-
Lightly stuff, close and fasten off
Assembly Guidance
-
To join the legs in R10, hold the leg against the body and crochet through both the leg stitches and the body stitches simultaneously; ensure the legs are pointing forward.
-
When sewing the head to the body, align the center of the face with the center of the chest (between the arms) to maintain symmetry.
-
Use the long tails left on the ears to whipstitch them securely to the top of the head; pinning them first is essential to ensure they don't lean to one side during sewing.
Eye and Facial Feature Placement
-
The safety eyes are placed lower on the head (R12-13) to give the character a "kawaii" or youthful appearance.
-
When embroidering the nose and eyebrows, use a contrasting scrap of yarn or embroidery floss; for the eyebrows, a simple diagonal line over one stitch is often enough to add expression.
Stuffing Tips
- Stuff the head firmly, especially around the "cheeks" (R13), to define the shape.
-
For the body, focus the stuffing at the bottom to provide weight, and slightly less at the neck to make sewing to the head easier.
-
Avoid over-stuffing the limbs where they join the body, as this can make them stick out awkwardly rather than hanging naturally.
Beginner Notes
-
If you find the legs or arms aren't lining up perfectly when joining to the body, it is okay to add or subtract one SC in the body round to center them; everyone's stitch "lean" is slightly different.
-
For a cleaner color change on the limbs, pull the new color through the last two loops of the final stitch of the previous color.
Troubleshooting
-
If your head looks lopsided, check that your increases in R7 and R12 were spaced exactly as the pattern describes; these specific counts create a subtle oval shape.
-
If the chenille yarn is shedding or "balding," try using a lighter touch or switching to a hook with a smoother finish to reduce friction.
Customization Ideas
-
Change the look of the ears by using a 5 mm hook for a floppier, larger appearance compared to the head.
-
The optional bow or scarf adds a pop of personality; try using a variegated yarn for the accessory to contrast with the solid colors of the body.