
Crochet Sloth Amigurumi Pattern Free In Different Colors
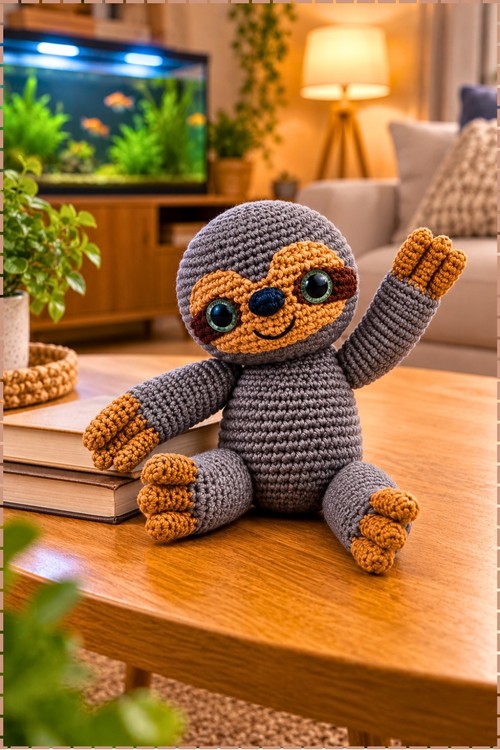
Prop the crochet sloth amigurumi upright on a coffee table or bookshelf, since its splayed legs keep it seated without any support. Jungle themed nurseries welcome a cuddly sloth plush in grey and mustard, and slow morning people deserve a stuffed sloth toy on their desk too.
Kids grab the raised arm on this crochet sloth amigurumi, the one held up in a wave. It suits the ones who nap best with something to hug. The crochet sloth amigurumi fits the friend who answers every text late. Hand that friend a crochet sloth amigurumi and say nothing.
Crochet Sloth Amigurumi
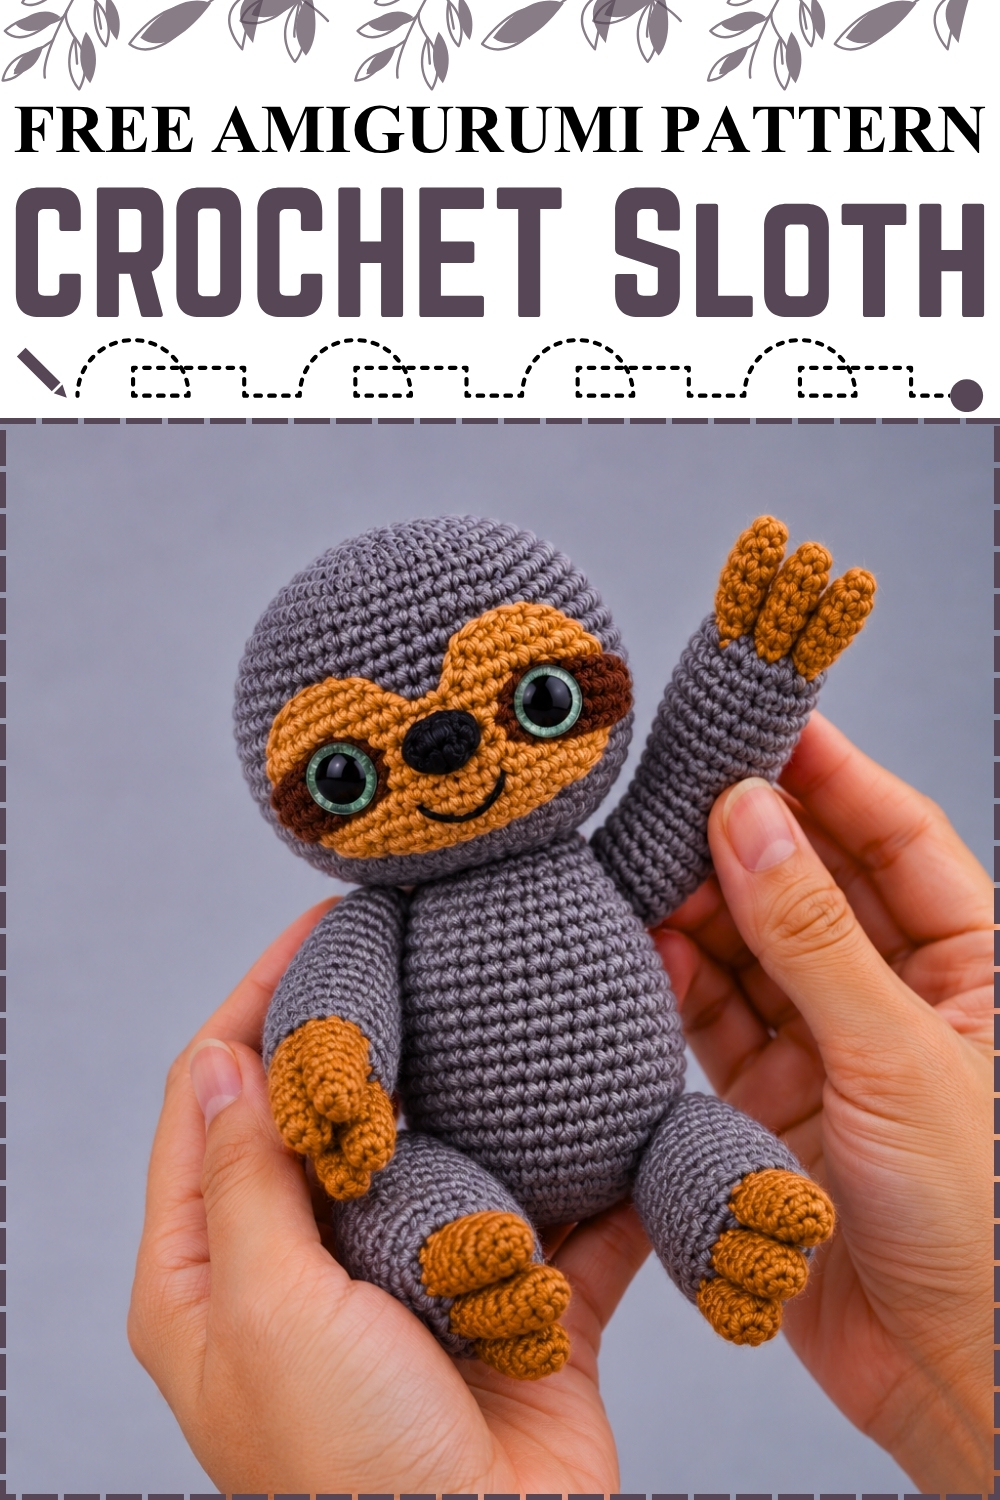
Thread jointing through the shoulders and hips lets every limb swing, so this crochet sloth amigurumi can wave, sit, or hug a branch. I chose a soft grey for the head and body instead of the usual latte brown. Mustard ochre covers the heart shaped face mask and all twelve toes. Dark brown patches sweep down from green eyed safety eyes, giving it that sleepy sloth look. Below a black nose, a single curved smile finishes the face. Expect a project of several evenings, in my experience, since every limb and toe is worked separately.
Materials and Tools
- 3.75 mm crochet hook
- Medium weight (4) yarn in grey for the head, body, and limbs, about 1 skein
- Mustard ochre yarn for the face mask and toes
- Dark brown yarn for the eye patches
- Black yarn for the smile
- One pair of 21 mm safety eyes (mine have green irises)
- One black safety nose (25 mm triangle in the original)
- Tapestry needle, scissors, stuffing, and stitch markers
- 10 inch upholstery needle for attaching the limbs (optional but much easier)
Difficulty and Time
Intermediate. In my experience it takes several evenings, mostly because of the twelve toes.
Technique Notes
- Single crochet (sc): insert hook, yarn over, pull up a loop, yarn over, pull through both loops. Keep it tight so stuffing does not show through the grey.
- Increase: 2 sc in the same stitch.
- Decrease (sc2tog): work 2 sc together. Use the invisible decrease through front loops for a smoother head.
- Magic circle: work the first stitches over a loop of yarn, then pull the tail tight so no hole shows at the top of the head.
- Chain (ch) and slip stitch (sl st): used for the face pieces and closing.
- Working in rounds: place a marker in the first stitch of every round. With 12 straight rounds on the head and 22 on the body, losing count is the most common mistake.
- Thread jointing: a double strand of yarn passed through the body and limb twice, then pulled firm. Pull just enough to dimple the body; too tight and the limbs stop moving.
- Leaving a working loop: when you set the head aside, slip a stitch marker into the live loop so it cannot unravel.
The Pattern
Head
- Round 1: with grey, make a magic circle with 6 sc and pull closed (6 sts).
- Round 2: 2 sc in every stitch (12 sts).
- Round 3: (1 sc, 2 sc in next st) repeat around (18 sts).
- Round 4: (1 sc in next 2 sts, 2 sc in next st) repeat around (24 sts).
- Round 5: (1 sc in next 3 sts, 2 sc in next st) repeat around.
- Round 6: (1 sc in next 4 sts, 2 sc in next st) repeat around.
- Round 7: (1 sc in next 5 sts, 2 sc in next st) repeat around.
- Round 8: (1 sc in next 6 sts, 2 sc in next st) repeat around.
- Round 9: (1 sc in next 7 sts, 2 sc in next st) repeat around (54 sts); you have a flat circle that starts to cup.
- Work 12 straight rounds of 1 sc in every stitch (54 sts); the head is now a deep open dome.
- Leave the working loop at the back of the head on a marker and set it aside.
Face Mask
- With mustard ochre, ch 16.
- Row 1: 1 sc in the 2nd chain from the hook, then 1 sc in each chain across (15 sts).
- Row 2: ch 1, turn, 1 sc in the same stitch, 1 sc across, and 2 sc in the last stitch (17 sts).
- Row 3: ch 1, turn, 1 sc in the same stitch, 1 sc across, and 2 sc in the last stitch (19 sts).
- Row 4: ch 1, turn, 1 sc in the same stitch, 1 sc in the next stitch, 1 sc across, and 2 sc in the last stitch (21 sts).
- Work 2 rows of 1 sc in every stitch (21 sts); you have a small widening rectangle.
- First arch: fold the piece in half, mark the center stitch, work 9 sc from the center up to the marker, then turn and work rows of 8, 7, 6, and 4 sc, sl st into the 5th stitch, and fasten off with a long sewing tail.
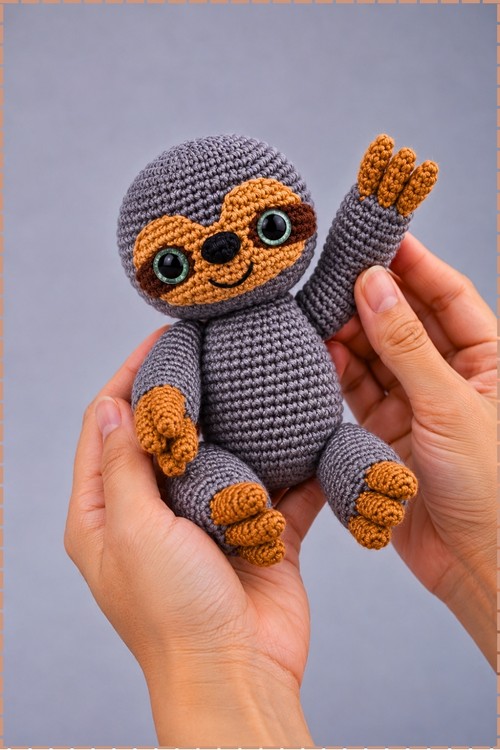
- Second arch: skip 1 stitch from the center on the other side, join yarn, ch 1, work 9 sc, then repeat the decreasing rows down to 4 sc, sl st into the 5th stitch, and fasten off with a tail; the two arches together form the heart shaped top of the mask, as on my sloth.
- Sew the mask to the front of the head about one round up from the bottom, with the arches pointing up toward the crown.
Eye Patches (Make 2)
- With dark brown, ch 8.
- Round 1: 1 sc in the 2nd chain from the hook, 1 sc in each chain across, 3 sc in the last chain, then 1 sc in each stitch along the other side, 3 sc in the final stitch, and sl st to join (about 17 sts); you get a small oval.
- Fasten off with a long tail for sewing.
- Push a 21 mm safety eye through each patch and lock the backing on the reverse.
- Sew the patches onto the mask, angled down and outward toward the sides of the head; on mine the brown extends past the mask edge onto the grey.
Nose and Smile
- Fix the black safety nose in the center of the mask between the eyes, just below the arch dip.
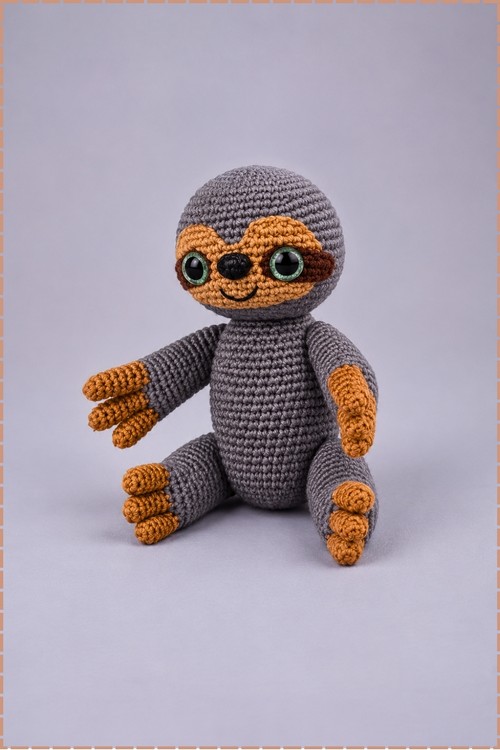
- With black yarn, bring the needle up level with the outer edges of the nose and stitch the smile; I stitched one gentle curved line below the nose instead of the original diagonal sides and straight bottom line.
- Knot all ends on the inside of the head.
Closing the Head
- Pick up the working loop at the back of the head.
- Round 1: (1 sc in next 7 sts, sc2tog) around (48 sts).
- Round 2: (1 sc in next 6 sts, sc2tog) around.
- Round 3: (1 sc in next 5 sts, sc2tog) around.
- Round 4: (1 sc in next 4 sts, sc2tog) around.
- Round 5: (1 sc in next 3 sts, sc2tog) around.
- Round 6: (1 sc in next 2 sts, sc2tog) around.
- Round 7: (1 sc in next st, sc2tog) around; stuff the head firmly before the opening gets too small.
- Work sc2tog until nearly closed, sl st around the opening to seal it, fasten off, and bury the tail.
Body
- Round 1: with grey, make a magic circle with 6 sc (6 sts).
- Round 2: 2 sc in every stitch (12 sts).
- Rounds 3 to 9: increase as for the head, from (1 sc, increase) up to (1 sc in next 7 sts, 2 sc in next st) (54 sts).
- Work 22 straight rounds of 1 sc in every stitch (54 sts); the body becomes a tall rounded pear.
- Work the matching decrease rounds from (1 sc in next 7 sts, sc2tog) down to (1 sc in next st, sc2tog), stuffing as the opening shrinks.
- Work sc2tog until nearly closed, sl st closed, fasten off, and bury the tail.
Attaching the Head
- Set the head on top of the body, with the mask facing forward.
- With grey yarn and a tapestry needle, stitch around the neck several times, pulling tight, and hide the knots.
Toes (Make 12, 3 per Limb)
- Round 1: with mustard ochre, make a magic circle with 8 sc (8 sts).
- Rounds 2 to 7: 1 sc in every stitch for 6 rounds (8 sts per round); each toe is a small tube.
- Sl st, fasten off, and tuck the ends inside the toe.
Limbs (Make 4)
- Line up 3 toes side by side with their open ends together and join grey yarn on the right edge.
- Work sc across all three toes to bind them into one round (about 23 sts).
- Work a decrease round with 5 evenly spaced sc2tog (18 sts).
- Work 18 straight rounds of 1 sc in every stitch (18 sts).
- Lightly stuff the limb, work sc2tog until nearly closed, sl st closed, and bury the tail; light stuffing keeps the limbs floppy so they bend at the toes like mine.
Attaching Arms and Legs
- Thread the upholstery needle with a double strand of grey yarn.
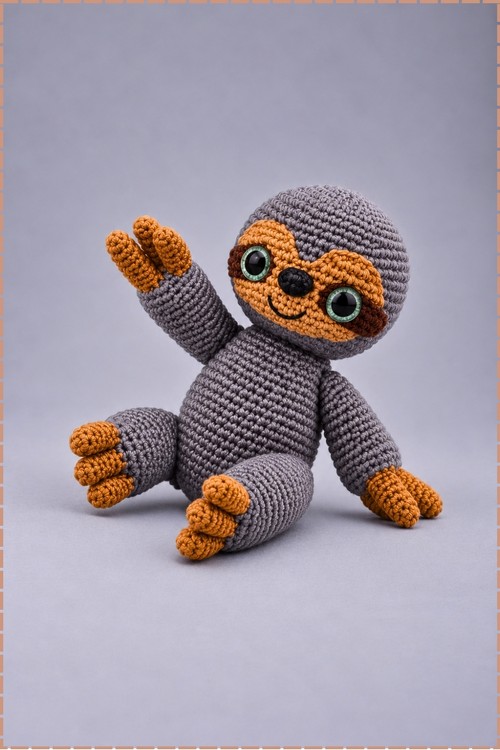
- Arms: push the needle through the upper body and the top of each arm with the toes facing up and down, go back and forth a second time, pull firm to dimple the body, knot, and bury the ends; my arms sit just under the head so one can lift into a wave.
- Legs: attach them the same way at seated height on the lower body, lined up with the arms, so the sloth sits upright with the toes facing forward.
FAQ
Can I sew the limbs on instead of jointing them? Yes. Whipstitch them in place, but they will not move.
Why does my face mask pucker? It was likely sewn on too tight. Pin it first and stitch through only the outer loops.
Are safety eyes safe for babies? Not for children under three. Embroider the eyes and nose instead.