
Crochet Halloween Bear Keychain Pattern Free
No arms or legs stick out from the round crochet Halloween bear keychain, so it slides in and out of a pocket or locker without snagging. October office parties and classroom gift swaps get a cute monster bear amigurumi charm that looks right on any lanyard or laptop bag.
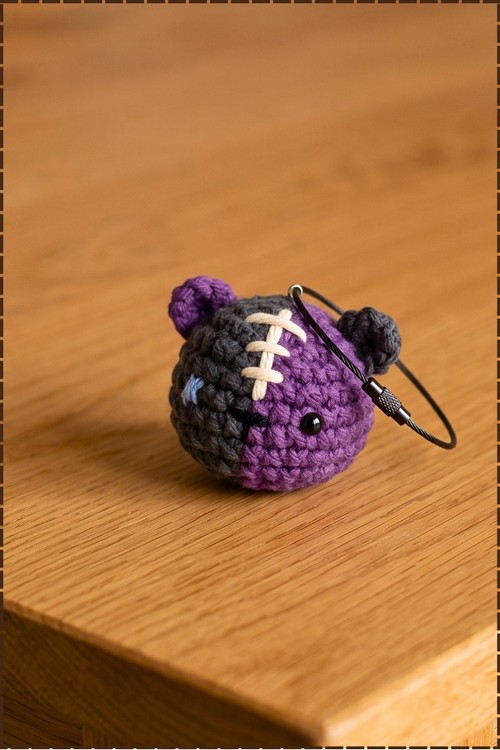
Your keys get a bodyguard when the Crochet Halloween Bear swings from the ring, cream seam stitched across its head like a scar. Fans of Frankenstein and soft horror tend to claim the Crochet Halloween Bear first. Clip it to a zip and it acts like it owns the place.
Crochet Halloween Bear
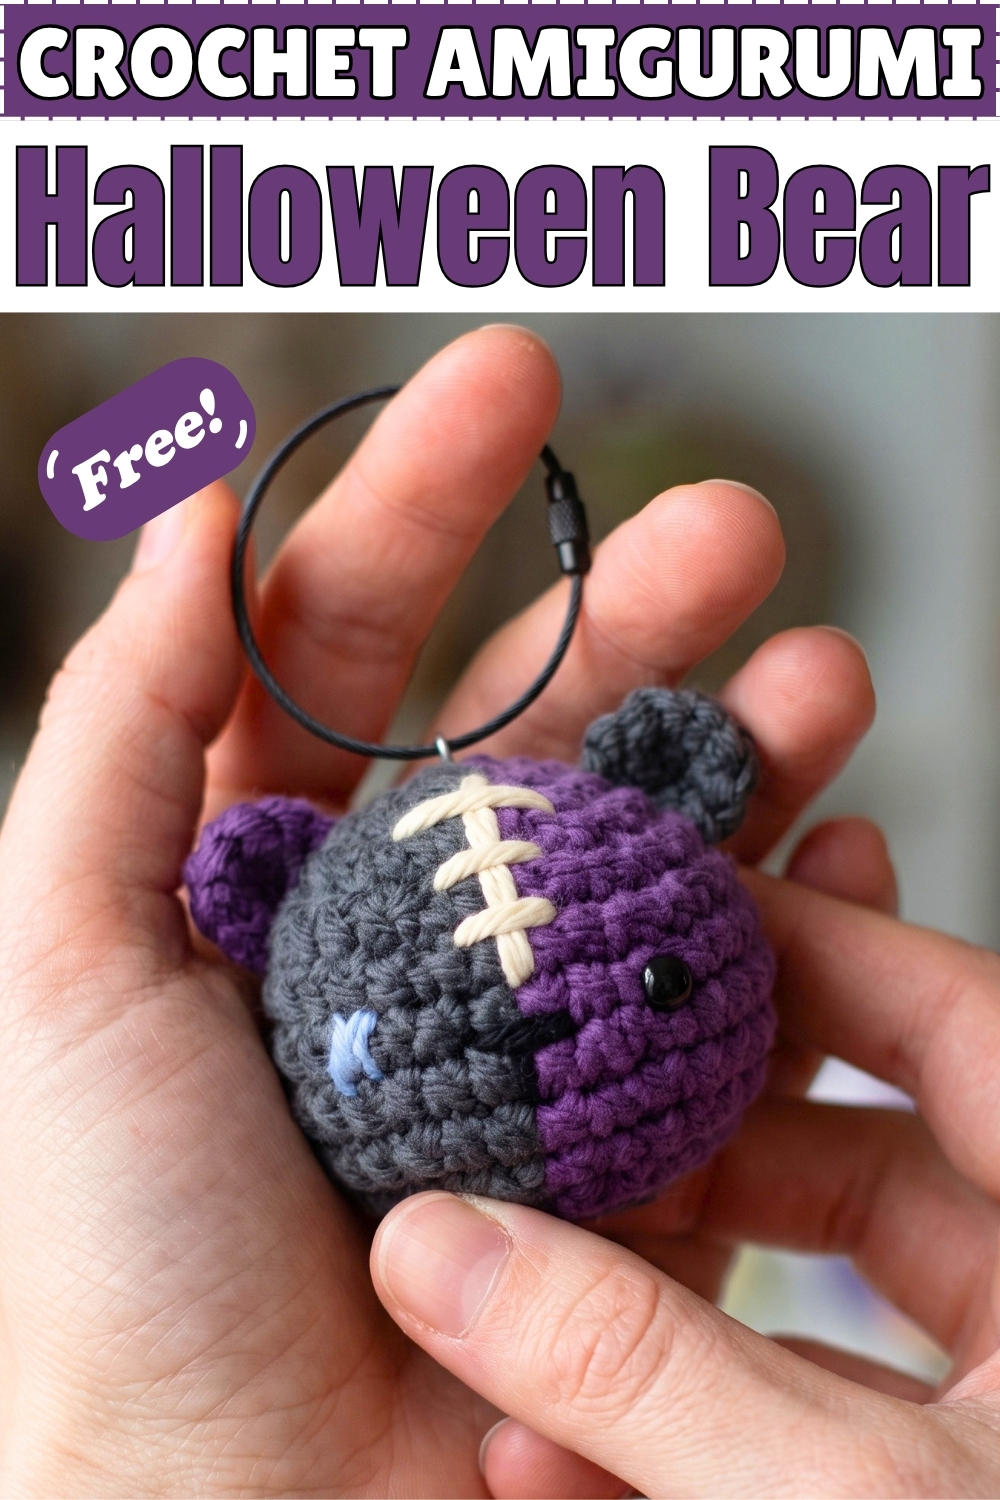
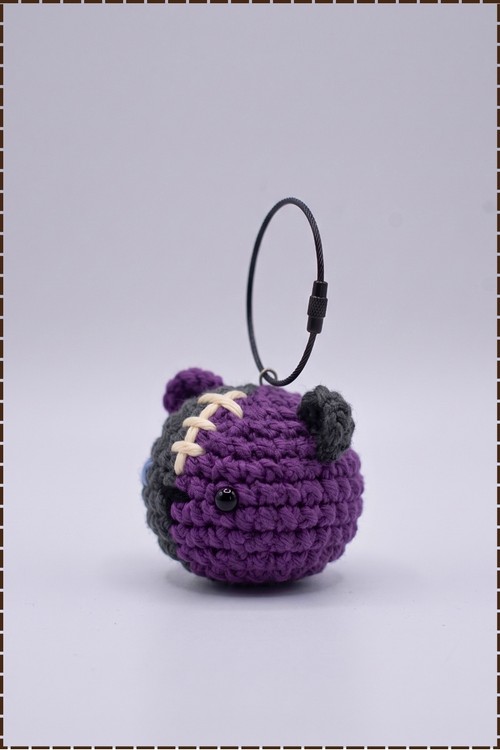
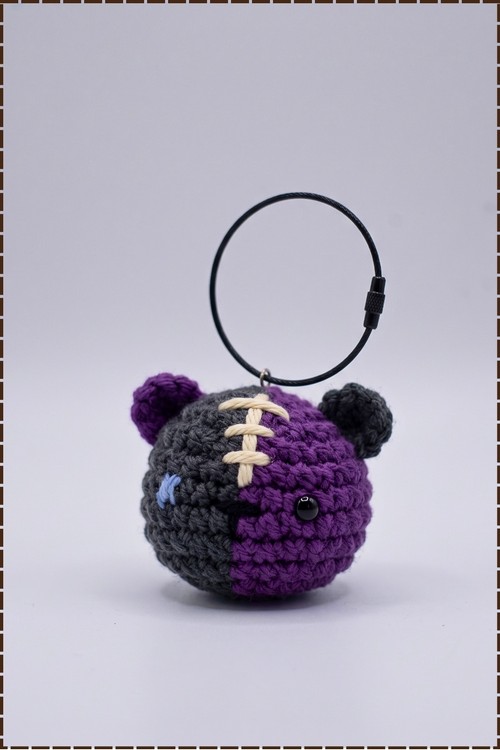
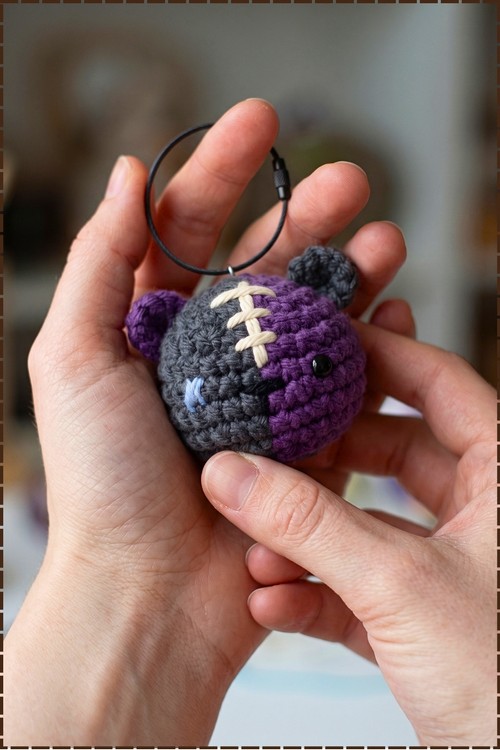
Two yarn colours split this little body straight down the middle, with gray on one side and purple on the other, all worked in single crochet rounds from a magic ring. I stitched a cream scar right along the colour seam so my crochet Halloween bear reads as a tiny Frankenstein style monster. One side gets a shiny black safety eye while the other carries a soft blue embroidered X. Contrasting ears swap the colours over for a playful, mismatched finish. My finished bear rides on a black wire key ring and sits comfortably in the palm of my hand. You can make one in an evening of steady stitching.
Why I Love Making This Little Monster
This bear started as a quick keychain idea and turned into my favourite spooky season make. The split body does most of the work for you, because the colour change alone gives it that stitched together monster look. Add a scar, two different eyes, and swapped ears, and the personality shows up without any extra shaping.
Materials and Tools
- Worsted weight cotton or acrylic yarn in gray (Colour A)
- Worsted weight yarn in purple (Colour B)
- Small amount of cream yarn for the scar
- Small amount of light blue yarn for the X eye
- Small amount of black yarn for the nose
- One small black safety eye (or black yarn if you prefer to embroider both eyes)
- Crochet hook suited to your yarn, going one size smaller than the label suggests for a tight fabric
- Polyester fiberfill stuffing
- Black wire key ring with screw lock
- Small metal eye pin or jump ring to attach the key ring
- Tapestry needle and scissors
- Stitch marker (optional but helpful)
Difficulty and Time
In my experience this is an easy project for anyone who can work in the round. The colour changes are the only part that needs attention. It took me roughly two to three hours from magic ring to key ring, though your time may differ.
Abbreviations
- MR: magic ring
- sc: single crochet
- hdc: half double crochet
- inc: increase (2 single crochet in one stitch)
- dec: decrease (single crochet two stitches together through the front loops)
- sl st: slip stitch
- ch: chain
- st(s): stitch(es)
Beginner Technique Notes
To change colour, work the last stitch in the old colour until two loops remain on the hook, then yarn over with the new colour and pull through. Carry the unused yarn inside the piece so it stays hidden by the stuffing. Each round in this pattern closes with a slip stitch and a chain in the first stitch, which keeps the colour line straight instead of spiralling around the bear.
The Pattern
Body and Head
- Round 1: Make a magic ring with gray, work 3 sc, switch to purple before finishing the third stitch, work 3 sc in purple, switch back to gray before finishing the last stitch, pull the ring closed, then sl st and ch 1 [6 sts]; you should see a small circle that is half gray and half purple.
- Round 2: Starting in the same stitch, work 1 inc in each of the 3 gray stitches, switch to purple before finishing the last increase, work 1 inc in each of the 3 purple stitches, switch back to gray, then sl st and ch 1 [12 sts]; the colour line should run straight across the centre.
- Round 3: In gray work [1 sc, 1 inc] 3 times, switch to purple and work [1 sc, 1 inc] 3 times, switch back to gray, then sl st and ch 1 [18 sts]; keep your colour changes on top of the previous ones so the seam stays clean.
- Round 4: In gray work [2 sc, 1 inc] across the gray stitches, switch to purple and work [2 sc, 1 inc] to the end of the round, then sl st and ch 1 [24 sts]; the piece now looks like a flat disc ready to curve.
- Round 5: In gray work [3 sc, 1 inc] 3 times, switch to purple and work [3 sc, 1 inc] to the end of the round, switch back to gray, then sl st and ch 1 [30 sts]; this is the widest round, so count carefully before moving on.
- Rounds 6 to 9: In gray work 15 sc, switch to purple before finishing the 15th stitch, work 15 sc in purple, then sl st and ch 1 at the end of each round [30 sts per round]; the sides rise straight up and the bear starts to look like a rounded bowl.
- Safety eye placement: Insert the black safety eye between Round 7 and Round 8 on the purple side, close to the outer edge away from the seam, and secure the backing before you stuff; on my bear it sits slightly lower than the ear on that side.
- Round 10: In gray work [3 sc, 1 dec] 3 times, switch to purple and work [3 sc, 1 dec] to finish the round, then sl st and ch 1 [24 sts]; work each decrease through the front loops only so it blends in.
- Round 11: In gray work [2 sc, 1 dec] 3 times, switch to purple and work [2 sc, 1 dec] to finish the round, then sl st and ch 1 [18 sts]; the opening is narrowing, so get ready to stuff.
- Stuffing: Stuff the body firmly now while the opening is still big enough to shape the bear into a smooth round ball; a firm fill keeps the stitches from stretching and showing white fiberfill.
- Round 12: In gray work [1 sc, 1 dec] 3 times, switch to purple and cut the gray yarn, finish the remaining section in purple with [1 sc, 1 dec], then sl st in the first stitch and cut the yarn leaving a tail [12 sts].
Closing the Body
- Add a little more stuffing through the small opening if the bear feels soft.
- Thread the tail onto a tapestry needle and pass it through the front loop of each remaining stitch.
- Pull the tail tight to close the hole completely, knot it securely, and weave the end deep into the body so it vanishes.
Face Details
- X eye: Using light blue yarn, embroider an X on Round 7 on the gray side, matching the height of the safety eye on the purple side; my blue X sits further from the seam than the safety eye, which gives the face its lopsided monster look.
- Nose: Using black yarn, stitch a small horizontal line low on the face right beside the colour seam, between the two eyes in height; keep it short so it reads as a tiny nose rather than a mouth.
- Scar: Using cream yarn, sew a straight running stitch along the colour seam from the top of the head down toward the face, then add short cross stitches over it at even spacing until the scar reaches your preferred length; on my bear the scar runs from the crown to just above eye level.
- White accents (optional): The original pattern adds small white highlight stitches around the face; I left these off my bear, but you can add them if you want extra sparkle.
Ears (Make 2: One Gray, One Purple)
- Step 1: Make a magic ring.
- Step 2: Work 1 sc into the ring.
- Step 3: Work 4 hdc into the ring.
- Step 4: Work 1 sc into the ring.
- Step 5: Pull the ring tight to close it; the ear should curl into a small rounded cup.
- Step 6: Cut the yarn, leaving a long tail for sewing, then repeat to make one gray ear and one purple ear.
Assembly
- Sew the purple ear onto the gray side of the head between Round 3 and Round 5, angling it outward toward the side; swapping the ear colours is what makes my version stand out.
- Sew the gray ear onto the purple side of the head between Round 3 and Round 5, mirroring the position of the first ear.
- Push a small metal eye pin into the top centre of the head right on the colour seam, or stitch a jump ring firmly in place there.
- Thread the black wire key ring through the eye pin or jump ring and screw the lock closed.
- Secure every knot tightly and weave in all remaining loose ends.
Tips for a Clean Finish
- Keep a stitch marker in the first stitch of each round, because the slip stitch and chain join can make it easy to lose your place.
- Pull the colour change snug every time, since loose changes leave gaps that the scar cannot fully cover.
- Stuff in small pieces rather than one big clump so the ball stays smooth without lumps.
- Check the safety eye position from the front before locking the backing, because it cannot come off once it clicks.
- Anchor the eye pin with a dab of craft glue if this keychain will see daily use on a bag or keys.
Yarn Substitution
Cotton yarn gives crisp, defined stitches like the ones on my bear, while acrylic feels softer and a little fuzzier. Any two contrasting colours work for the body, so lime and black or orange and black make fun alternatives. Use the same yarn weight for both colours so the two halves match in size.
Customization Ideas
Swap the cream scar for a zigzag in black for a sharper look. Embroider both eyes as X marks for a fully stitched monster, or use two safety eyes for a gentler face. Add two tiny gray bolts at the sides of the head for a classic Frankenstein touch. Skip the key ring and add a ribbon loop to hang the bear on a Halloween tree.
Frequently Asked Questions
Can I make this bear without safety eyes? Yes. Embroider a small black eye with yarn on the purple side instead, which is also the safer choice if the bear will go to a small child.
Why does each round end with a slip stitch and chain? Joining each round keeps the colour seam running straight up the body. Without the join, the colour line slowly drifts sideways as you spiral.
How big does the finished bear turn out? Mine fits in the palm of my hand, roughly the size of a small ball. Your size will depend on your yarn and hook, so treat this as a rough guide.
What if my colour seam looks messy? Make each change on the last stitch before the new colour starts, and tug both yarns gently. The cream scar also hides small wobbles along the line.
Is the key ring secure enough for everyday use? A screw lock wire ring holds well. The weak point is the eye pin, so glue it in place or stitch a jump ring through several stitches for extra strength.