
Crochet Pumpkin Marshmallow Keychain Free Pattern
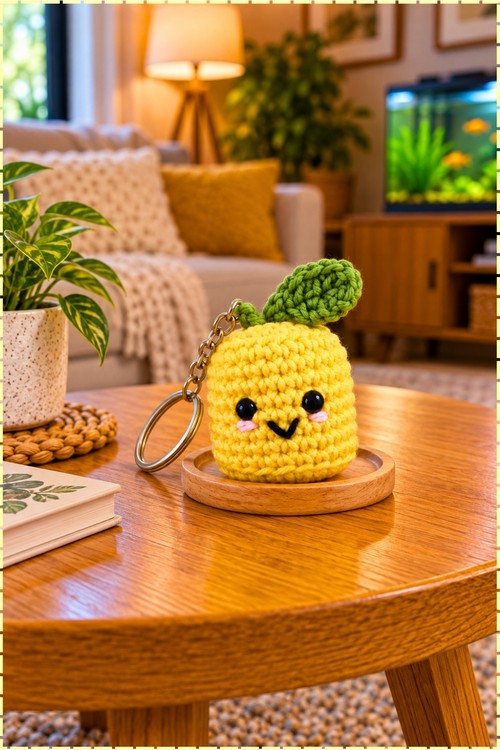
Backpack zippers are easier to spot in a crowded cloakroom when the crochet pumpkin marshmallow keychain hangs from them in sunny yellow. Stocking stuffer season calls for a marshmallow keychain amigurumi on a silver chain that also stands upright on a coaster between outings.
Making this Crochet Pumpkin Marshmallow Keychain is a satisfying project for crafters who enjoy shaping small pieces and adding tiny details. Crochet the rounded body, attach the green leaf, and finish the face with care. The keychain hardware brings the handmade design together.
Crochet Pumpkin Marshmallow Keychain

Worked entirely in the round with no pieces to sew together, this crochet pumpkin marshmallow keychain builds its soft marshmallow body from a single continuous tube of single crochet, with two BLO (back loop only) rounds creating the characteristic pillow-like ridges top and bottom. My version comes out in bright yellow cotton with a green leaf at the top instead of the usual orange and brown, giving it more of a lemon-candy read up close. Safety eyes, a v-stitch mouth, and tiny pink blush marks finish the face. A metal keychain ring clips through the leaf at the top.
Why I Love This One
It fits in your palm, takes under an hour in my experience, and the no-sew build means zero fiddly assembly at the end. The face lands exactly right every time because the BLO ridges act as natural placement guides for the eyes. Mine lives on my keys and gets comments every autumn.
Materials and Tools
- Cotton yarn in bright yellow for the body
- Cotton yarn in green for the leaf
- Black yarn for the mouth, split thin for embroidery
- Pink yarn for the cheeks, split thin for embroidery
- 2.5 mm crochet hook
- Two 6 mm black plastic safety eyes
- Stitch marker
- Toy stuffing, used lightly
- Yarn needle and scissors
- One metal keychain ring with a swivel clip
- Pliers to open and close the keychain ring
Cotton yarn at this weight gives a smooth, firm fabric that holds the round marshmallow shape without much stuffing and shows the face details cleanly.
The Pattern
Body (Yellow)
- Round 1: Start with a magic ring (MR) and work 6 single crochet (sc) into the ring, pull closed [6 sc].
- Round 2: Work an increase (inc) in each stitch around, placing 2 sc in every stitch [12 sc].
- Round 3: (1 sc, 1 inc) repeat 6 times around [18 sc].
- Round 4: (2 sc, 1 inc) repeat 6 times around [24 sc]; the piece looks like a small flat circle here.
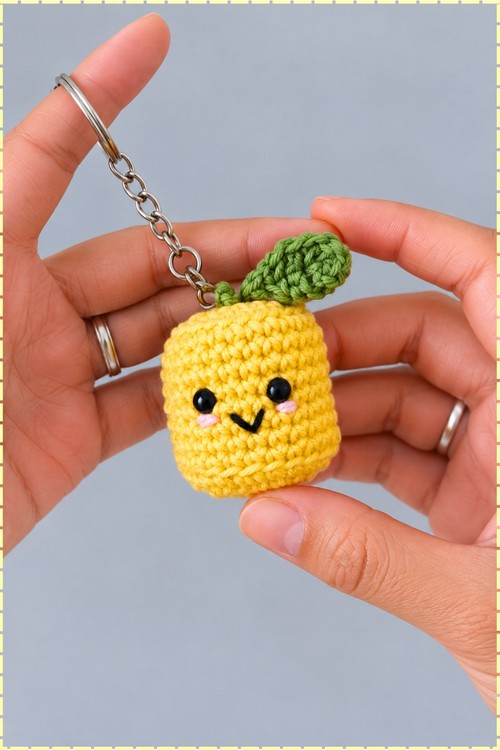
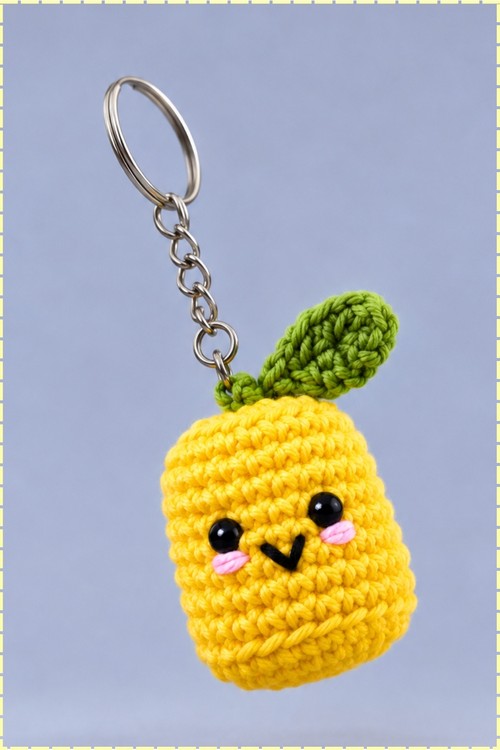
- Round 5: Work in back loops only (BLO) with 1 sc in each stitch around [24 sc]; this ridge will sit at the base of the finished keychain and is what gives it the marshmallow silhouette you can see in my photo.
- Rounds 6 to 12: Work 1 sc in each stitch through both loops for 7 rounds straight [24 sc per round]; the tube grows upward and this is where the face will land.
- Eye placement: Before Round 13, insert the 6 mm safety eyes between Rounds 8 and 9 counting down from the top opening, leaving 3 stitches between them and placing the second eye in the 4th stitch from the first; press the backs on firmly; on my keychain the eyes sit in the middle of the yellow tube, centred on the face.
- Round 13: Work in BLO again with 1 sc in each stitch around [24 sc]; this ridge mirrors the one at the base and closes the marshmallow shape at the top.
- Round 14: (2 sc, 1 decrease (dec)) repeat 6 times around [18 sc].
- Round 15: (1 sc, 1 dec) repeat 6 times around [12 sc]; stuff the body lightly at this point so it stays soft and pillow-like rather than firm; on my keychain the stuffing is very light, which keeps the marshmallow feel.
- Round 16: Work dec around until the hole is completely closed, fasten off, thread the tail on a needle, weave through the front loops of the remaining stitches, pull tight to cinch shut, and hide the tail inside the body.

Face Details
- Cheeks: Using pink yarn split to a finer ply, embroider small 2-stitch rosy cheeks just beneath each eye; my cheeks sit in the rounded corners of the face and read as two soft pink ovals in the photo.
- Mouth: Using black yarn split thin, embroider a small v-shape or smile stitch centred between the two eyes and just below them; on my keychain the mouth is a clean v that reads clearly against the yellow even in person.
- Weave in all face ends inside the body.
Leaf and Stem (Green)
- Attach green yarn to the top centre of the body at the magic ring area with a slip stitch (sl st).
- Chain 8, then anchor the chain back down near the centre hole with a sl st to form a loop sturdy enough to hold the keychain ring; on my keychain this forms the little hanging loop at the top visible in the photo.
- Tie secure knots and hide all remaining yarn tails inside the body.
- Attach a second length of green yarn right next to the loop base.
- Chain 13 for the leaf tendril.
- Starting from the second chain from the hook, work 2 sc in every stitch all the way back down to the base; the strip curls into a leafy shape on its own as you work the increases back along the chain.
- Finish with a sl st at the base to secure, cut the yarn, and weave in all ends.
- On my keychain the finished leaf stands upright beside the hanging loop at the top of the body, which is exactly what you can see in the photo.
Finishing
- Use pliers to open the metal keychain ring and clip it through the green loop at the top of the body.
- Close the ring firmly with pliers so the connection is secure enough for everyday bag use.
Customization Ideas
- Work the body in orange cotton for the original pumpkin read, keeping the green leaf.
- Try a pastel yellow or mint green body for a non-seasonal version.
- Add a thin black embroidered stem line from the base of the leaf loop down into the top BLO ridge to suggest a pumpkin stem.
- Work the body in white for a ghost marshmallow version and add black yarn eyes and a small round mouth.
- Make a set in three different colours to clip onto a zipper pull together.
FAQ
- Why do my BLO rounds create such a visible ridge? That ridge is intentional and is what gives the keychain its marshmallow shape; if yours is subtle, try pulling the BLO stitches slightly tighter than your usual tension.
- The face looks off-centre after I closed the top. How do I avoid that? Mark the stitch directly above each eye with a spare piece of yarn before Round 13 so you can line the top centre up correctly as the opening closes.
- My leaf is pointing sideways instead of standing up. What helps? Weave the yarn tail back through the base of the leaf a second time before hiding it, pulling it slightly toward the back; the extra anchoring stops it from flopping.
- Can I skip the safety eyes and embroider instead? Yes, embroider small round eyes with black yarn before stuffing; closing the body is easier without the eye shafts to work around.