
Crochet Owl Amigurumi Free Pattern With Big Eyes & Tufted Ears
Give a graduate or a bookworm a crochet owl amigurumi in soft tan with chocolate brown wings, and it settles right onto a study desk beside textbooks. Bird lovers of every age will want the big eyed owl plush within reach, whether it lives on a nightstand or in a reading nook.
Autumn shelves and Thanksgiving tables are where this crochet owl amigurumi belongs, with feathers in the same browns and oranges as the season. Harvest displays, classroom fall corners, October market stalls. Makers start the owl amigurumi as soon as the leaves turn, and it stays out until the holiday decorations take over.
Crochet Owl Amigurumi

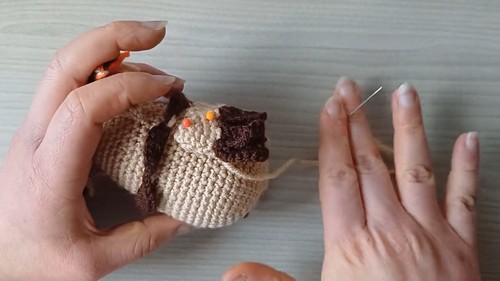
Tufted corners rise off the top of the head, each finished with a tassel of orange, brown and cream strands left loose. The body is covered in overlapping crocodile stitch feathers that shingle down from a brown collar to an orange bobble trim at the base. Two wide white eye patches ringed in orange hold black safety eyes, and an orange cone beak sits between them. Body, wings, eye patches, beak, collar and tassels all come as separate pieces to be joined. Crocodile stitch is the one technique that takes practice, since the feather rows are worked in front post stitches. Everything else stays standard.
Pieces List
- Eye pieces: 2
- Beak: 1
- Ears: 2
- Body with head: 1, worked in one piece
- Wings: 2
- Feet: 2
Materials and Tools
- Yarn in four coordinating colours
- 3 mm crochet hook
- 10 mm safety eyes
- Stuffing
- Tapestry needle
- Pins
- Scissors
No yarn weight is named. A DK or light worsted yarn suits a 3 mm hook, and it should give an owl roughly 12 to 15 cm tall. Budget about 4 to 6 hours, with most of that going into the crocodile stitch. These are estimates only.
Stitches Used
- Magic ring
- Single crochet
- Increase
- Decrease
- Chain
- Half double crochet
- Double crochet
- Slip stitch
Safety Eye Timing
The safety eyes go through the centre of each eye piece. The pattern then also inserts them between the upper rounds of the head shaping, before decreasing begins. The cleanest way to do both: push each safety eye through its eye piece, then through the body during the head shaping rounds, and snap the washer on from inside. This must happen before you stuff the head and before the final decrease round closes it.
For a child under three, skip the safety eyes. Embroider a black pupil in the centre of each eye piece and sew the pieces to the body instead.
The Pattern
Eyes (Make 2)
- Round 1: Magic ring with 6 single crochet. (6)
- Round 2: Increase in each stitch. Checkpoint: this should be a flat disc. If it cups, your tension is tight; go up half a hook size for these pieces. (12)
- Optional Round 3: Change colour and work 12 single crochet. Checkpoint: the new colour should form a ring around the centre. This round will curl the edge slightly, which helps the eye sit rounded on the face. (12)
- Fasten off, leaving a long tail.
- Attach the safety eyes to the centre.
Beak
- Round 1: Magic ring with 4 single crochet. (4)
- Round 2: (1 single crochet, 1 increase) repeat. Checkpoint: this should be a small cup with a pointed tip. (6)
- Round 3: 6 to 8 single crochet depending on size. Checkpoint: the beak should look like a short cone.
- Stuff lightly.
- Fasten off and sew between the eyes.
Ears (Make 2)
- Round 1: Magic ring with 6 single crochet. (6)
- Round 2: (1 single crochet, 1 increase) repeat. (9)
- Round 3: (2 single crochet, 1 increase) repeat. (12)
- Round 4: (3 single crochet, 1 increase) repeat. Checkpoint: this should be a flat round disc. If it ruffles, stagger the increases so they don't stack in the same spots every round. (15)
- Fasten off.
- Add yarn strands at the top if desired.
If rounds and stitch counts look confusing right now, don't stress! The video tutorial below walks you through this plushie step by step.
Body
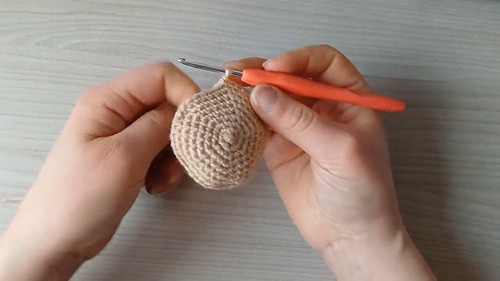
- Round 1: Magic ring with 6 single crochet. (6)
- Round 2: 6 increases. (12)
- Round 3: (1 single crochet, 1 increase) repeat. (18)
- Round 4: (2 single crochet, 1 increase) repeat. (24)
- Round 5: (3 single crochet, 1 increase) repeat. Checkpoint: the circle should lie completely flat. A bumpy base will make the owl rock later. (30)
- Round 6: (4 single crochet, 1 increase) repeat. (36)
- Round 7: (5 single crochet, 1 increase) repeat. Checkpoint: you should have a flat base about the size of a coaster. This is what lets the owl stand. (42)
Crocodile Stitch Section
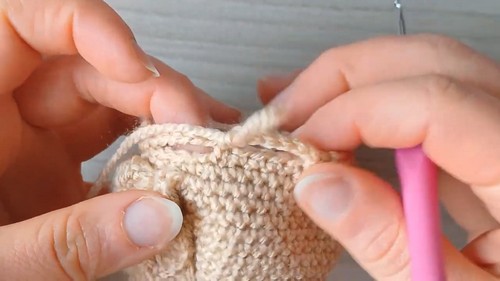
- Foundation round: (Chain 1, skip 1 stitch) repeat around.
- Slip stitch to join. Checkpoint: you should see an evenly spaced row of posts and gaps.
- Scale round: Work 5 double crochet down the first post.
- Work 5 double crochet up the next post.
- Skip to the next chain space.
- Repeat around. Checkpoint: each scale should look like a small fan pointing down. Scales that flip upward usually mean you worked up the first post instead of down; turn the work and try again.
- Alternate foundation and scale rounds.
- Change colours as desired for a layered feather look. Checkpoint: each new row of scales should sit between the scales below it, like roof tiles. If they line up directly on top, shift your foundation round by one stitch.
- Continue until the body reaches the height you want.
Head Shaping
- Work several rounds of single crochet evenly. Checkpoint: the top should rise as a smooth tube above the scales. Gaps between the last scale round and these stitches can be closed with a tighter tension.
- Insert the safety eyes between the upper rounds.
- Begin decreasing evenly.
- Stuff firmly as you decrease. Checkpoint: the head should curve in like the top of an egg. A pointed top means the decreases are stacking; stagger them.
- Final round: 6 decreases. (6)
- Fasten off and close.
Wings (Make 2)
- Round 1: Magic ring with 6 single crochet. (6)
- Round 2: 6 increases. (12)
- Round 3: 12 single crochet. Checkpoint: this should be a small shallow cup. (12)
- Row shaping: chain and use double crochet and half double crochet to create a curved feather shape. Checkpoint: the wing should taper to a rounded point. If it curls sideways, work the taller stitches on the outer edge only.
- Fasten off.
- Sew at a slight angle to the body.
Feet (Make 2)
- Chain a base row.
- Work single crochet across.
- For the toes, chain 3.
- Slip stitch back into the base.
- Repeat for three toes. Checkpoint: the toes should stick out as three short, even loops. Uneven toes usually come from slip stitching into different spots on the base; space them apart evenly.
- Fasten off.
- Sew to the lower front of the body.
Assembly
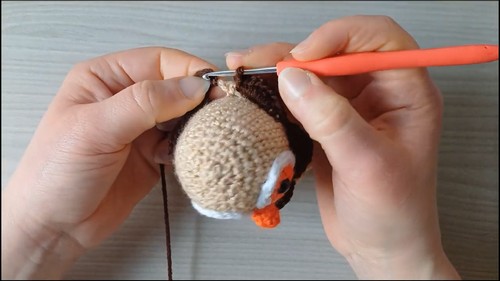
- Sew the eyes to the body if not attached.
- Attach the beak centred between the eyes.
- Sew the ears on top.
- Attach the wings symmetrically.
- Sew the feet at the bottom.
- Shape and adjust the stuffing.
Pattern Note
- Eyes attached twice: the safety eyes go into the eye pieces and also into the body during head shaping. Do both in one step by pushing each eye through its eye piece and the body together.
- Beak Round 3: working 8 single crochet into 6 stitches needs 2 increases, which the pattern doesn't mention. Work 6 for a small beak, or add the increases if you want the larger one.
- Crocodile foundation round: the round is written as only "chain 1, skip 1," but crocodile stitch needs upright posts, usually double crochet, to work the scales around. You'll likely need a stitch between each chain for the scales to form.
- Head shaping counts: the rounds between the scales and the final 6 decreases have no counts. Decrease evenly until you reach 12 stitches before the final round.
- Wings and feet: the row shaping on the wings and the base chain on the feet have no counts, so size them against your own owl.
Assembly
Pin every piece first and check the owl from the front before sewing.
- If the eye pieces aren't already attached through the body, pin them side by side just above the midpoint of the head and sew around their edges.
- Pin the beak between and slightly below the eyes, with the tip pointing down.
- Sew the ears on top of the head, set toward the outer edges so they look like tufts.
- Pin the wings on the sides, angled slightly back, and sew along the top edge only so they can flap a little.
- Sew the feet at the bottom front edge of the body, with the toes peeking out beyond the base.

Stuffing Guide
- The head wants firm stuffing so the eyes sit flat. The body can be firm too, but keep the base area tightly packed so it stays level. The beak only needs a pinch. Wings, ears and feet stay unstuffed.
- Overstuffing shows in the crocodile stitch section. The foundation rounds stretch open and the scales lift away from the body instead of lying flat.
Yarn Substitution and Size Scaling
Cotton gives the scales a crisp edge. Acrylic softens them. For a larger owl, use worsted yarn with a 4 mm hook and 12 mm eyes. Sport weight with a 2.5 mm hook makes a small version, though the crocodile stitch becomes fiddly.
Toy Safety
For children under three, embroider the eyes and sew all pieces with double passes. Skip loose yarn strands on the ears, since they can be pulled out.
FAQ
- Can I use one colour instead of four? Yes, a single colour still shows the scales well. Using two tones just makes the layered feathers easier to see.
- Is crocodile stitch hard? It takes a few tries to get the direction right. Once the first scale works, the rest follow the same rhythm.
- Can I skip the feet? You can. The flat base keeps the owl standing without them.