
Crochet Frog Amigurumi Free Pattern Made With Chenille Yarn
Pillows in a cottagecore room make a soft perch for a crochet frog amigurumi, its bright green chenille and lime belly popping against white bedding. Set a chenille frog plush between the keyboard and monitor on a gaming desk, where the flat body stays put through long sessions.
Flat shape and a two tone belly are why the crochet frog amigurumi keeps showing up in request lists. It squishes in one hand. The face is one line and two eyes, so nobody fusses over expression. Makers hand it over and get asked for another. That is the frog amigurumi effect.
Crochet Frog Amigurumi

Flat body fills a whole palm, more pancake than ball, with a pale belly panel covering the lower front. Two eye bumps sit on top of the head, each holding a safety eye, and one straight black line marks the mouth below them. Short arms stick out at the sides and stubby legs point down, all worked in the same bright green as the head. Chenille gives it that squishy pile. Parts break down into the body worked flat and joined, the two eye bumps, four limbs, and the belly in a second shade. The colour change across the front is the only step that needs attention.
Quick Facts
- Finished size: approximately 4 to 6 inches tall in chunky chenille (estimate only — varies with yarn and tension)
- Difficulty: intermediate — uses popcorn stitches and two-colour belly work within continuous rounds
- Working time: approximately 2 to 3.5 hours
- Piece count: 1 (the entire frog — head, body, eye bumps, arms, and legs are all worked into one continuous piece)
No pieces to sew on. Every limb is a popcorn stitch crocheted directly into the body rounds. The light green belly section is worked as a colour change within each round rather than as a separate piece.
Colour and Customization Ideas
Worth choosing before you wind anything, since two colours run through every body round.
- The classic version is dark green back and light green belly. Swap the light green for cream or yellow for a more illustrated look.
- A teal body with white belly produces a less naturalistic but very clean graphic version.
- Work the entire frog in one colour and skip the belly change entirely — the popcorn limbs and eye bumps carry the silhouette on their own.
- The mouth is embroidered in black cotton. A few extra stitches in red before the black creates a small tongue detail at no structural cost.
- For a more opaque belly, double the light green yarn held together for the belly rounds only.
Materials and Tools
- Dark green chenille yarn, chunky weight
- Light green chenille yarn, chunky weight
- Crochet hook appropriate for your yarn weight
- Safety eyes
- Polyester fiberfill stuffing
- Black cotton yarn for mouth embroidery
- Darning needle
- Stitch marker
- Scissors
Abbreviations
- MR: magic ring
- SC: single crochet
- Inc: increase, work 2 SC into the same stitch
- Dec: decrease, SC two stitches together
- Sl st: slip stitch
- Ch: chain
- DC: double crochet (used in popcorn stitches)
Popcorn Stitch Guide
There are two popcorn sizes in this pattern.
4-stitch popcorn (eye bumps): Work 4 DC into the same stitch. Drop the loop from the hook. Insert the hook into the first DC of that group. Pick up the dropped loop and pull it through. Chain 1 to lock if needed.
5-stitch popcorn (arms and legs): Work 5 DC into the same stitch. Drop the loop from the hook. Insert the hook into the first DC of that group. Pick up the dropped loop and pull it through. Chain 1 to lock if needed.
Popcorn stitches count as one stitch in your total stitch count.
Pieces List
One piece: the complete frog body including all eye bumps, arms, and legs, worked continuously from top to bottom.
The Pattern
Round 1
- MR, 6 SC [6]
Round 2
- Inc in each stitch around [12] Checkpoint: a small flat disc. Should lie flat without any cupping.

For This Round 3 — Eye Bumps
Work the following sequence 6 times around:
- 1 SC
- 1 inc
- 1 SC
- 1 popcorn increase in the next stitch (work a 4-stitch popcorn into the stitch, then add 1 SC into the same stitch to complete the increase)
- Total [18] Checkpoint: six small raised bumps should be distributed evenly around the disc. These are the eye bump positions — check that they are spaced evenly before continuing. Insert safety eyes now, between rounds 3 and 4, placing them on the front face between two of the raised bumps. Secure the washers from inside before moving on. For toys going to children under three, embroider the eyes with black yarn at this same stage instead of using safety eyes.
Round 4
- 2 SC, inc, repeat around [24]
Never made an amigurumi before? The video tutorial below is the perfect starting point, and the written pattern is right here whenever you're ready!
Rounds 5 to 7
- SC in each stitch around [24] each round Checkpoint: after three straight rounds the body should look like a wide, shallow dome beginning to show some height. The eye bumps should be clearly visible on the top surface.
Round 8 — Increase and Belly Colour Begin
- Work 2 SC, inc, repeat 8 times [32]
- Work in dark green at the start of the round
- Switch to light green for the belly section across the front
- Switch back to dark green for the back section
- Keep the light green centred on the front face of the frog throughout
Round 9 — Arms
- SC in each stitch around [32]
- Place 2 popcorn stitches for the arms on the sides of the body (5-stitch popcorn for each arm)
- Keep light green centred on the belly, dark green on the back
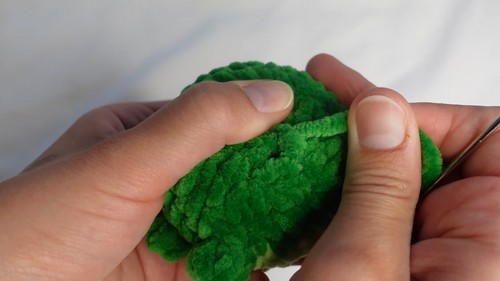
For This Round 10 — Colour Placement
- 12 SC in dark green, 9 SC in light green, 11 SC in dark green [32]
Round 11 — Colour Placement Adjusted
- 13 SC in dark green, 8 SC in light green, 11 SC in dark green [32] Checkpoint: the body should be at its widest point now, clearly rounded from the side. The light green belly should be centred on the front and the arm popcorns should be sitting out from the sides.
Round 12 — Legs
- Continue dark green, light green, dark green belly layout as established
- Place 2 popcorn stitches for the legs near the base of the body (5-stitch popcorn for each leg)
- Position legs slightly toward the front so the frog reads as sitting upright
- Keep counting each popcorn as one stitch
- Total [32]
For This Round 13 — Decrease
- 2 SC, dec, repeat around [24]
Round 14 — Decrease
- 1 SC, dec, repeat around [16] Checkpoint: the base of the frog is now closing. Begin stuffing at this point — push filling into the cheeks and belly area, and keep the bottom slightly rounded rather than flat. Firm stuffing now prevents the frog from caving in after closing.
- Stuff firmly

Round 15 — Closing
- Dec around 8 times [8]
- Work 2 more dec to reduce to 6 stitches [6]
- Cut yarn leaving a long tail
- Thread tail onto the darning needle
- Weave through the front loops of the remaining stitches and pull tight to close
- Knot and hide the tail inside the body
Mouth Embroidery
- Thread black cotton yarn onto the darning needle
- Insert needle at the back of the head and bring it out where you want the mouth to begin
- Stitch a simple curved smile
- Return the needle to the same entry point to knot and hide the ends inside the body
- Keep the smile small and centred below the eyes

Assembly
This frog has no separate pieces to attach. The only finishing steps after closing the body are the mouth embroidery and checking that all popcorn limbs are sitting in the right direction.
- After closing, press each arm and leg popcorn outward with your thumb if any have settled inward against the body. Do this while the stuffing is still malleable.
- Embroider the mouth last, after all stuffing and closing is complete, so you can judge the placement against the finished face.
- The safety eyes should already be in from round 3. If they look uneven after stuffing, it is too late to move them — this is why checking placement before locking the washers matters.
Stuffing Guide
- Stuff through the open base from round 14 onward, adding small pinches of fiberfill rather than one large piece.
- Push filling into the cheek area (the area near the eye bumps) first — this is where the frog loses shape most visibly if underfilled.
- The belly section needs enough filling to hold its rounded curve without the light green section pulling flat.
- Keep the base slightly rounded rather than flat so the frog can sit stably without tipping.
- Chenille stretches slightly under pressure, so what feels adequately firm before closing may settle softer. Err toward firm.
- If stitches begin to separate and the pile opens up, there is too much filling — remove a small amount before the round 15 closing.
Three Tips
- The key to keeping the belly centred is starting each round with the same stitch every time. Mark the start of round stitch and the centre-front belly stitch separately so the two colours land in the same position each round.
- Push each popcorn stitch outward immediately after working it, before the next SC locks it in position. Once the surrounding stitches are worked, coaxing a sunken popcorn back out is possible but frustrating.
- Chenille yarn absorbs safety eye posts differently than smooth yarn. Hold the eye firmly against the fabric and push it through in one movement rather than easing it in gradually — a slower push tends to snag the pile fibres rather than parting them.

Toy Safety
- Safety eyes must go in between rounds 3 and 4, while the body is still a small open disc. Waiting until round 14 as the source order implies makes fitting the washers from inside nearly impossible.
- For children under three, embroider the eyes at that same stage using black yarn.
- Weave in all yarn tails inside the stuffing with at least two direction changes. In chenille, a tail that works free catches easily.
Frequently Asked Questions
- The popcorn stitches for the arms are sinking inward instead of popping out. Push each popcorn outward with your finger right after locking it off, while the next round has not yet been worked. If they have already set inward, insert a blunt needle through the nearest stitch and nudge them outward from inside. The chenille pile hides some of the detail, so even a small amount of outward positioning makes a visible difference.
- My belly section is drifting to one side across the rounds. The belly drift follows the start-of-round marker position. If the marker is moving even slightly each round, the colour change point moves with it. Place a second marker at the exact centre-front stitch of the belly at the start and check it against the belly position every two rounds rather than every single round.
- Can I use smooth yarn instead of chenille? Yes, and it makes the popcorn stitch definition cleaner and easier to see. The frog will be smaller at the same hook size and the stitches will not have the chenille softness, but the construction is identical. Smooth DK or worsted at a 4 mm hook produces a firm, well-defined finish.
- The frog tips forward when I try to sit it upright. This is a leg placement issue. The legs need to be positioned slightly more forward than feels natural when working them in round 12 — if they sit directly on the sides of the base they do not provide enough front support. Tacking stitches from the base of each leg to the body at a slightly forward angle can correct this after the fact.