Crochet Amigurumi Ice Cream Cone Free Pattern You Will Love Making
This crochet ice cream cone amigurumi pattern is a fun and beginner friendly project that creates a charming miniature treat. Designed with simple stitches and clear shaping, the finished piece is perfect for keychains, bag charms, desk decor, or small gifts.
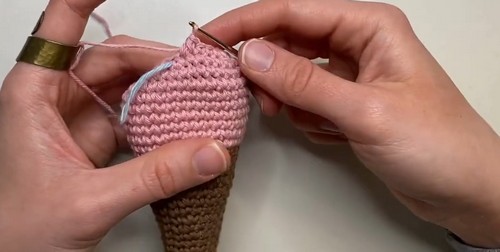
Crochet Ice Cream Cone Amigurumi


Imaginative crafters seeking a burst of nostalgic fun will adore working up this Crochet Ice Cream Cone Amigurumi guide, turning simple yarn into a delightfully realistic, sweet confection. Featuring a ribbed, cone-shaped base topped with a fluffy, pastel scoop, the finished piece serves beautifully as a quirky desk companion or a colorful pincushion. Testing out this whimsical pattern provides endless creative appeal, giving you total freedom to stitch custom sprinkles, cherry accents, and double-scoop variations.
Project Overview
-
Skill level is determined as confident beginner due to the simple stitches and structural loop color changes.
-
Finished size typically sits between three to four inches tall, depending on your tension and precise yarn choice.
-
Construction overview involves crocheting the cone from the bottom point upward and the scoop from the top down, then joining them together.
Core Materials
-
Yarn in beige or light brown for the cone
-
Yarn in pink or mint for the scoop
-
Small amount of dark brown yarn for syrup
-
Crochet hook suitable for your yarn, usually 2.5 mm or 3.0 mm
-
Fiberfill stuffing
-
6 mm or 8 mm safety eyes
-
Black embroidery thread for the mouth
-
Pink embroidery thread for cheeks
Essential Abbreviations
-
Magic ring serves as the adjustable starter loop for working in the round.
-
Single crochet is the foundational tight stitch used for the main body panels.
-
Double crochet provides the height needed to create the scalloped ruffle edge.
-
Increase means placing two single crochets into a single stitch to expand the shape.
-
Decrease means combining two stitches into one to narrow the shape.
-
Slip stitch is a low-profile stitch used to anchor the ruffles down.
Critical Notes Before Starting
-
Using a stitch marker in the first stitch of every round is vital because working in continuous spirals makes it easy to lose your place.
-
Choosing a hook size slightly smaller than recommended on your yarn label keeps your stitches tight enough to prevent stuffing from peeking through.
-
Maintaining consistent tension throughout both pieces ensures the base of the scoop matches the top circumference of the cone perfectly.
Shaping and Stitch Clarity
-
Alternating between increase rounds and even rounds on the cone prevents the piece from flaring out too quickly into a flat circle.
-
Working exclusively in the front loops for the decorative edge leaves the back loops completely untouched and ready for clean assembly structural joining.
-
Using invisible decreases instead of standard decreases on the scoop keeps the surface smooth and prevents noticeable gaps in your fabric.
Cone Pattern Instructions
-
Round 1: Magic ring with 6 single crochet
-
Round 2: 1 single crochet, 1 increase repeated 3 times for 9 stitches
-
Round 3: Single crochet in each stitch around for 9 stitches
-
Round 4: 2 single crochet, 1 increase repeated 3 times for 12 stitches
-
Round 5: Single crochet in each stitch around for 12 stitches
-
Round 6: 3 single crochet, 1 increase repeated 3 times for 15 stitches
-
Round 7: Single crochet in each stitch around for 15 stitches
-
Round 8: 4 single crochet, 1 increase repeated 3 times for 18 stitches
-
Round 9: 5 single crochet, 1 increase repeated 3 times for 21 stitches
-
Round 10: 6 single crochet, 1 increase repeated 3 times for 24 stitches
-
Fasten off and leave a long tail for sewing
Ice Cream Scoop Pattern Instructions
-
Round 1: Magic ring with 6 single crochet
-
Round 2: Increase in every stitch for 12 stitches
-
Round 3: 1 single crochet, 1 increase repeated 6 times for 18 stitches
-
Round 4: 2 single crochet, 1 increase repeated 6 times for 24 stitches
-
Round 5: 3 single crochet, 1 increase repeated 6 times for 30 stitches
-
Rounds 6 to 10: Single crochet in each stitch around for 30 stitches
-
Round 11: 3 single crochet, 1 decrease repeated 6 times for 24 stitches
-
Insert safety eyes between rounds 8 and 9, about 5 stitches apart
Ruffle Drip Edge Instructions
-
Working in the front loops of round 11, skip 1 stitch, work 5 double crochet in the next stitch, skip 1 stitch, slip stitch in the next stitch, repeat around
Assembly and Structural Details
-
Stuff the cone and scoop firmly with fiberfill
-
Sew the back loops of round 11 of the scoop to the top edge of the cone
-
Embroider a small V shaped mouth between the eyes
-
Add pink cheek lines below the eyes
-
Optional: Add chocolate syrup details using dark brown yarn with surface stitches or a small sewn piece
Precision Feature Placement
-
Securing the safety washers firmly before moving past the decrease rounds prevents the eyes from shifting during the stuffing process.
-
Centering the embroidered mouth exactly between the safety eyes gives the face a balanced, symmetrical appearance.
-
Placing the cheek lines just one round below the outer corners of the eyes helps create a classic, endearing expression.
Professional Stuffing Techniques
-
Adding small pinches of fiberfill down into the very tip of the cone first prevents the point from collapsing or folding over later.
-
Filling the main scoop shape firmly helps stretch out the stitches slightly, which beautifully rounds out the top of the ice cream.
-
Leaving a slight hollow space right near the final open rounds keeps the stuffing from getting caught in your yarn as you sew the pieces together.
Clean Assembly Guidance
-
Pinning the scoop to the cone with long sewing pins before taking your first stitch keeps the alignment from rotating out of place.
-
Utilizing the unworked back loops of the scoop creates a hidden, sturdy seam right underneath the decorative ruffle line.
-
Pulling your yarn tail through the body of the toy and clipping it close to the surface hides the raw edge completely inside the stuffing.
Troubleshooting Common Mistakes
-
If your cone looks bumpy or wonky, check that your increases are evenly spaced out according to the pattern structure.
-
If your ruffles are curling up too tightly against the scoop, try loosening your tension slightly on the double crochet stitches.
-
If stuffing is showing through your scoop, try switching to a smaller hook size to close up the spaces between your single crochets.
Creative Customization Ideas
-
Embroidering tiny, colorful straight stitches all over the top of the scoop easily mimics the look of rainbow sprinkles.
-
Stitching a small red sphere to anchor at the very top creates a classic hot fudge sundae presentation with a cherry.
-
Varying your yarn textures by using a textured chenille or a fuzzy bouclé can make the ice cream scoop look realistically textured.