
Crochet Amigurumi Dress Free Pattern - Two-Color Doll Dress
Swapping outfits on one plush bunny takes seconds, since this amigurumi dress buttons at the back and slides off. Worked flat on a 1.6 mm hook, the white yoke opens two chain-space armholes before a triple increase flares the yellow skirt from 24 to 72 stitches.
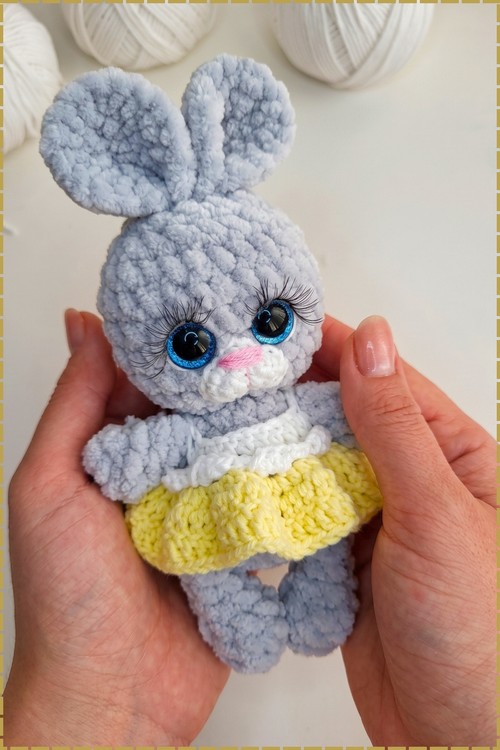
Ruffled yellow skirt, white bodice, and the whole Crochet Amigurumi Dress slips on and off the toy. Fits plush bunnies of the same build. Make it in other colours and one toy gets a wardrobe. Quick to work, since the skirt is the only shaped part. Good use of leftover yarn.
Crochet Amigurumi Dress

Yellow ruffles flare out from a white bodice that sits across the bunny's chest and ties over the shoulders. The skirt is worked in a row of rounded shell shapes, so the hem waves instead of lying flat, and the white trim above it curls slightly where the two colours meet. Plain stitches make up the top half, with the texture saved for the bottom. It comes off the toy and goes back on, so one bunny can wear more than one. Two pieces really. Bodice worked flat, then the skirt joined and flared out from there. Nothing in it goes beyond basic shells.
Beginner Technique Notes
This is a flat row pattern, not crocheted in the round. Read this section before starting. Every technique used in the dress is covered here.
Reading Row Instructions
This pattern is worked in rows, which means you turn the piece at the end of each row rather than continuing in a spiral. Each row begins with a turning chain. The turning chain counts as a stitch in this pattern for hdc and dc rows, so include it in your count. A chain 2 turning chain counts as one hdc; a chain 3 turning chain counts as one dc.
The Turning Chain
At the end of each row you chain a set number of stitches and turn the work. These chains replace the first stitch of the next row and bring the working yarn up to the correct height. For half double crochet the turning chain is 2. For double crochet it is 2 as well in this pattern. Always include the turning chain in your stitch count.
The Chain Space Armhole
Row 1 creates two armhole openings by chaining over a set number of stitches rather than crocheting into them. The chain spans the gap and row 2 works back across those chain spaces as if they were regular stitches. This is how the yoke creates the sleeve openings without any separate shaping. It looks confusing written out but makes immediate sense once your hook is in the work.
Back Loops Only
Row 3 of the skirt says to work in back loops only. Every stitch has two loops on top. The back loop is the one furthest from you as you work. Working into it only leaves the front loop free as a visible ridge on the right side of the fabric, which creates a clean yoke-to-skirt dividing line. Use your fingertip to feel for the back loop if the 1.6 mm hook makes the loops hard to see.
The Triple Increase
Row 3 works 3 dc into every stitch across. This triples the stitch count from 24 to 72 in one row and creates the flared skirt. Work all three dc into the same stitch before moving to the next. This is not an error; the dramatic increase is how the skirt gets its fullness.
Counting Stitches
Count your stitches at the end of every row before continuing. Row 1 has specific counts split by chain spaces, row 2 reaches 24, and row 3 reaches 72. Write these numbers on a scrap of paper and check each one before moving on. Catching a missed stitch at the end of row 3 means frogging 72 stitches.
Materials and Tools
- Two colors of yarn, thin enough to suit a 1.6 mm hook. A fine lace or thread weight works well
- 1.6 mm crochet hook
- Scissors
- Sewing needle for the button
- One small button for the back closure
Approximate finished size depends on the doll it is intended for. A foundation chain of 26 at lace weight on a 1.6 mm hook typically fits a doll with a chest circumference of around 9 to 11 cm, estimated from experience with similar doll dress constructions. Adjust the starting chain length to fit your specific doll before beginning. This is an estimate, not a measurement from the pattern.
Abbreviations Used
- hdc: half double crochet
- dc: double crochet
- BLO: back loop only
- sl st: slip stitch
- ch: chain
- Stitch counts in brackets at the end of each row
Pieces List
This dress is worked as one continuous flat piece from the foundation chain through the skirt, then finished with a decorative edge and a button closure. There are no separate pieces to sew together except the back skirt seam.
The Pattern
The dress is worked flat in rows. Turn at the end of every row using the turning chain specified.
Foundation and Yoke
- Foundation: chain 26, then chain 1 extra for turning [26 foundation stitches]
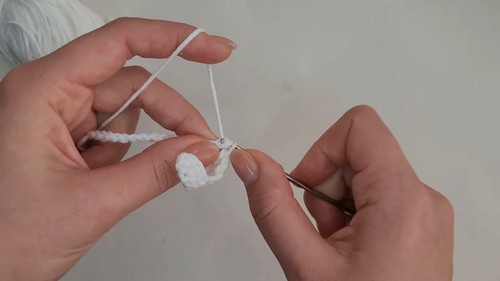
- Row 1: starting in the second chain from the hook, work 4 hdc, chain 3, skip 4 stitches, work 10 hdc, chain 3, skip 4 stitches, work 4 hdc. Checkpoint: two chain-space gaps sit where the armholes will be, dividing the row into three sections of 4, 10 and 4 hdc. The chain spans should arch cleanly across each gap without pulling tight
- Row 2: chain 2 and turn, work 1 hdc in every stitch including into each chain space across the full row [24]. Change to second colour at the end of this row. Checkpoint: a flat rectangular yoke in two joined colours with no gaps or puckers at the chain space sections
Skirt
- Row 3: chain 2 and turn, working in back loops only work 3 dc in every stitch across the full row [72]. Checkpoint: the skirt fans out dramatically from the narrow yoke above it. The front loops left from row 2 form a visible ridge at the yoke-to-skirt join on the right side of the fabric. If the skirt is not flaring, check that all three dc were placed into every stitch rather than alternating
- Row 4: chain 2 and turn, work 1 dc in every stitch across [72]. Checkpoint: the skirt is now two dc rows deep and begins to show its final drape
- Row 5: chain 2 and turn, work 1 dc in every stitch across [72]. Checkpoint: three skirt rows completed, the skirt is visibly fuller than the yoke and the colour change dividing line sits cleanly at the waist
- Fasten off leaving a long tail for sewing the back seam
Just picking up your first amigurumi project? The video tutorial below breaks it all down in a simple, beginner-friendly way!
Decorative Edging
- Attach the first colour to the top edge of the dress at one back corner
- Chain 1
- Work 3 hdc into the same stitch [3]
- Work 2 slip stitches into the next two stitches [2]
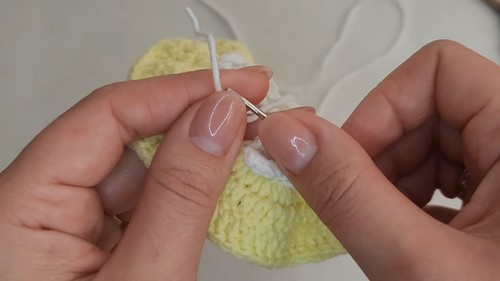
- Repeat this pattern of 3 hdc plus 2 sl st across the full top edge, 8 times total. Checkpoint: a scalloped edging runs across the neckline with raised hdc clusters separated by flat sl st sections. Each cluster should sit upright and the sl stitches should lie flat between them
- Fasten off
Finishing
- Sew the back seam of the skirt using the long yarn tail, working from the hem upward and leaving the upper yoke section open for the button closure
- Attach yarn to the top back corner of the open edge
- Chain 5 to create the button loop
- Secure the loop with a slip stitch back into the same corner. Checkpoint: the chain loop should be large enough to pass your chosen button through with slight resistance, not loose
- Sew the small button to the opposite back corner at the matching height
Assembly
The dress is worked in one piece and the only joining step is the back skirt seam. Sew it with the right sides together using a mattress stitch or whip stitch, then turn the dress right side out. The button and loop close the upper back.
FAQ
- My row 3 skirt is not laying flat and keeps curling. The triple increase in row 3 creates significant added fabric and some roll is normal before blocking. Lightly dampen the finished dress and press it flat under a cloth. Thread weight yarn blocks easily and the skirt will lie flat once dry.
- The chain spaces in row 1 look uneven. Chain tension varies stitch by stitch and chain spaces almost always look slightly uneven before row 2 is worked back across them. Once row 2 fills in those spaces with hdc stitches the armhole shaping evens out automatically.
- I cannot find the back loops in row 3. Hold the piece up to a direct light source and look at the top of each stitch from above. The back loop is the strand further from you. At 1.6 mm this is genuinely small. Use your fingertip to feel the two loops apart and hook only the one furthest from you. A magnifying glass or good task lighting helps significantly at this hook size.
- The scallop edging is pulling the neckline tight. The sl st stitches between the hdc clusters need to be kept very loose. Work them with a deliberately relaxed grip, or go up one hook size for the edging only. A tight edging distorts the neckline regardless of the rest of the tension.
- The button loop is too large and the button slides through. Chain 4 instead of chain 5 for a tighter loop, or add one slip stitch into the base of the loop before securing it to reduce the effective size. Always test the loop with your actual button before fastening off.