Crochet Amigurumi Chicken Nugget Free Tutorial Step By Step
Bring charm to your crochet collection with this Plushy Amigurumi Chicken Crochet Pattern. Perfect for beginners and soft toy enthusiasts, this adorable chicken is worked using Bernat Blanket Tweeds for a cozy, plush feel.
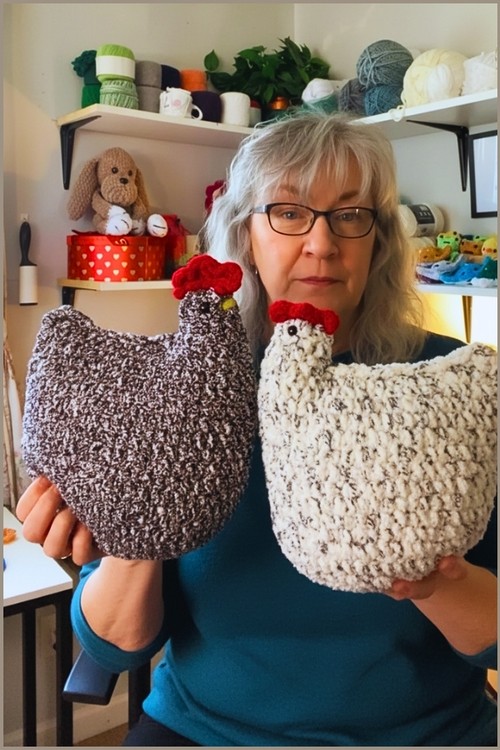
Crochet Amigurumi Chicken
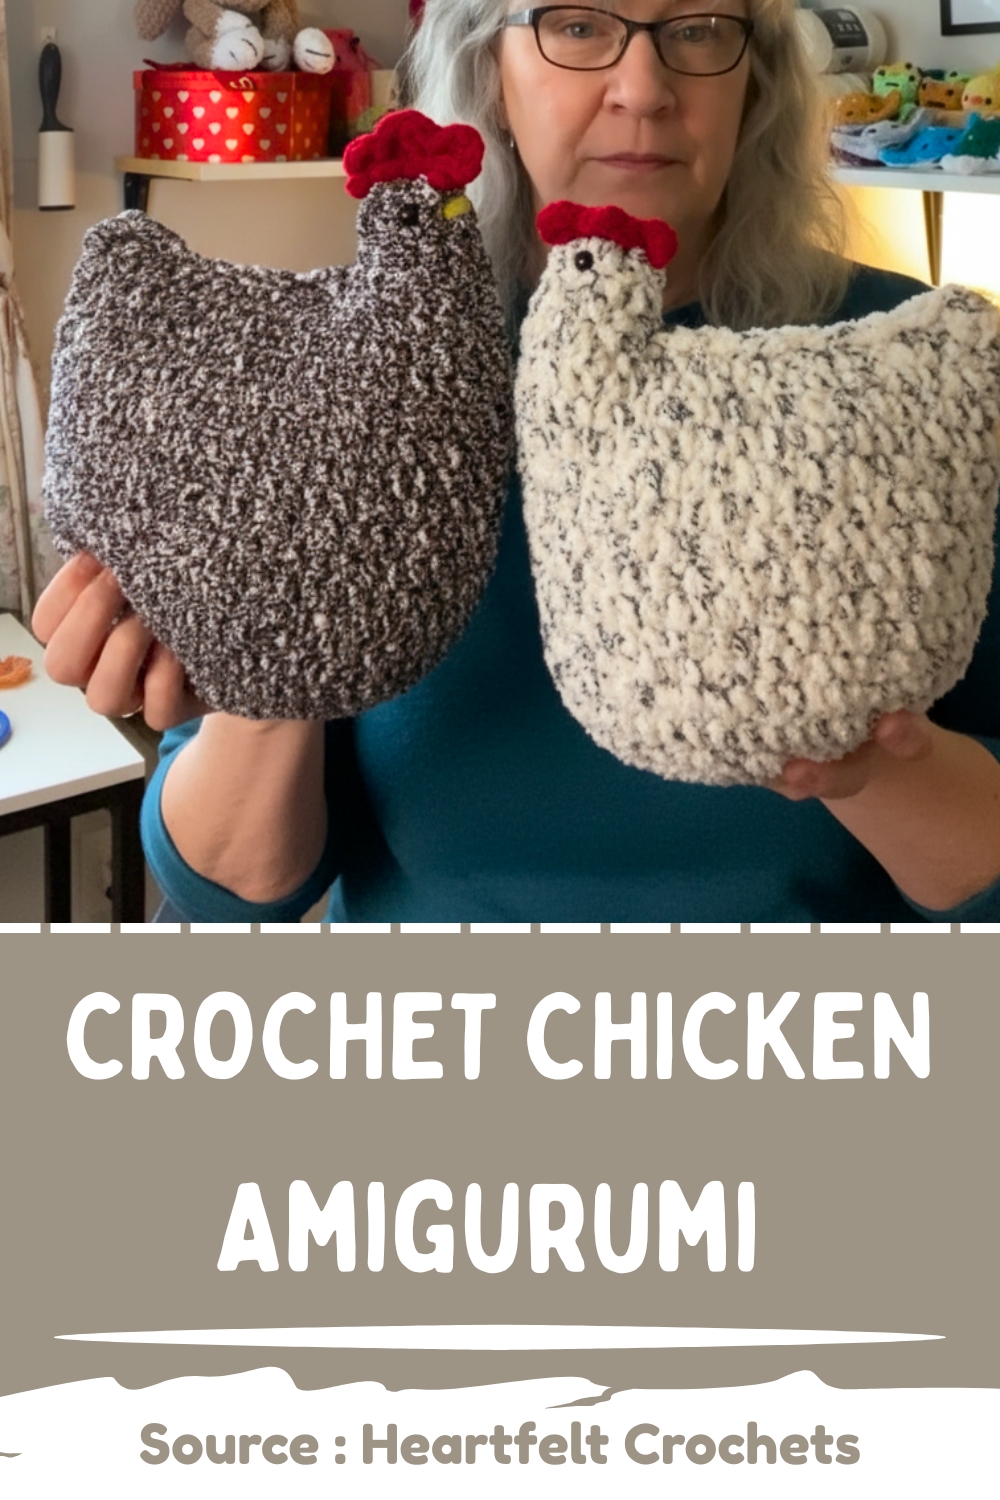
Spicing up your crafting routine is easy when you dive into making a charismatic Crochet Amigurumi Chicken, which offers a wonderful blend of country flair and artistic expression. Flaunting a rotund body, dangling legs, and a bright, cozy texture, this miniature bird is highly useful as a playful pincushion or a charming keychain. Diving into this wonderful pattern allows your imagination to soar.
Skill Level
-
This project is perfect for advanced beginners who want to move beyond basic spheres and learn how to shape an animal using clever construction rather than sewing separate parts together.
Finished Size
-
Using the specified blanket yarn and hook size, your finished chicken will stand as a substantial, huggable plush toy, roughly the size of a small grapefruit or melon.
Materials
-
Bernat Blanket Tweeds Yarn – Ivory Tweed (#6 weight)
-
5.5 mm crochet hook
-
8 mm or 10 mm safety eyes
-
Red blanket yarn (for comb)
-
Yellow or orange worsted weight yarn (for beak)
-
Scissors, darning needle, stitch marker, stuffing
Abbreviations
-
ch: chain
-
sc: single crochet
-
hdc: half double crochet
-
dc: double crochet
-
inc: increase (two single crochet stitches worked into the same stitch)
-
dec: decrease (invisible single crochet decrease recommended for amigurumi)
-
st: stitch
Helpful Notes Before Starting
-
Working with chenille or blanket yarn can make it difficult to see your stitches, so you must rely on feeling the loops with your fingers and using a stitch marker to track the first stitch of every round.
-
To keep your stitches tight enough that stuffing does not peek through, ensure you maintain a firm tension, as the plush yarn compresses easily.
-
If you find the starting chain 2 method leaves a hole at the bottom of your work, you can substitute it with a magic ring, pulling it tight after the first round.
Construction Overview
-
This pattern uses a unique and seamless construction method where the body is worked from the bottom up as a large bowl shape, which is then folded and partially joined to create both the flat tail and the round neck opening.
-
The head and neck are worked directly from that open section in continuous rounds, meaning you will not have to sew a heavy head onto a body later, ensuring excellent structural stability.
Stitch and Shaping Clarity
-
Rounds 4, 6, and 10 use shifted increases, which means the increases are staggered rather than stacked directly on top of the increases from the previous round, creating a perfectly smooth, round circle instead of a hexagon.
-
The transition from double crochet to half double crochet and then single crochet during the closing step creates a natural, sloping angle that perfectly mimics the tail feathers of a bird.
Step by Step Pattern Instructions
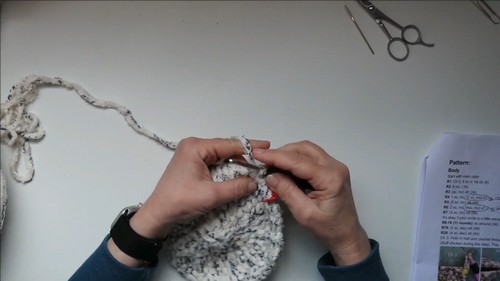
Body (Starting at the Base)
-
Chain 2, work 8 single crochet (sc) in the second chain from hook (8)
-
8 increases (2 sc in each stitch) around (16)
-
(Sc 1, inc) repeat around (24)
-
Sc 1, then (sc 2, inc) seven times, sc 1 (32)
-
(Sc 3, inc) repeat around (40)
-
Sc 2, then (sc 4, inc) seven times, sc 2 (48)
-
(Sc 5, inc) repeat around (56)
-
Sc evenly for 11 rounds (56)
-
(Sc 5, dec) repeat eight times (48)
-
(Sc 4, dec) repeat around (40)
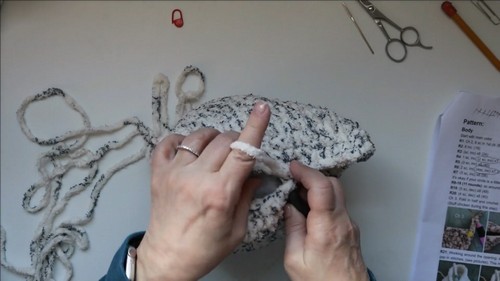
Tail and Neck Formation
-
Fold the opening in half and line up stitches
-
Work through both sides: dc 1, hdc 1, sc 12 to close
-
Undo a few stitches to stuff the body firmly, including the tail area
-
Crochet the undone stitches to close again
-
For the neck, sc 12 around the remaining opening
-
Sc 1 into the gap (13)
-
Sc around (13)
-
Dec 1, sc 11 (12)
-
Decrease 6 times to form the head shape
-
Stuff the neck and head firmly
Assembly and Finishing
-
Insert safety eyes evenly on the head
-
Cut yarn, leaving a long tail for sewing
-
Weave needle through the front loop of the remaining stitches and pull tight
-
Secure the yarn and hide the end inside the body
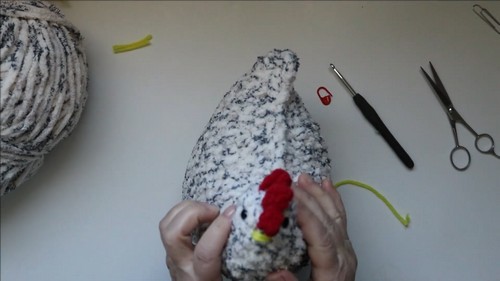
Comb (No-Sew Method)
-
Insert hook into the top of the head and pull red yarn through
-
Slip stitch to secure
-
Dc 1, chain 1, slip stitch close to dc
-
Chain 1, dc 1 again close to the previous stitch
-
Chain 1, slip stitch in the next stitch
-
Cut yarn and hide tails inside the body
Beak
-
Thread yellow or orange yarn through a darning needle
-
Bring needle up between the eyes
-
Stitch horizontally across for the beak line, repeat once to thicken
-
Knot ends, then insert and hide the tails inside the body
Assembly Guidance
-
When folding the body opening in half to start the tail, use stitch markers to pin the two sides together before stitching to ensure your edges align perfectly without shifting.
-
When working through both sides to close the back, insert your hook under both loops of the stitch on the front panel and both loops of the matching stitch on the back panel to create a secure, clean seam.
Eye and Facial Feature Placement
-
Position your safety eyes before closing up the final decreases of the head, placing them about two to three rounds below the top crown, with a spacing of three to four stitches between them.
-
Check the facial symmetry from the front and from the top of the head before snapping the plastic washers into place, as they cannot be removed once locked.
Stuffing Tips
-
Tear your fiberfill into small, fluffy pieces rather than stuffing large clumps into the body, which prevents the toy from looking lumpy.
-
Pay special attention to the neck area by packing the stuffing firmly enough to support the weight of the head, ensuring the chicken does not drop its head over time.
Finishing Notes
-
When weaving through the front loops of the final six stitches to close the head, pull the yarn tail slowly and steadily to prevent the blanket yarn from snapping under tension.
-
Use your darning needle to poke any stray fibers of stuffing back inside the stitches for a clean, professional finish.
Beginner Notes
-
If your blanket yarn keeps catching or shredding on your hook, try slowing down your stitch pace and using a plastic or ergonomic aluminum hook with a deeper throat.
-
Count your stitches at the end of every round during the base expansion to ensure you have the exact stitch count before starting the eleven even rounds.
Troubleshooting
-
If your chicken looks too long or stretched out, you may have accidentally crocheted extra rounds in the body, so verify your round count using the stitch lines on the inside of the piece.
-
If the head looks crooked relative to the tail, your alignment was off during the body-folding step, which can be fixed by unraveling the join and re-centering the fold line.
Customization Ideas
-
You can create a colorful flock by replacing the ivory yarn with brown, gray, or black tweed blanket yarn while keeping the bright red comb exactly the same.
-
For a different texture and look, use two strands of worsted weight acrylic yarn held together with a 5.0 mm hook, which will result in a slightly smaller but highly durable plush.