Easy Crochet Caterpillar Amigurumi Pattern Free Using Simple Stitches
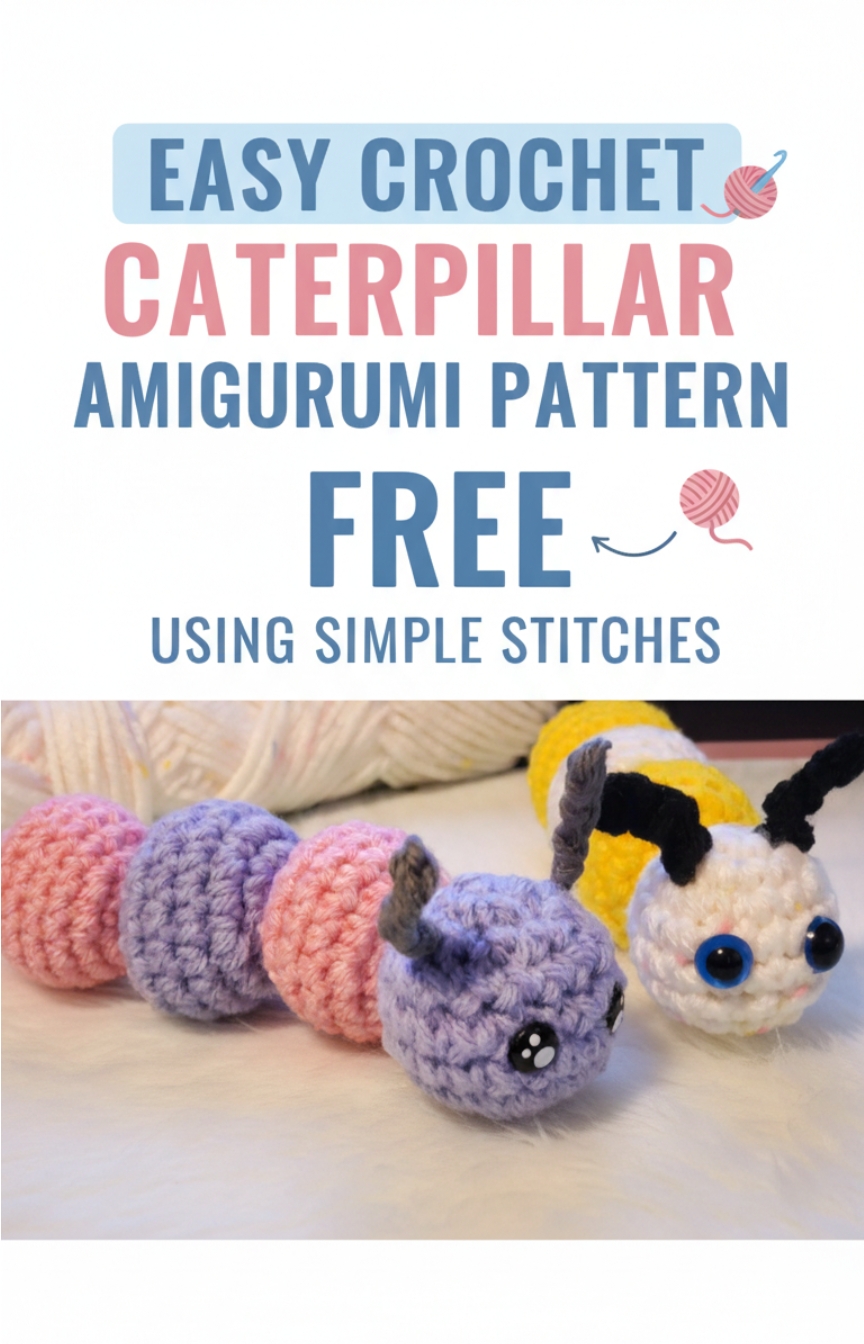
Create your own adorable and squishy Crochet Caterpillar Amigurumi with this easy, no-sew tutorial inspired by Nova Gnome Creations. Perfect for beginners, this project uses simple stitches and just four small yarn balls to form the head and body.
Crochet Caterpillar Amigurumi
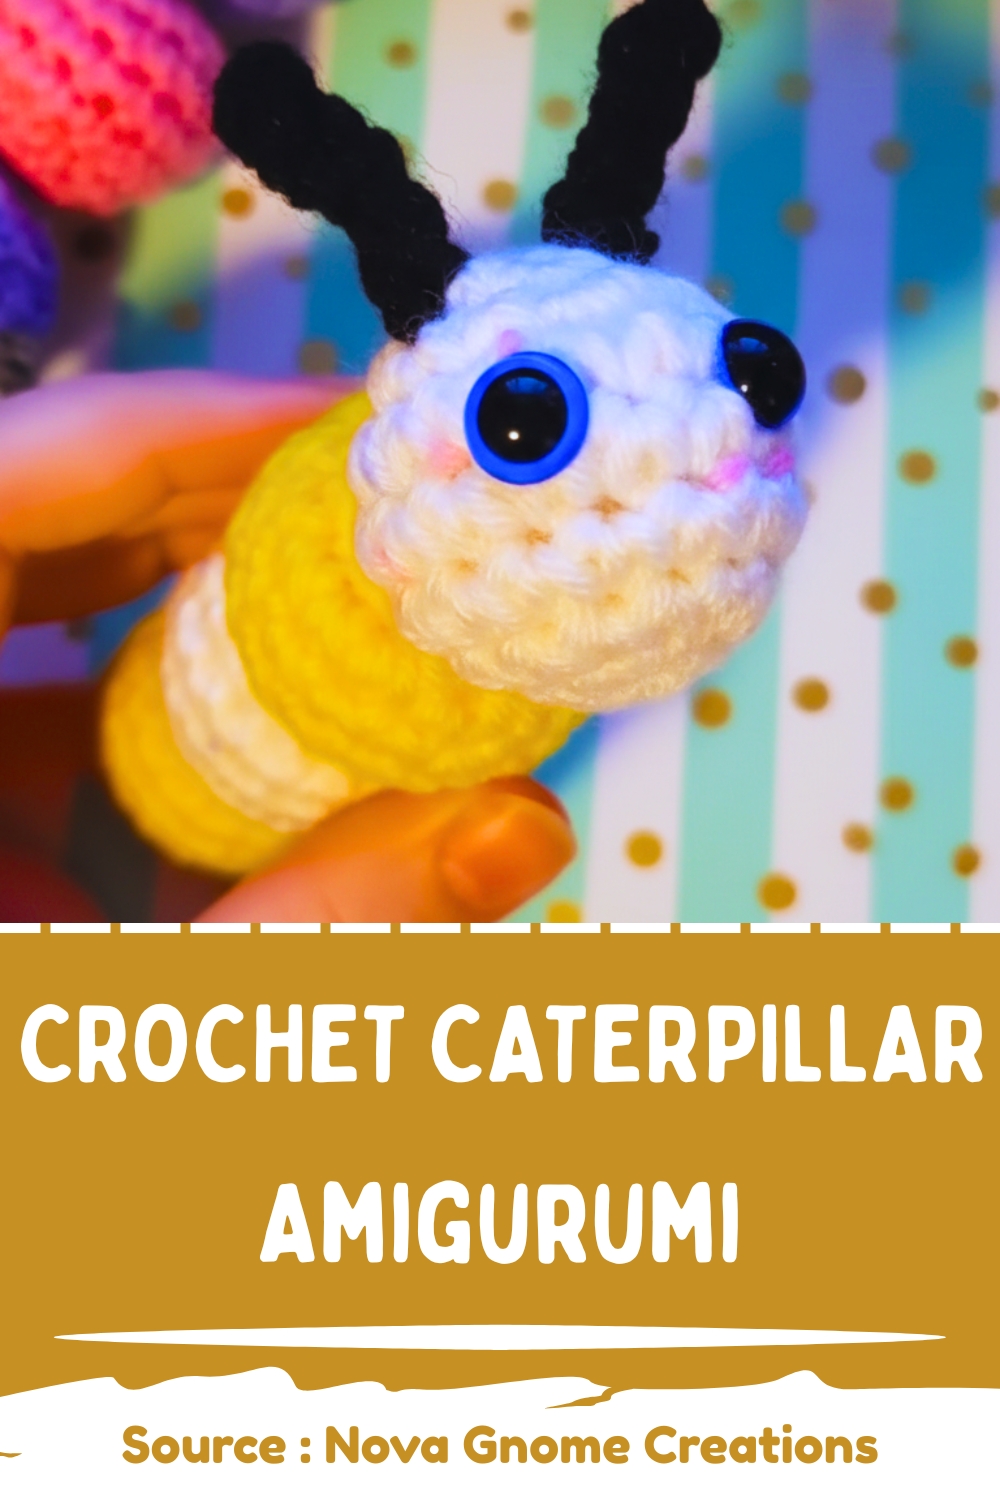
The pattern works up quickly using worsted weight yarn and a 3.75 mm hook, giving you a soft and flexible toy that’s perfect for kids or as a cheerful desk companion. With no sewing required, you’ll enjoy a smooth, relaxing crochet experience from start to finish.
Materials
- Size 4 worsted weight yarn (4 colors)
- 3.75 mm crochet hook
- Poly-fil stuffing
- Safety eyes
- Darning needle
- Scissors
Stitch Key
- MC: Magic Circle
- SC: Single Crochet
- INC: Increase (2 SC in one stitch)
- DEC: Invisible Decrease (SC2TOG using front loops only)
- Round 1: SC 6 in a Magic Circle
- Round 2: INC in every stitch (12)
- Round 3: (SC 1, INC) repeat 6 times (18)
- Round 4: SC in each stitch (18)
- Round 5: SC in each stitch (18)
- Round 6: SC in each stitch (18)
- Round 7: (SC 1, DEC) repeat 6 times (12)
- Round 8: DEC in every stitch (6)
- Cut yarn, leaving a tail. Weave through front loops of last round, pull tight to close, and weave in the end.
- Stuff firmly before finishing the final decrease.
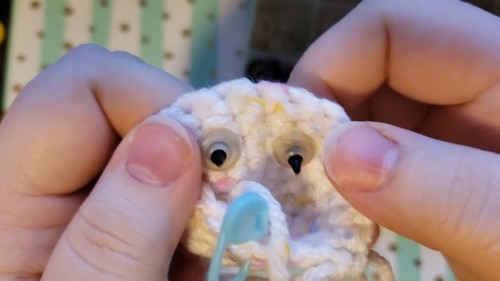
Head Assembly
- After Round 6 of the head ball, insert safety eyes between Rounds 4 and 5, spaced about four stitches apart.
- Secure the backs of the eyes.
- Continue crocheting Rounds 7 and 8 as for the body.
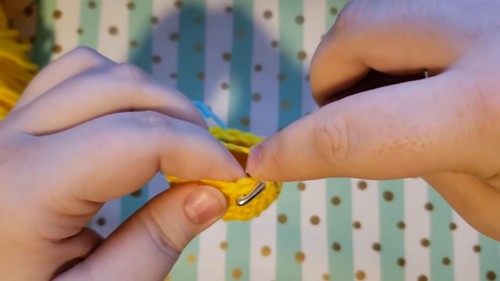
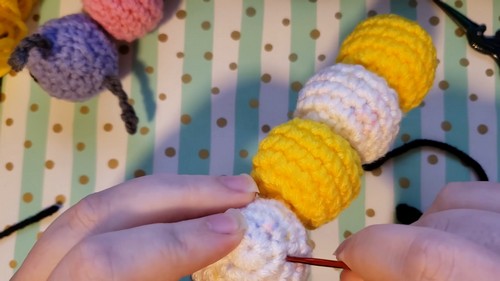
Connecting the Body Segments (No-Sew)
- Thread a long piece of matching yarn on a darning needle.
- Anchor the yarn at the back of the head with two or three tight knots.
- Push the needle through the center of each ball to connect all body segments.
- Pull slightly to snug them together.
- Secure by weaving the yarn into the last ball several times, then trim.
Antennas
- Leave a 5–6 inch tail before the slip knot.
- Chain 5 (or more for longer antennas).
- Chain 1 for turning, then slip stitch in the second chain from the hook.
- Fasten off, leaving another long tail.
- Weave the top tail down through the center so both tails are at the base.
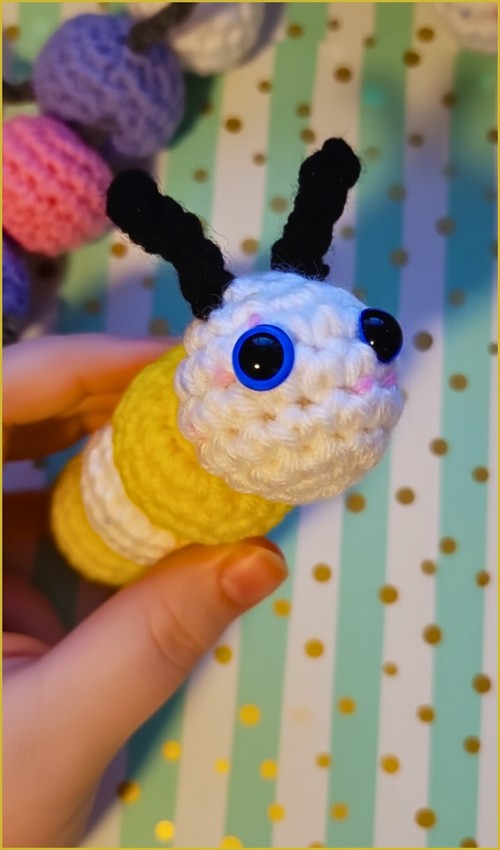
- Attach above the eyes by threading one tail through the head, tying both ends together securely, and tucking in the tails.
- Repeat for the second antenna.
https://www.youtube.com/watch?v=1fZUltsWmk4