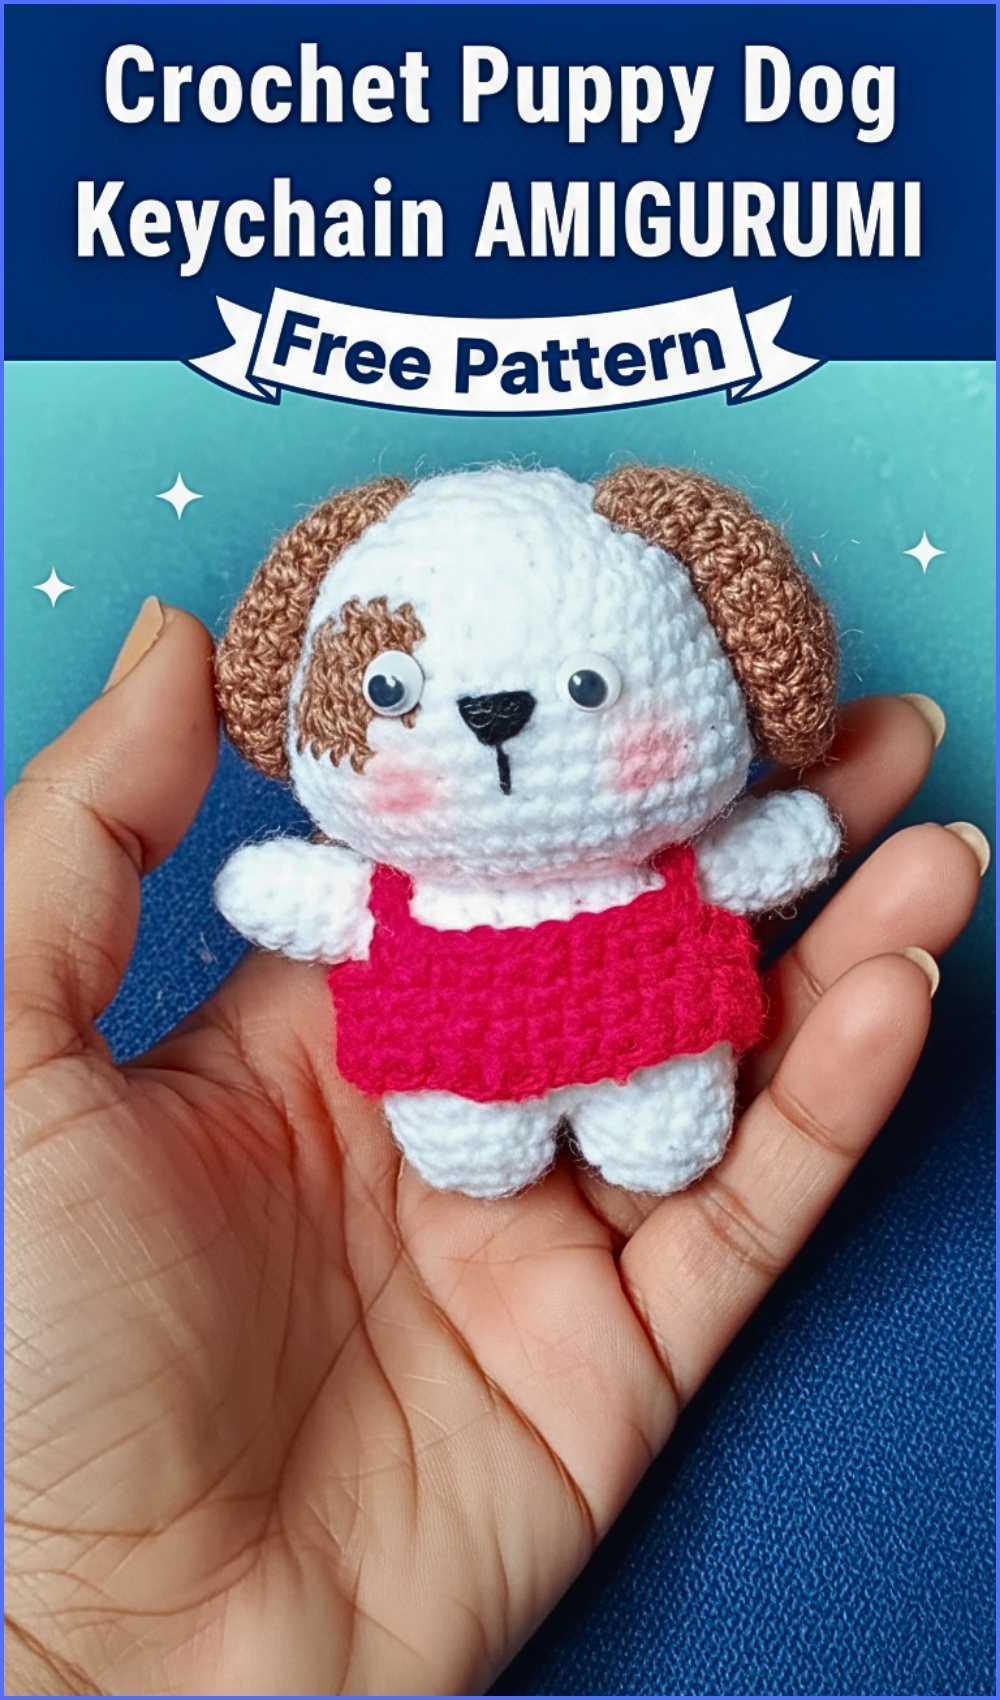
Adorable Crochet Puppy Dog Amigurumi Free Pattern
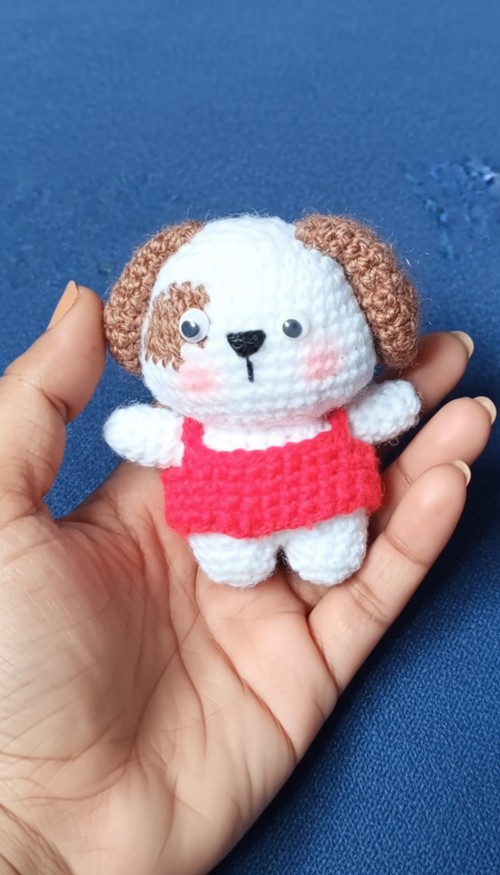
Bringing a crochet animal amigurumi pattern to life is all about shaping soft yarn into a character that feels expressive and full of personality. From rounded heads and balanced bodies to carefully placed features like ears, snouts, and eyes, each detail works together to create a toy that looks charming and feels satisfying to hold.
Crochet Puppy Dog Amigurumi
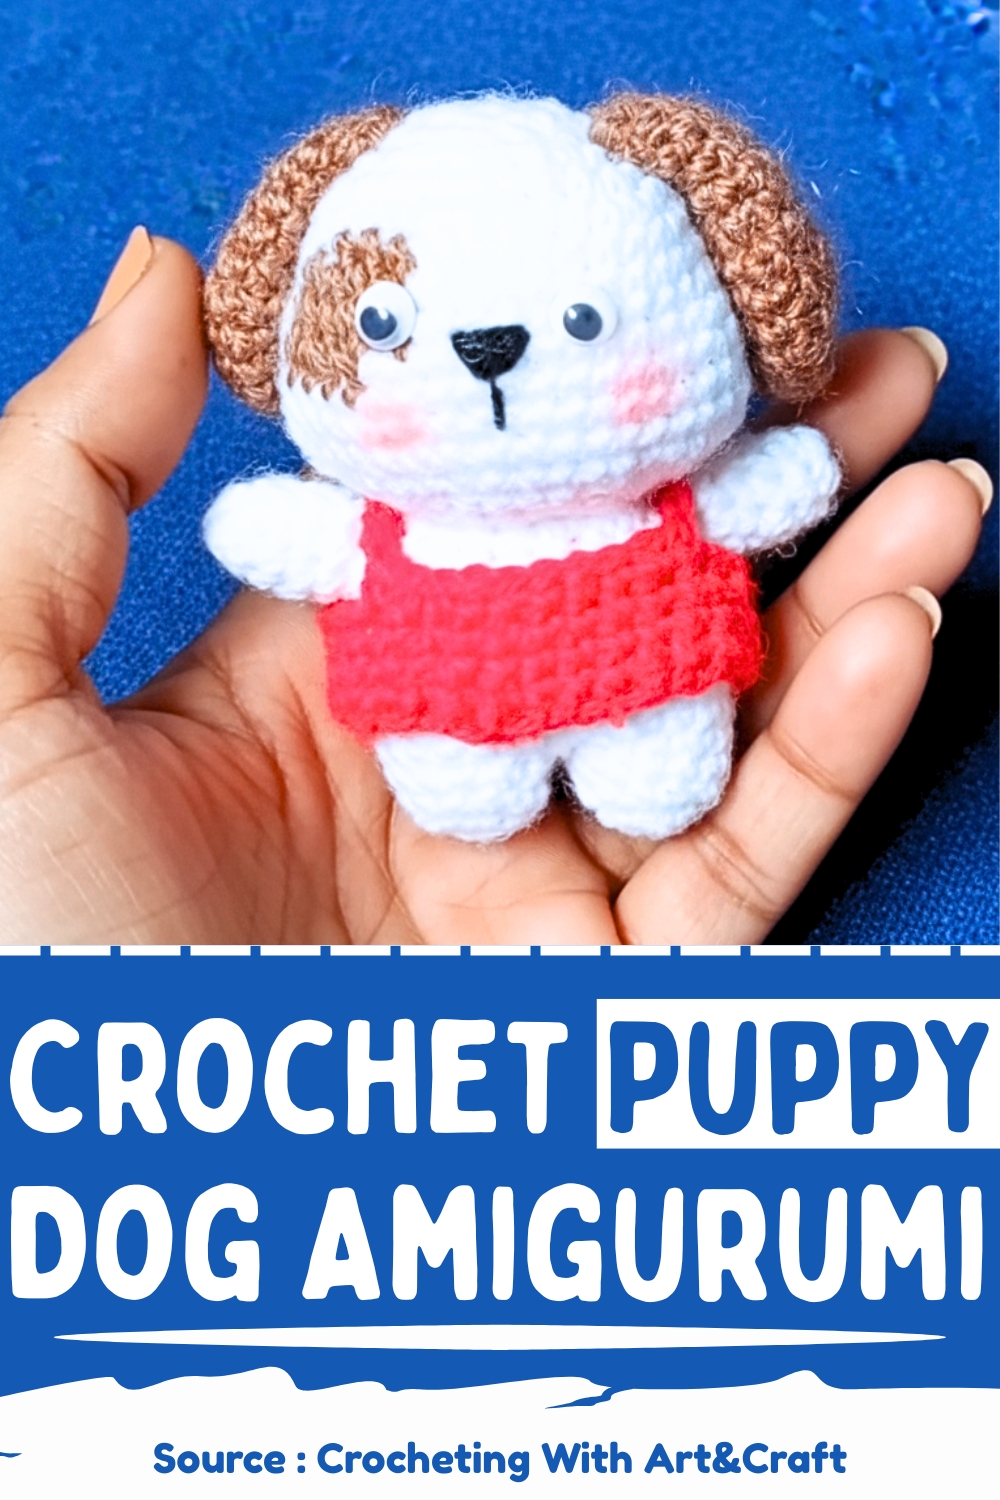
These designs are not just decorative—they’re perfect for gifts, nursery displays, or adding a handmade touch to your space, while also helping you practice shaping, assembly, and finishing skills that make your crochet work look more polished and intentional.
Skill Level
Beginner to Intermediate
This pattern uses basic stitches and shaping, but includes multiple pieces and assembly steps that benefit from careful placement and patience.
Finished Size
Size will vary depending on yarn and hook choice, but expect a small plush that fits comfortably in your hand.
Materials
- Yarn (Harvest color for some parts, Fleece color for others).
- Crochet hook appropriate for your yarn.
- Yarn Needle, Scissors, Polyester Fiberfill (stuffing).
- Eyes: 16mm Shank Button or Safety Eyes (2).
- Nose: 19mm Shank Button or Safety Eye (1).
- Stitch Marker.
Abbreviations
- sc: single crochet
- sc2tog: single crochet decrease
- st: stitch
- rnd: round
- ch: chain
Helpful Notes Before Starting
- Work in continuous rounds unless stated otherwise. Use a stitch marker to keep track of the first stitch of each round.
- Stuff gradually as you go, especially for the head and body. This helps maintain shape and avoids lumps.
- Keep your tension consistent. Uneven tension can distort shaping, especially during decreases.
- When decreasing, try to keep stitches tight to avoid gaps where stuffing might show.
Construction Overview
This amigurumi is made in separate parts and then assembled:
- Head is worked first and fully shaped before attaching.
- Body is slightly larger and includes a color change for contrast.
- Snout, ears, and legs are made separately and sewn on.
- Final assembly focuses on symmetry and placement, which defines the character’s look.
HEAD (STARTING WITH HARVEST COLOR YARN)
Begin by stuffing the piece lightly and continue to stuff as you go.
- Rnd 1: 6 sc into magic ring. (6 sc)
- Rnd 2: 2 sc in each st around. (12 sc)
- Rnd 3: [2 sc in next st, sc in next st] around. (18 sc)
- Rnd 4: [2 sc in next st, sc in next 2 st] around. (24 sc)
- Rnd 5-7: Sc in each st around. (24 sc)
- Rnd 8: [Sc2tog (decrease), sc in next 2 st] around. (18 sc)
- Rnd 9: [Sc2tog, sc in next st] around. (12 sc)
- Rnd 10: [Sc2tog, sc in next st] around. (8 sc)
Fasten off, leaving a long tail for sewing.
Shaping Notes
- The increases in rounds 2–4 create a smooth dome for the top of the head.
- Rounds 5–7 maintain width, giving the head its fullness.
- The decreases in rounds 8–10 close the shape, forming a slightly tapered bottom that attaches neatly to the body.
BODY (STARTING WITH FLEECE COLOR YARN)
Begin to stuff and continue to stuff as you go.
- Rnd 1: 6 sc into magic ring. (6 sc)
- Rnd 2: 2 sc in each st around. (12 sc)
- Rnd 3: [2 sc in next st, sc in next st] around. (18 sc)
- Rnd 4: [2 sc in next st, sc in next 8 st] around. (20 sc)
- Rnd 5-7: Sc in each st around. (20 sc)
- Rnd 8-11: Switch to Harvest color yarn, sc in each st around. (20 sc)
- Rnd 12: [Sc2tog, sc in next st 8 st] around. (18 sc)
- Rnd 13: [Sc2tog, sc in next st] around. (12 sc)
- Rnd 14: Sc2tog around. (6 sc)
Fasten off, leaving a long tail. Finish stuffing and sew the opening closed.
Shaping Notes
- The body grows slightly wider than the head, giving a stable base.
- The color change adds visual separation between body sections.
- Final decreases create a rounded bottom so the toy can sit evenly.
OTHER PARTS (SNOUT, EAR, LEG)
Snout (Harvest color)
- Chain 5, sc in next 4 ch, on other side of ch, sc in next 4 ch (8 sc).
- Rnd 2: [2 sc in next 2 st, sc in next 2 st] around (12 sc).
- Rnd 3: Sc in each st around. Fasten off, leaving a long tail.
Note: This oval shape forms a natural protrusion for the face.
Ear (Make 2, Harvest color)
- 4 sc into magic ring. Increase rounds up to 12 sc over 4 rounds. Do not stuff.
- Note: Keeping ears unstuffed allows them to sit flatter and look more natural when sewn on.
Leg (Make 4)
- 4 sc into magic ring.
- Rnd 2: 2 sc in each st around (8 sc).
- Rnds 3-5: Sc in each st around (8 sc). Fasten off, leaving a long tail.
ASSEMBLY
Snout
- Stuff the snout lightly and sew onto the Head. If using a safety nose, place it before sewing the snout.
- Placement is about 3 rounds up from the last row of the head.
Placement Tip: Position the snout centrally and slightly forward. Pin it in place before sewing to check alignment.
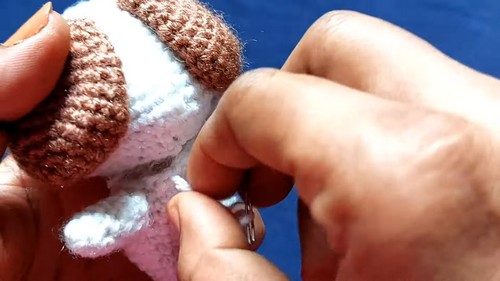
Ears
- Sew the two Ears to the Head.
Placement Tip: Attach them evenly on both sides of the top of the head. Slightly angled placement can give more personality.
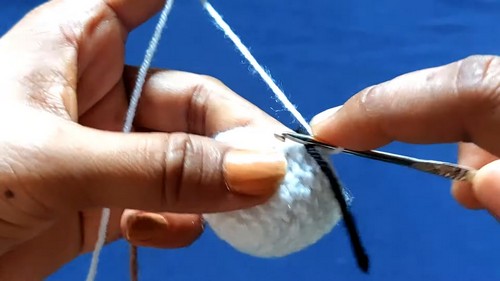
Eyes and Nose
- Sew on the Eyes (or use safety eyes). Sew the Nose to the middle of the snout.
Tip:
- Place eyes symmetrically before securing.
- The distance between eyes affects expression—closer gives a softer look, wider gives a more playful look.
Head to Body
- Sew the Head to the Body.
Tip:: Make sure the head is centered and slightly tilted forward for a natural posture.
Legs
- Stuff the four Legs and sew them onto the Body.
Tip: Attach evenly so the toy sits balanced. Front legs slightly forward and back legs slightly outward often look best.
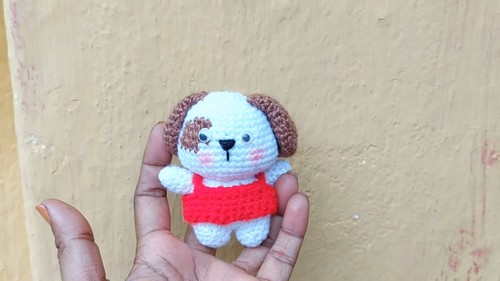
Finishing
- Sew on the tail, hide all yarn ends, and optionally use a Pet Slicker Brush on all parts to create the furry, brushed texture.
Stuffing Tips
- Use small amounts of fiberfill at a time.
- Focus on shaping while stuffing—especially the head and snout.
- Avoid overstuffing the body if you want a softer, cuddly feel.
Beginner Notes
- If your decreases leave gaps, try tightening your tension or using an invisible decrease method.
- Always count stitches at the end of each round to stay on track.
- Take your time with assembly—this is where the final look really comes together.
Troubleshooting
- Head looks uneven: Check stitch count and ensure increases were evenly spaced.
- Snout looks crooked: Reposition before sewing fully. Use pins to preview placement.
- Toy doesn’t sit properly: Adjust leg placement or redistribute stuffing in the body.
Customization Ideas
- Change yarn colors for different animal styles.
- Add blush, embroidery, or eyelids for expression.
- Use textured yarn for an even fluffier finish.
- Adjust ear size or placement to create different character types.